Button Box and Trigger Signals
This section describes the recommended steps for connecting and testing all the components of the Button Box and Trigger (TTL) Signals. These signals all come through the fORP Box, and the success of receiving your signals properly is quite sensitive to the order of your setup steps! (As one example, if you select your mode prior to connecting the button box, you may not receive button press characters as expected.)
For most consistent results, we recommend the following order of steps:
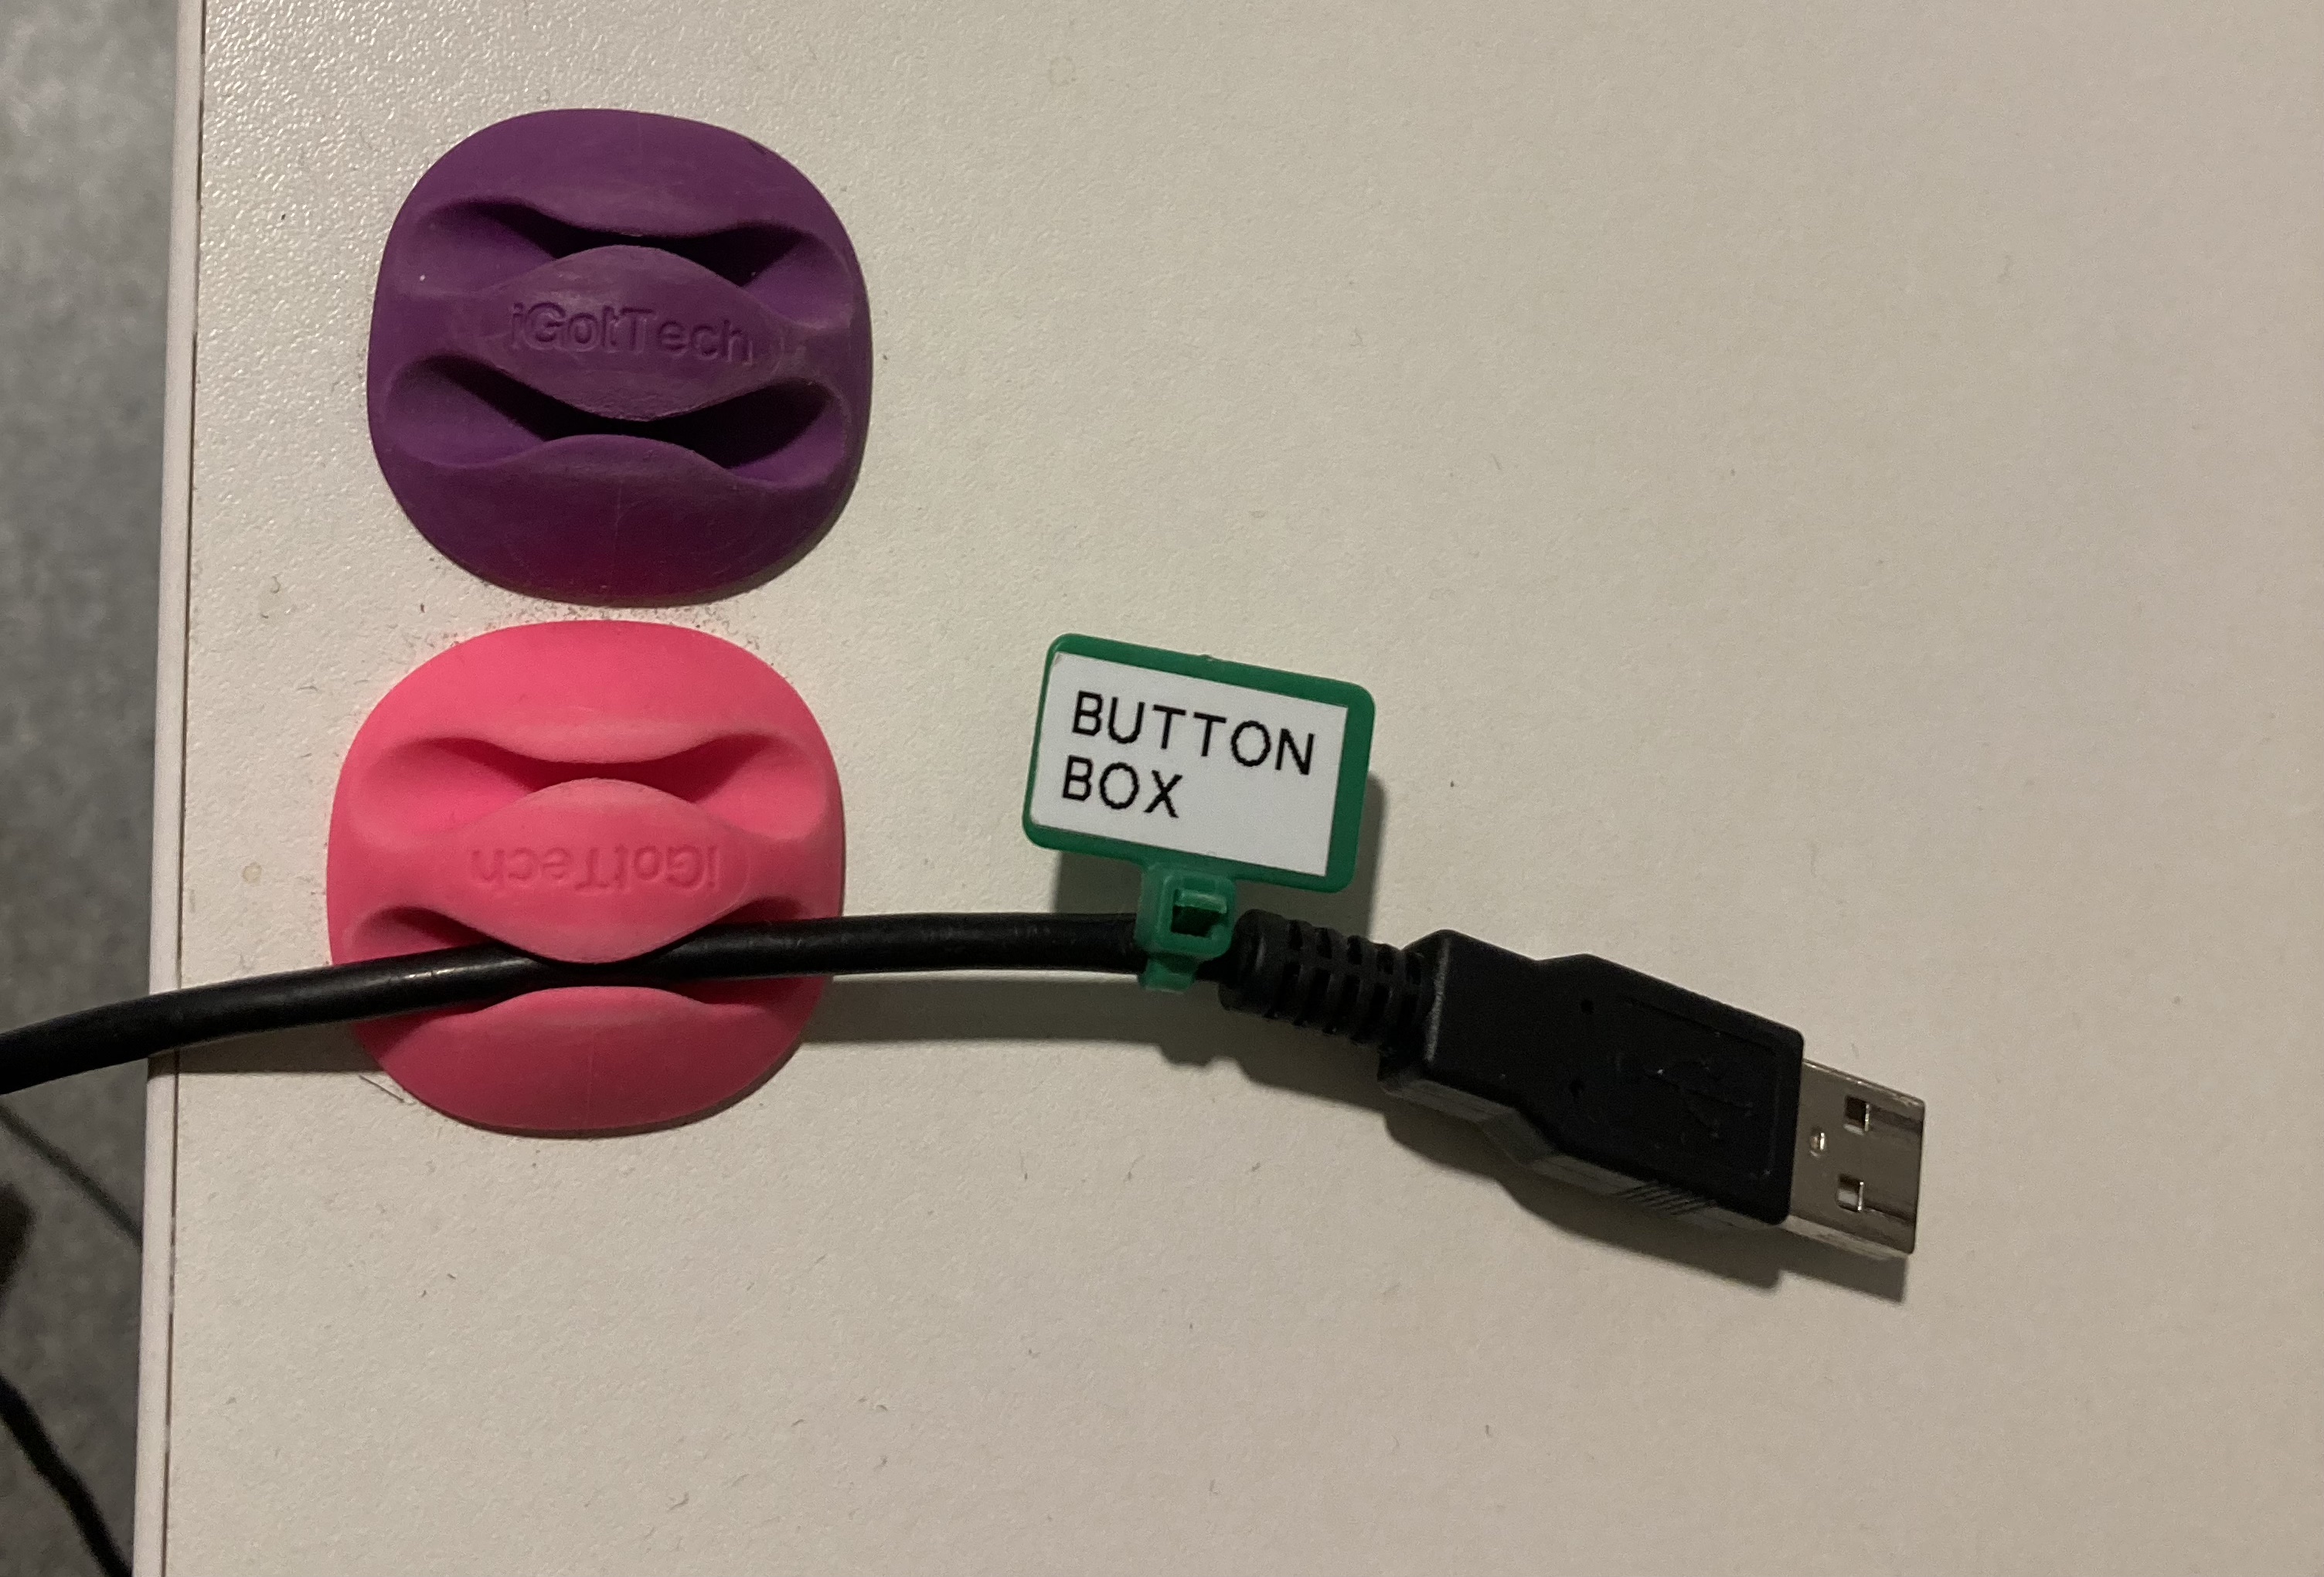
Connect the button box in the magnet room using the black cable hanging to the right of the scanner bore.
Connect the USB connector on the scanner console desk to your computer.
Select your Mode sse Mode Select on the fORP box (the silver-colored box) to choose your settings for interpreting incoming button presses and triggers.
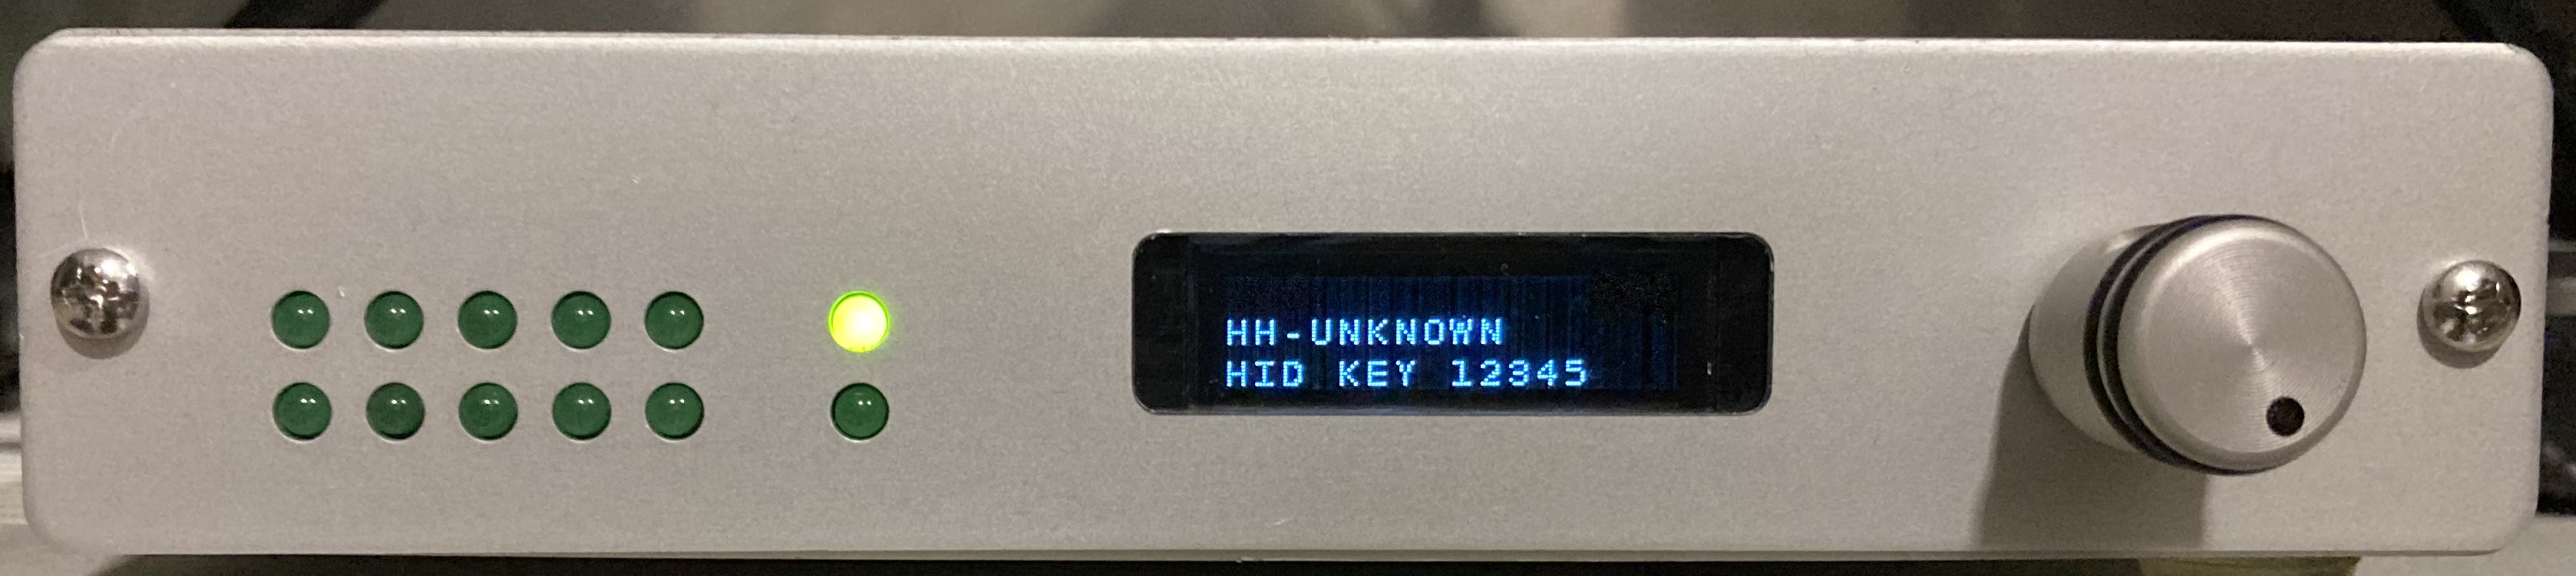
Follow the guide below for choosing the mode.
Check that button presses are received by your computer. Open a simple text editor (e.g., Notepad, TextEdit, etc.) on your computer. Press all buttons on the response box one at a time to ensure button presses are coming in. This should be done during setup of the room. As a last resort, you can ask the subject to press all buttons before starting your session, but it is a much better practice to test the box during room setup.
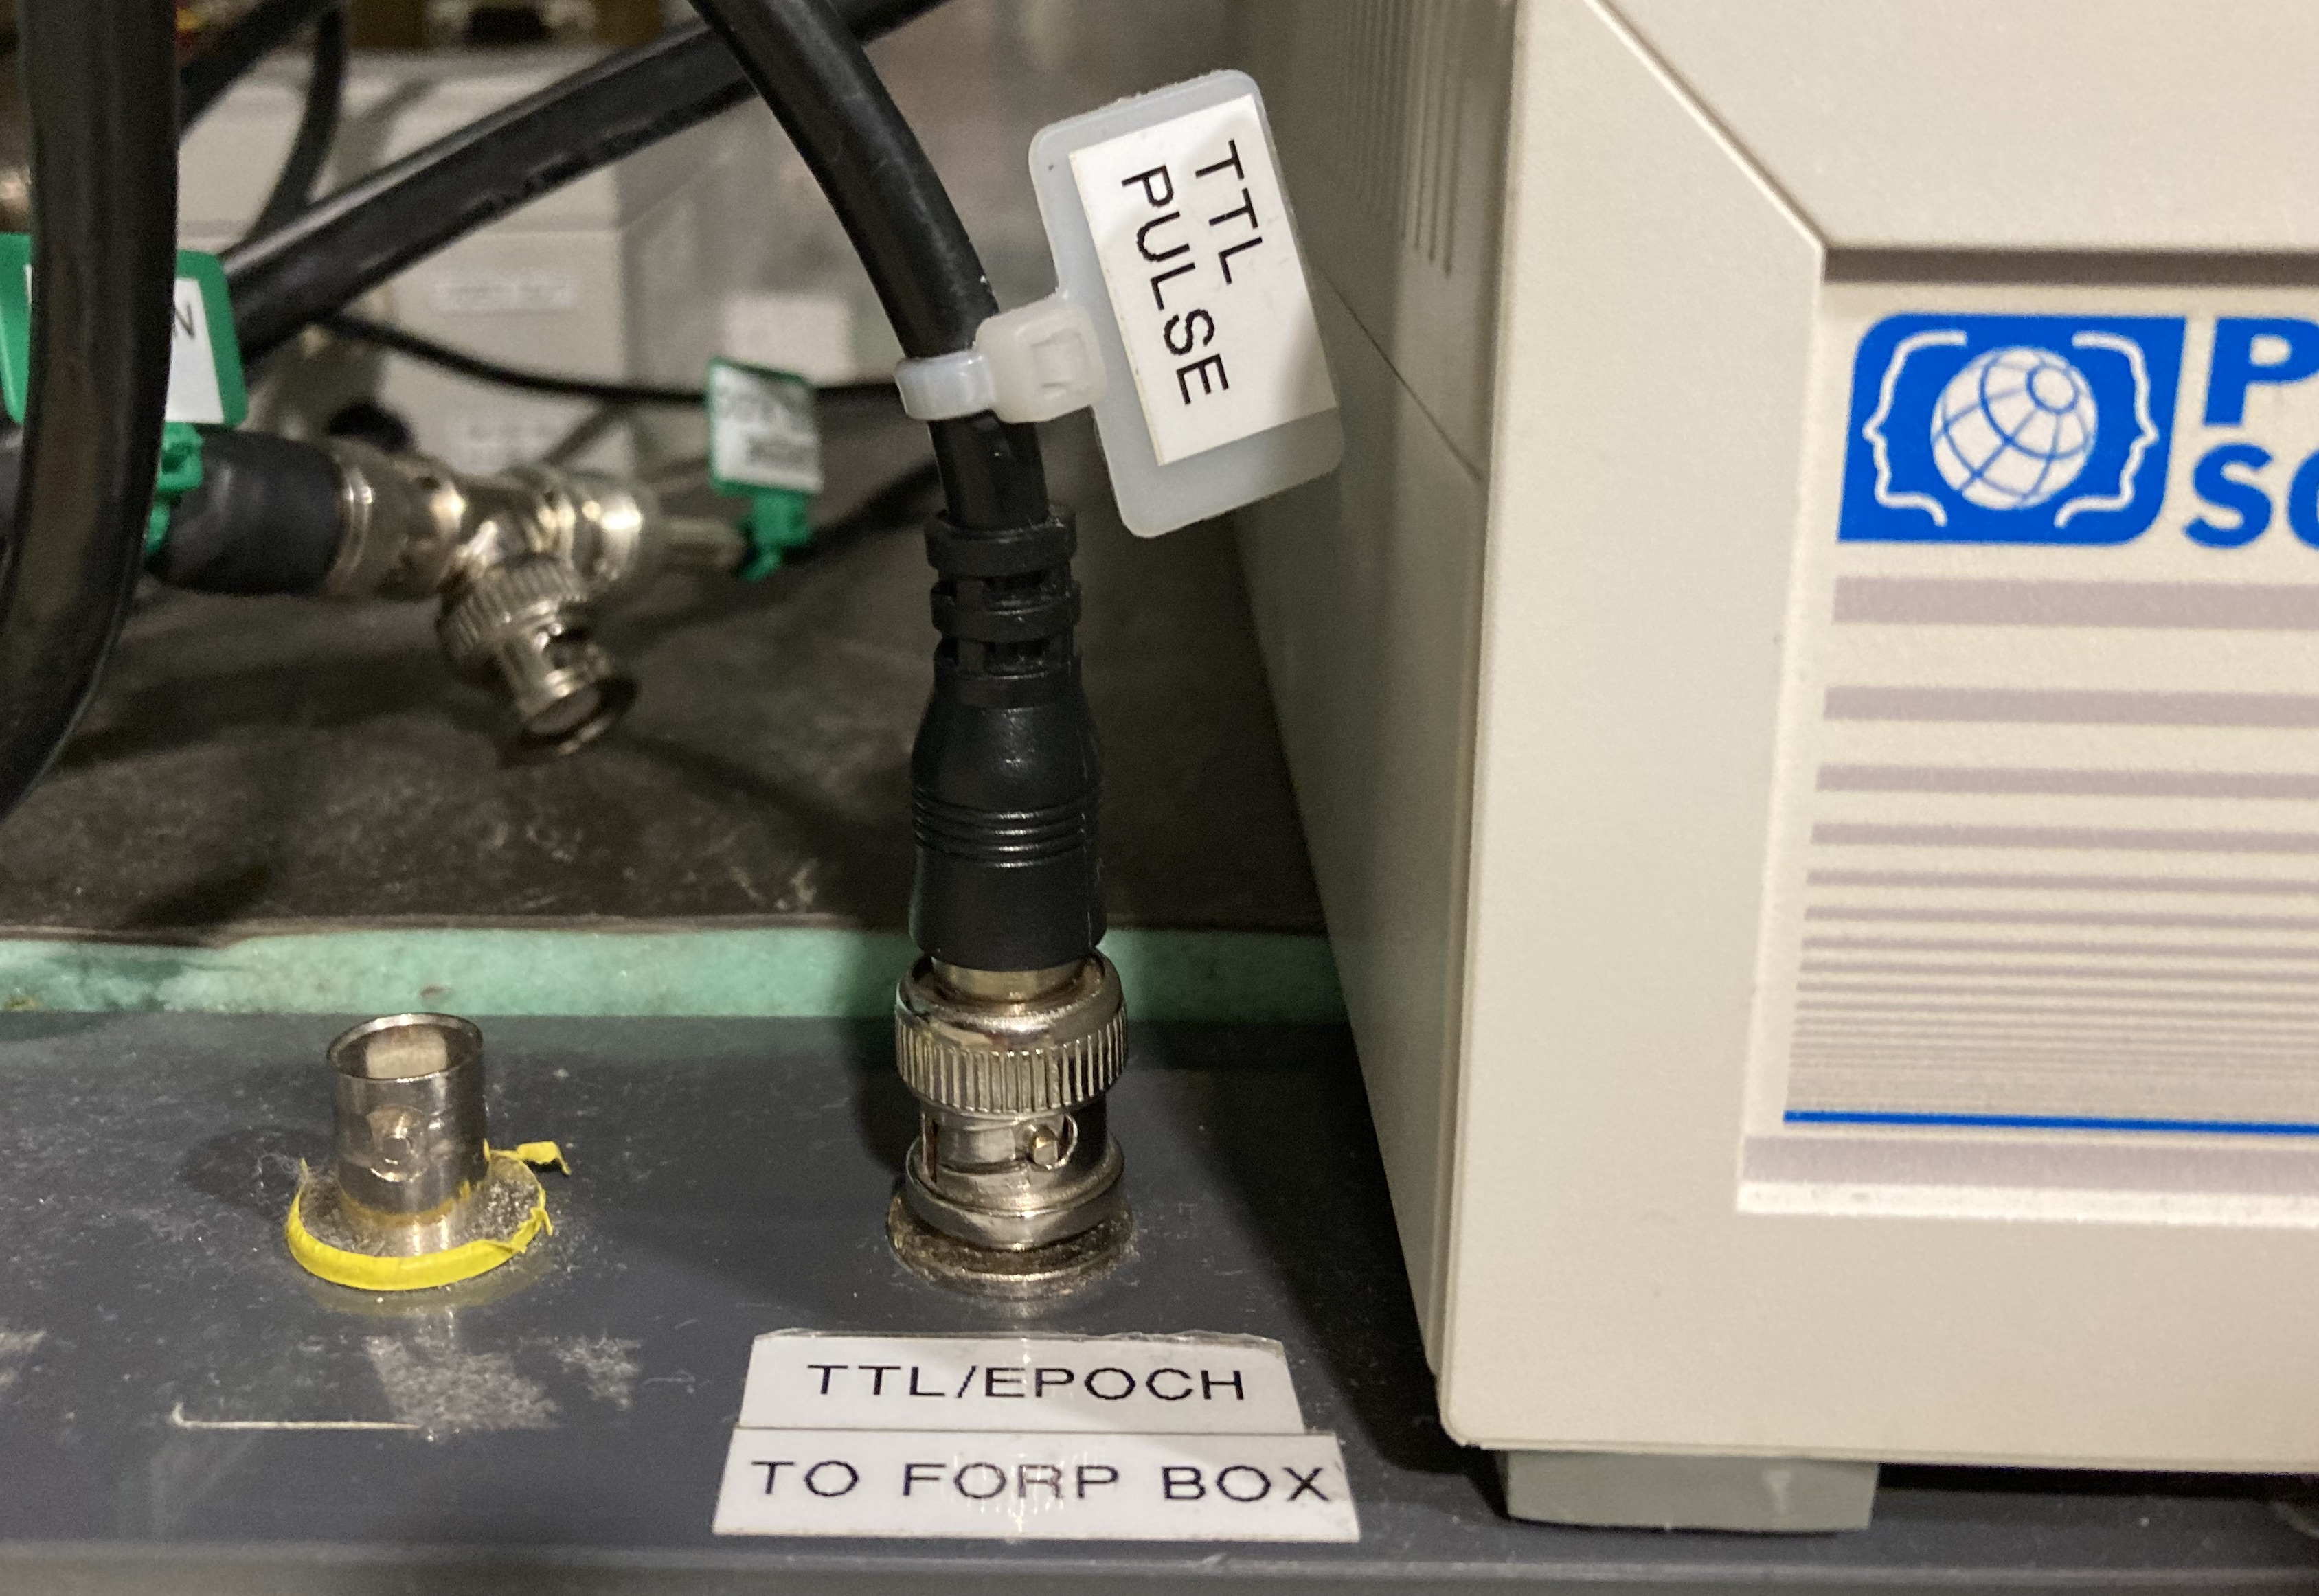
If you plan to use the TTL trigger from the scanner to start your fmri task computer, ensure the TTL pulse cable is connected. The cable and BNC connection are in the cabinet to the right of the console desk, under the projector.
Check that TTL triggers are received by your task computer. To test this, unplug and re-plug the TTL cable BNC connection. This should send a mock trigger to your text editor window on your laptop. You can also configure a short scan (e.g. 1 repetition) to be included as part of your scanning protocol, for the sole purpose of testing the trigger. You would need to open your text editor, then start that scan, then check for a
Tor5in the editor window. You should receive a trigger every time the trigger indicator light (see diagram in Step 3) flashes. The first trigger will be 4-9 sec after your scan start, depending on the scan parameters in your protocol.
In general, if things don’t seem to be working properly (e.g. you are not getting the expected numbers/letters from button presses or triggers), try:
Re-selecting your Mode setting on the Silver fORP Box Interface (Step 3).
Unplugging and re-plugging the button box USB into your computer (Step 2).
Else, retrace your steps starting from Step 1.
Other scenarios to keep in mind:
Computer going to sleep: Even after you have everything connected, tested and working properly, if your task computer goes to sleep, that may also interfere with the button box or trigger signals! In this scenario, you could try Steps 7-9, but best would be to avoid this issue entirely by configure your task computer to always stay awake (or select a long-enough time to prevent unwanted sleeps).