Prisma MRI Operator Tips
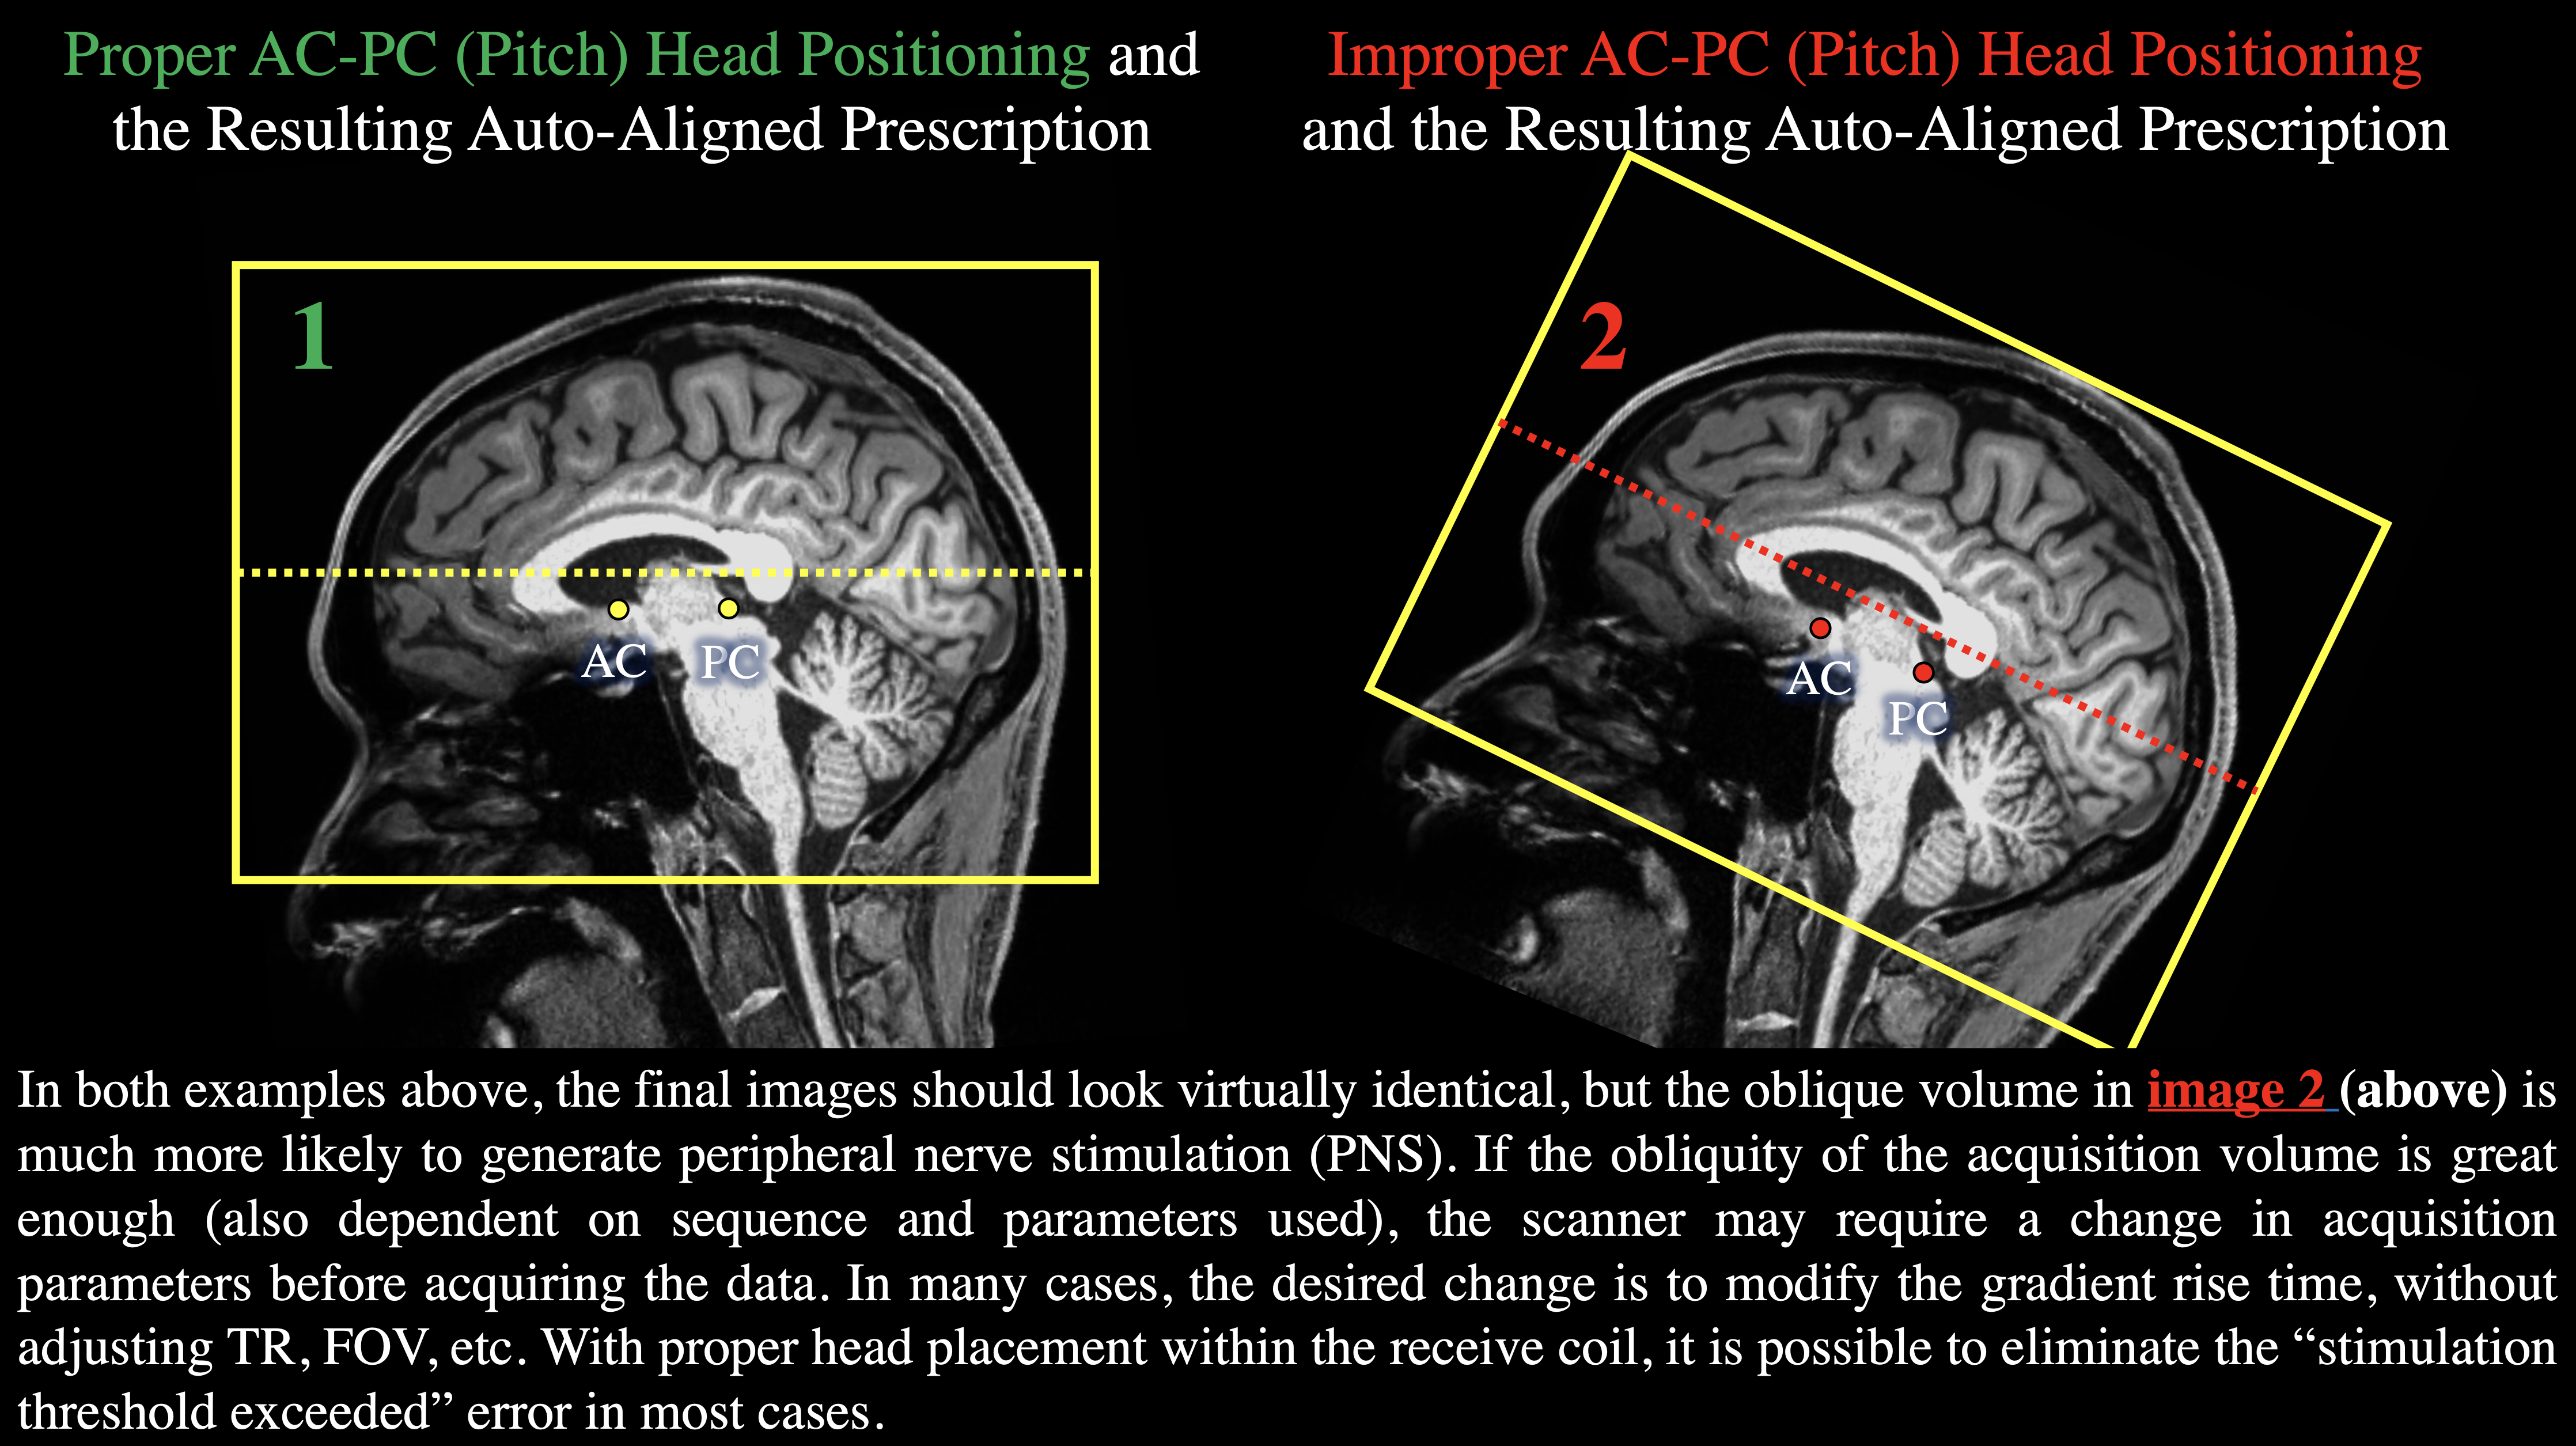
Auto-Align is Not a Substitute for Proper Head Positioning
The Auto-Align feature on the Siemens Prisma is outstanding! Even the most poorly positioned heads will end up looking perfectly straight in the image acquisition when the Auto-Align feature is used.
If your protocol uses Auto-Align to correct small head tilts during your scan, please do not make the mistake of assuming that you no longer need to pay attention to the initial head position of your research subject.
Failure to properly position the head of your research subject can result in potential issues in your session.
One potential issue is described below.
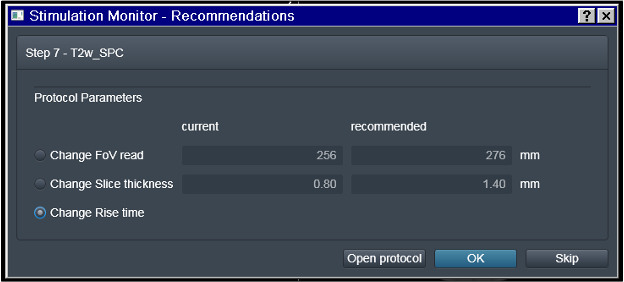
- If you see the error pop-up: “Stimulation Monitor - Stimulation Limit Exceeded! Unable to start the measurement”
Choose the “Calculate” option, then “Change Rise Time”
Charging the Physio Devices After Use (IMPORTANT)
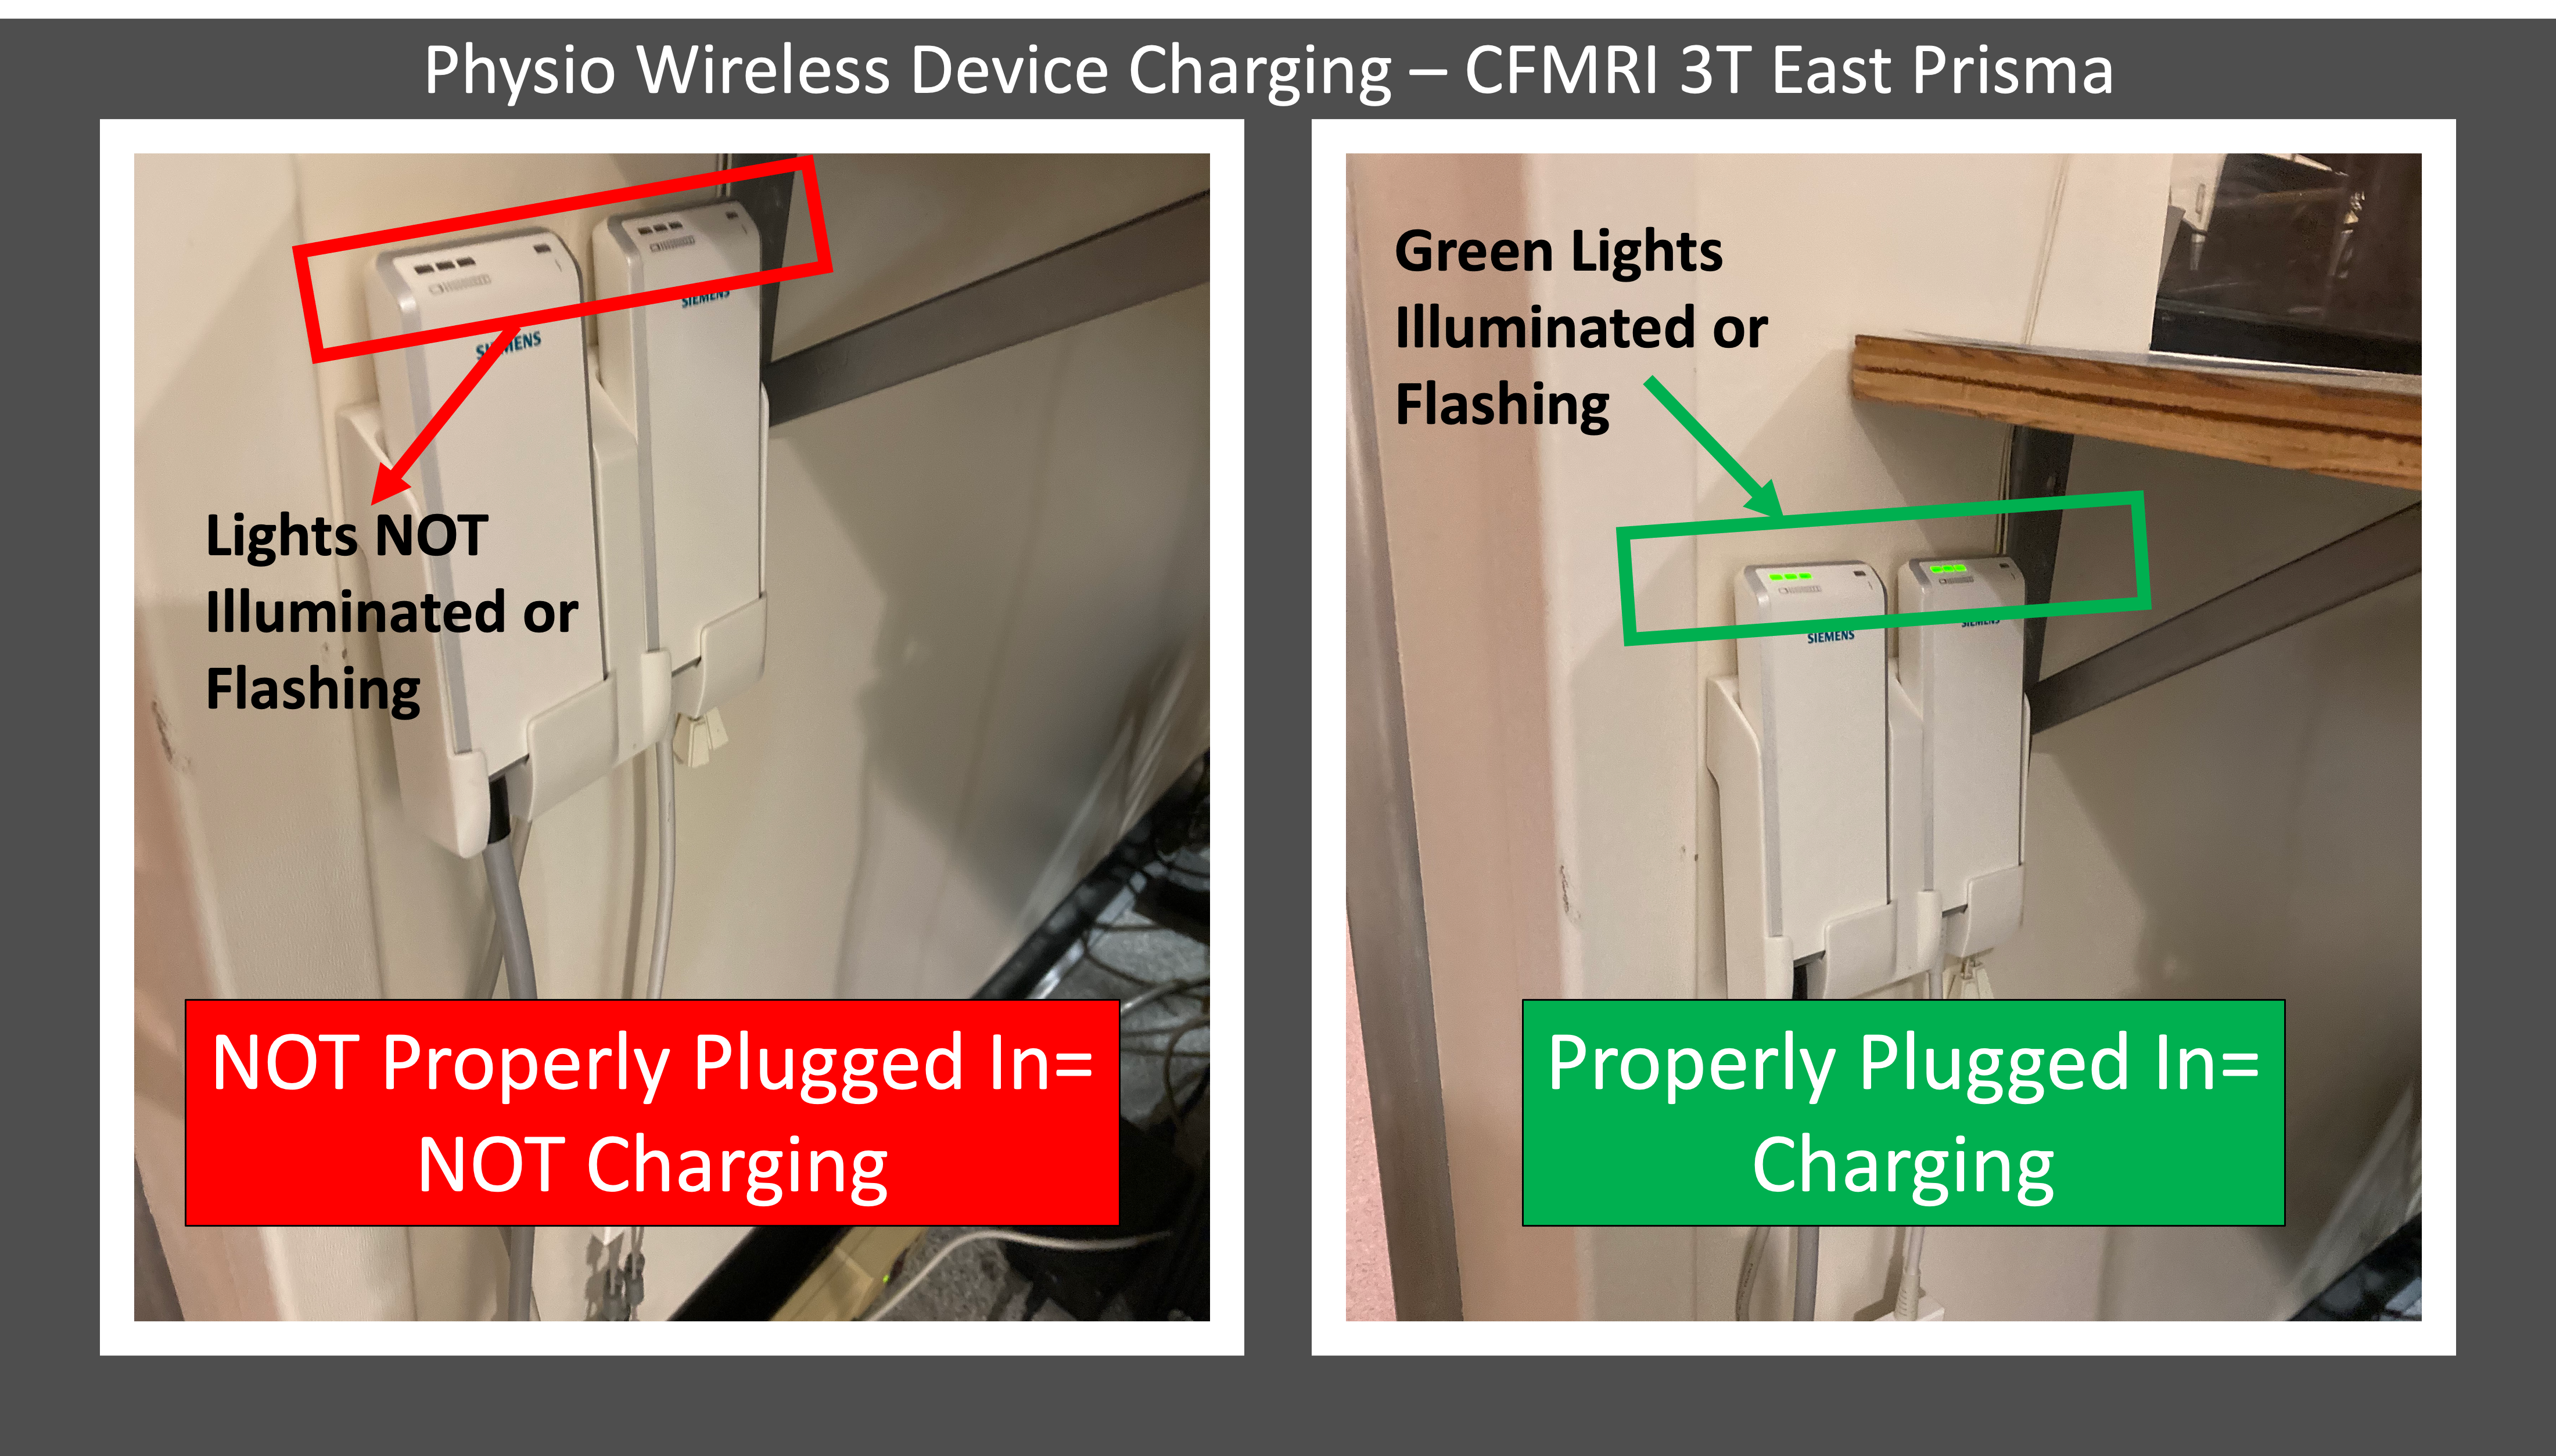
If your group uses the wireless physiological monitoring system on the Siemens Prisma (3T East), please ensure that the devices are properly plugged into the charging station (near the magnet room door) when you complete your session
After placing them on the charger, press down gently until you see the green charging lights flashing
Proper Physio Pulse-Ox Device Usage & Finger Placement
Proper pulse-ox placement and device usage is critical when acquiring physio data on the Siemens Prisma at CFMRI
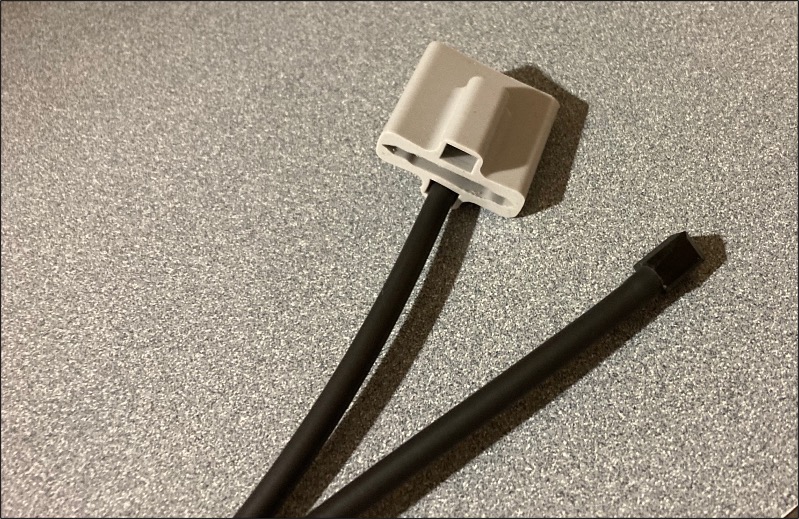
The device below is used to collect subject pulse readings during scan sessions
The rubber finger attachment is removable and comes in various sizes
To acquire accurate and consistent pulse recordings, please ensure that both ends of the sensor cables are inserted into the finger attachment
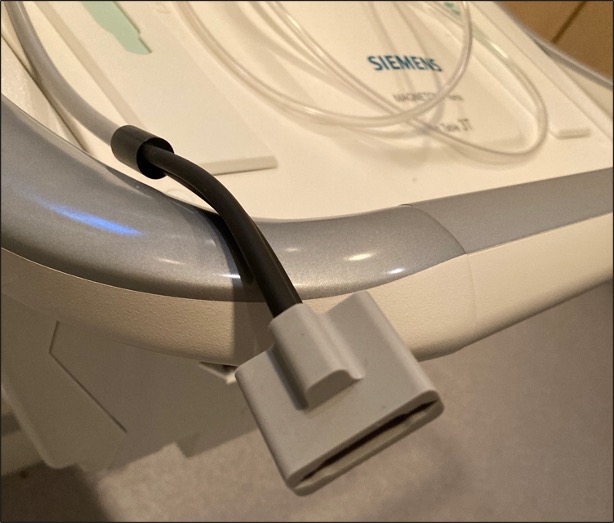
Below is an example of a disconnected sensor cable
Before using the pulse recording device, always ensure the red sensor light is positioned within the finger attachment so that it is shining through the hole in the center of the grey clip (shown below)
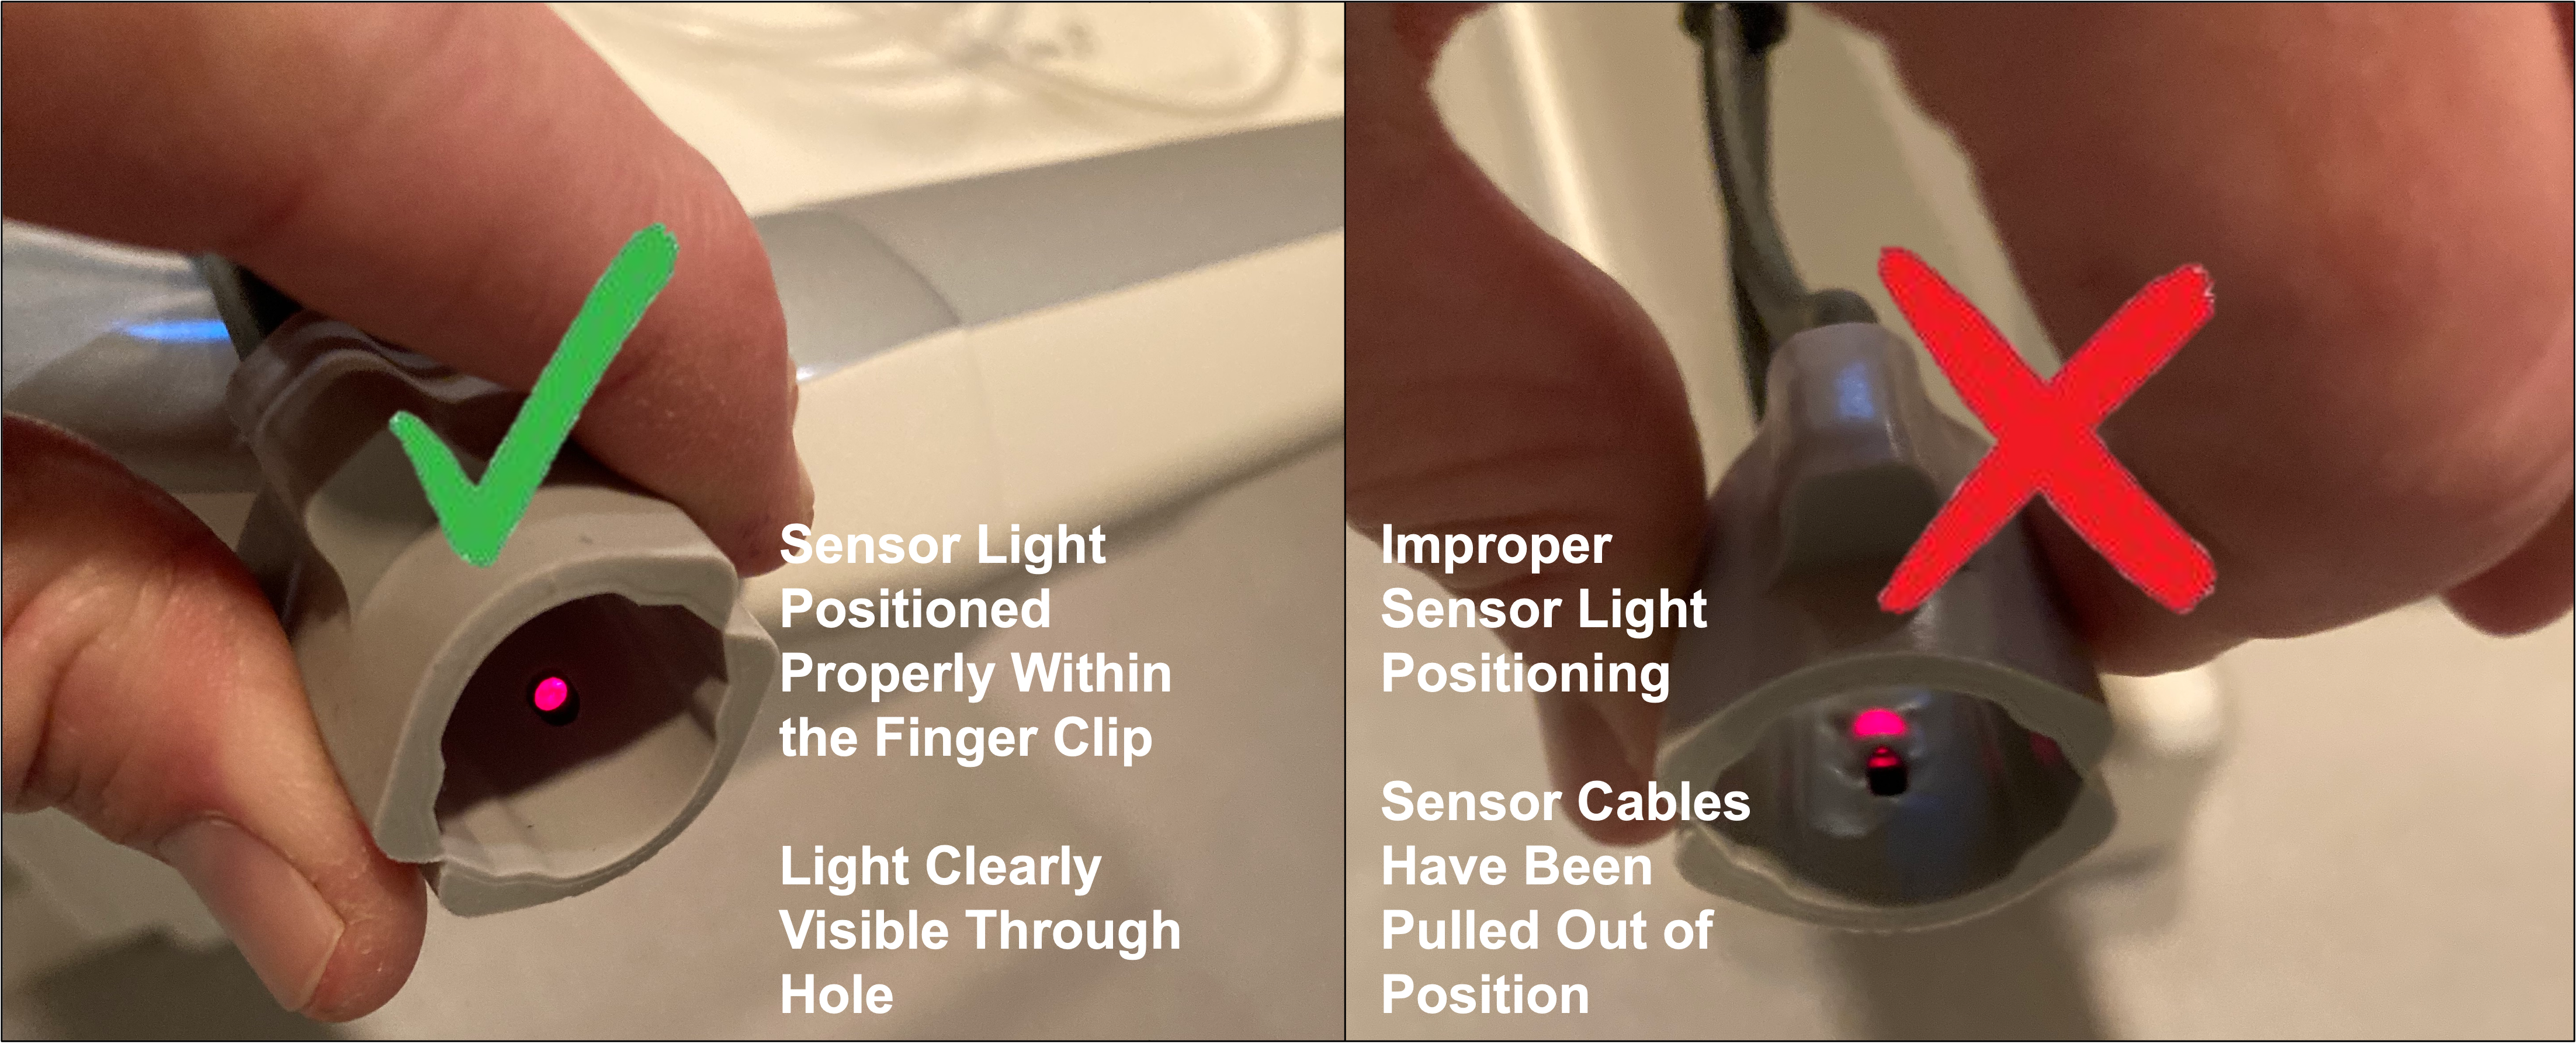
With the two black sensor cables connected, and the sensor properly positioned, place the grey clip on the finger with the sensor light on the inside of the subject’s fingertip
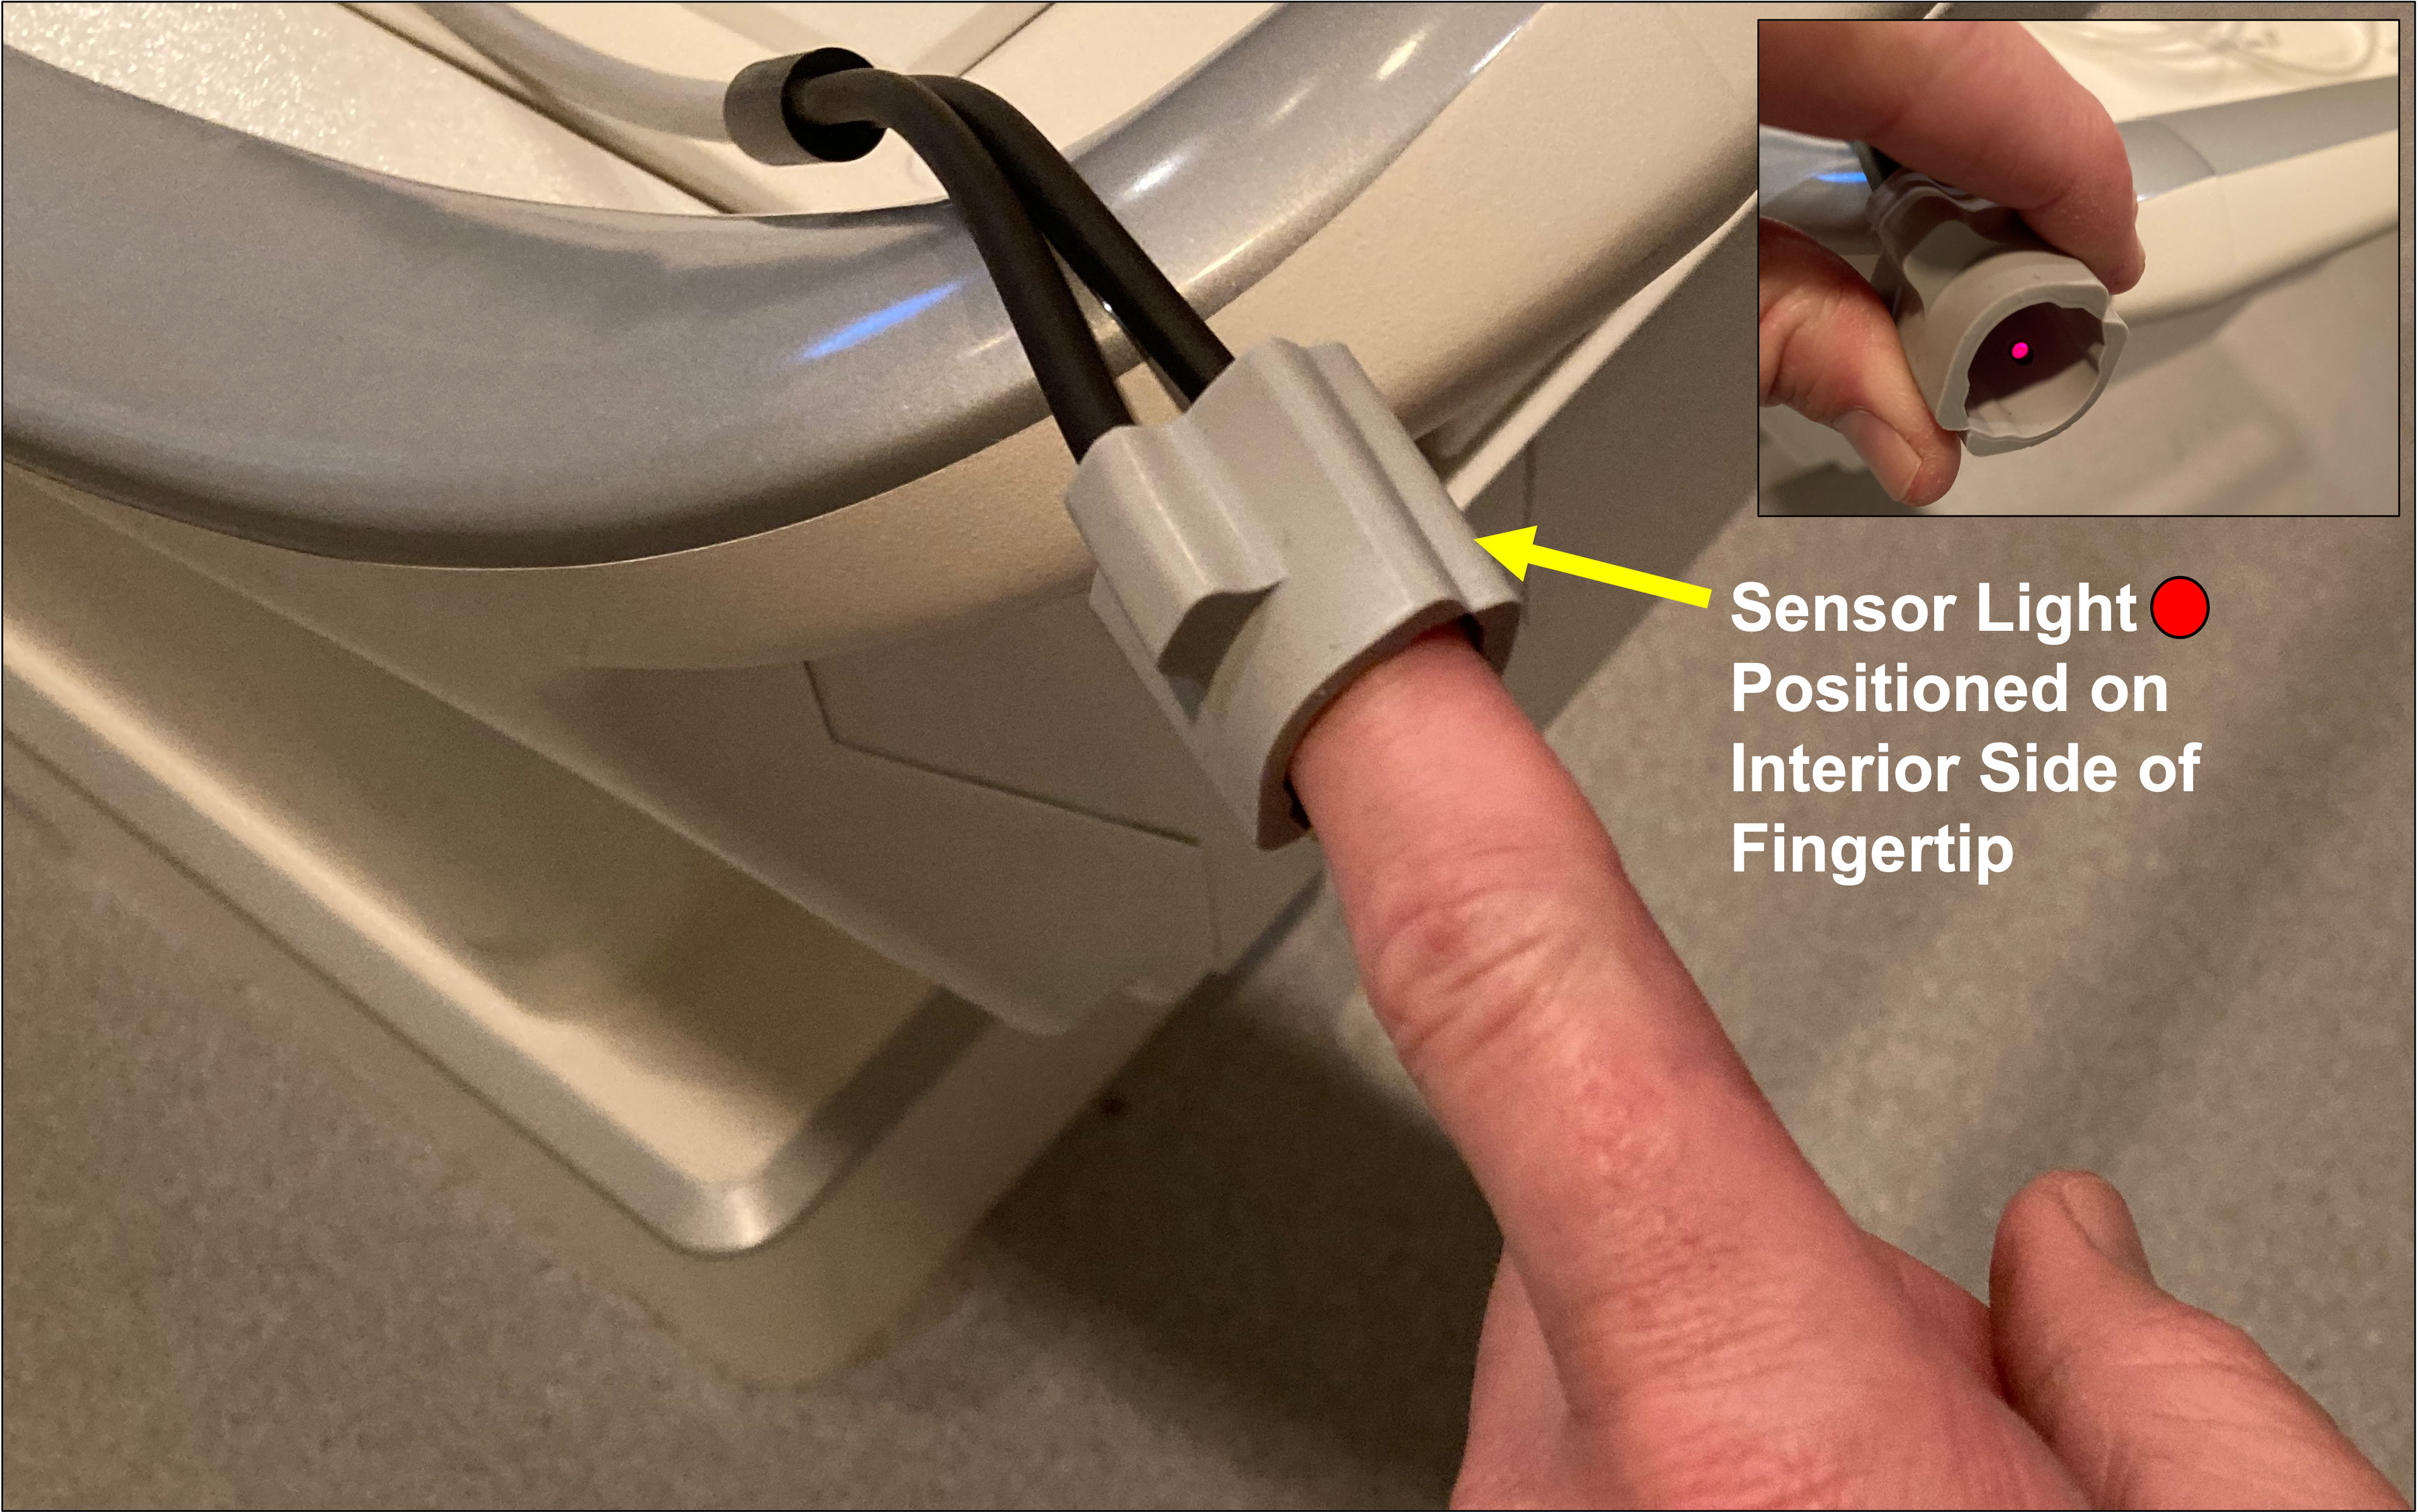
Confirm that you are receiving a clean signal on the magnet display screen physio tab
You may need to wait a minute for the system to re-scale and start displaying a clean signal after the subject has been properly positioned and is no longer moving their hand
Unintended PE-Direction Swaps with Copy References
When copying references from one scan to another, check that the scanner does not make any unexpected changes to the PE (phase-encoding) direction of the scan.
This is especially apparent and common when you have an fMRI or DTI scan with PE A>P for one scan, with the prescription copied to a subsequent P>A scan. In this situation, the second scan (receiving the copied Rx) may flip its PE direction to R>L! This is a bug for certain, specific sequences on VE11C.
This issue must be corrected during your scan session (i.e. not something that can be fixed in the protocol). To correct your PE direction to the proper one:
Note the R>>L phase encoding direction.
Use the dropdown to switch to A>>P.
Use the “…” to rotate 180 degrees. This is what allows you to swap from A>>P to P>>A. Press Enter on the keyboard to ensure it “takes” the change, and then press Close.
Now you should have P>>A Phase Encoding Direction.
