“Clipboard Full” Error & Clearing Network Jobs
“Clipboard Full” Error
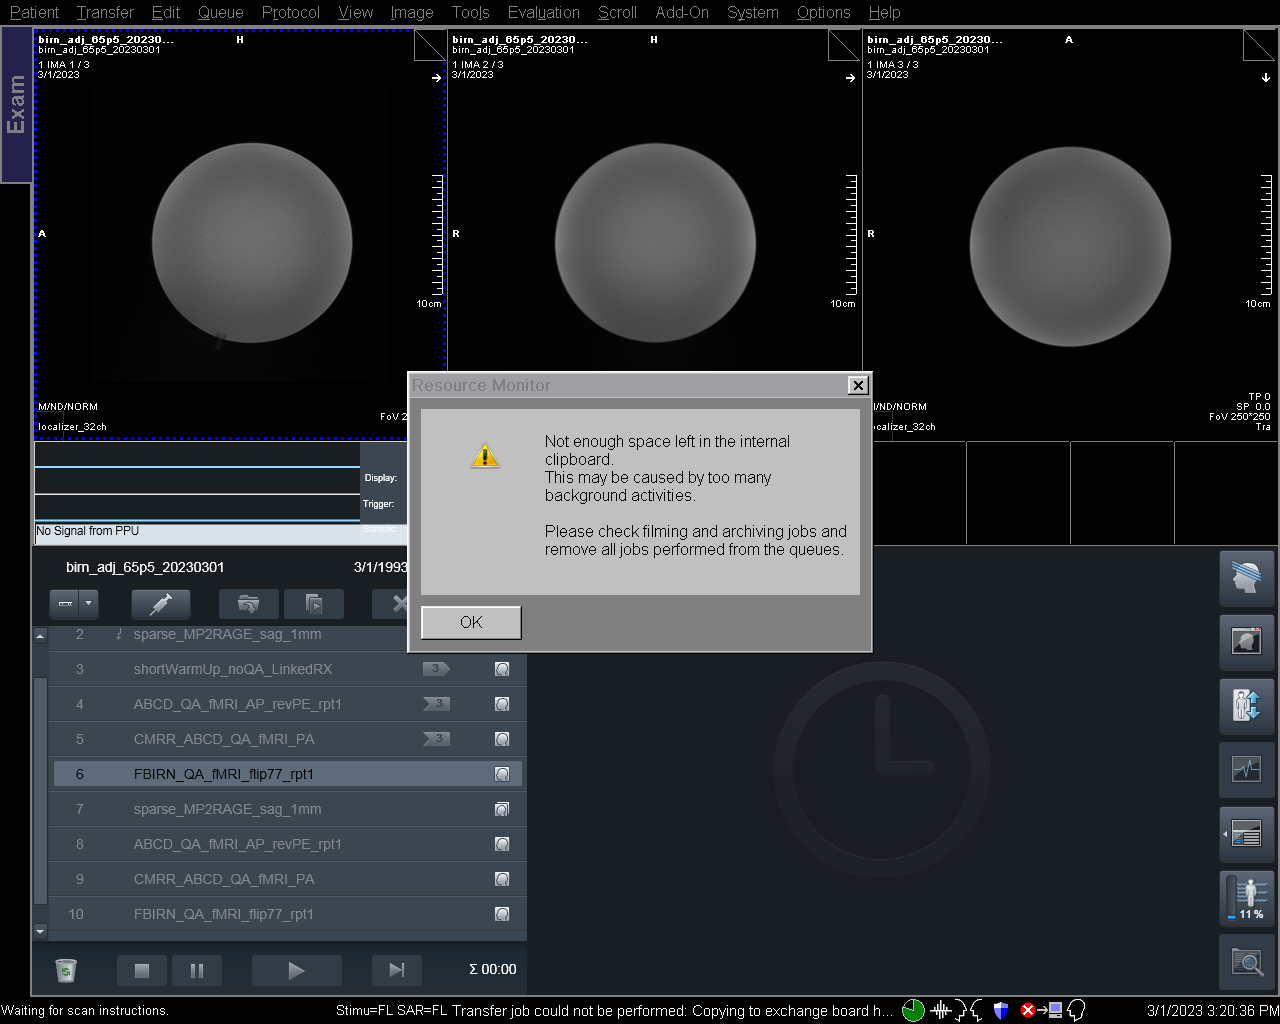
If your imaging session involves a large number of back-to-back scans (particularly fMRI), it is possible that you might experience a “Clipboard Full” Error.
If you encounter this error during your session, it is very important that you know how to address the issue.
Why am I seeing the “Clipboard Full” Error?
During your session, every scan you run is automatically synced to the Mac workstation (cfmridcm) on the desk to the right of the scanner computer.
If you run scans that generate a large number of files (e.g., fMRI, multi-echo fMRI) and/or you run a large number of scans in quick succession, every once in a while the scanner computer cannot keep up with all the requests for data transfer to cfmridcm.
When this occurs, typically a single scan transfer will not be initiated, giving the system a few minutes to catch up with the high level of demands we are imposing on it.
If you see the error, you DO NOT need to stop scanning.
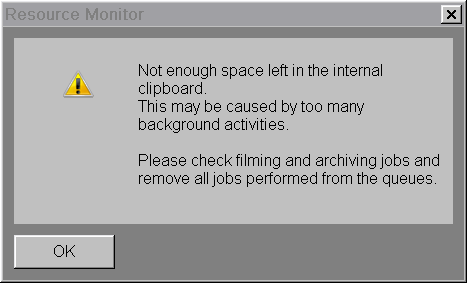
While the error looks very serious and states “not enough space left”, this is not indicative of a disk space issue on the scanner computer.
What should I do if I see the “Clipboard Full” Error?
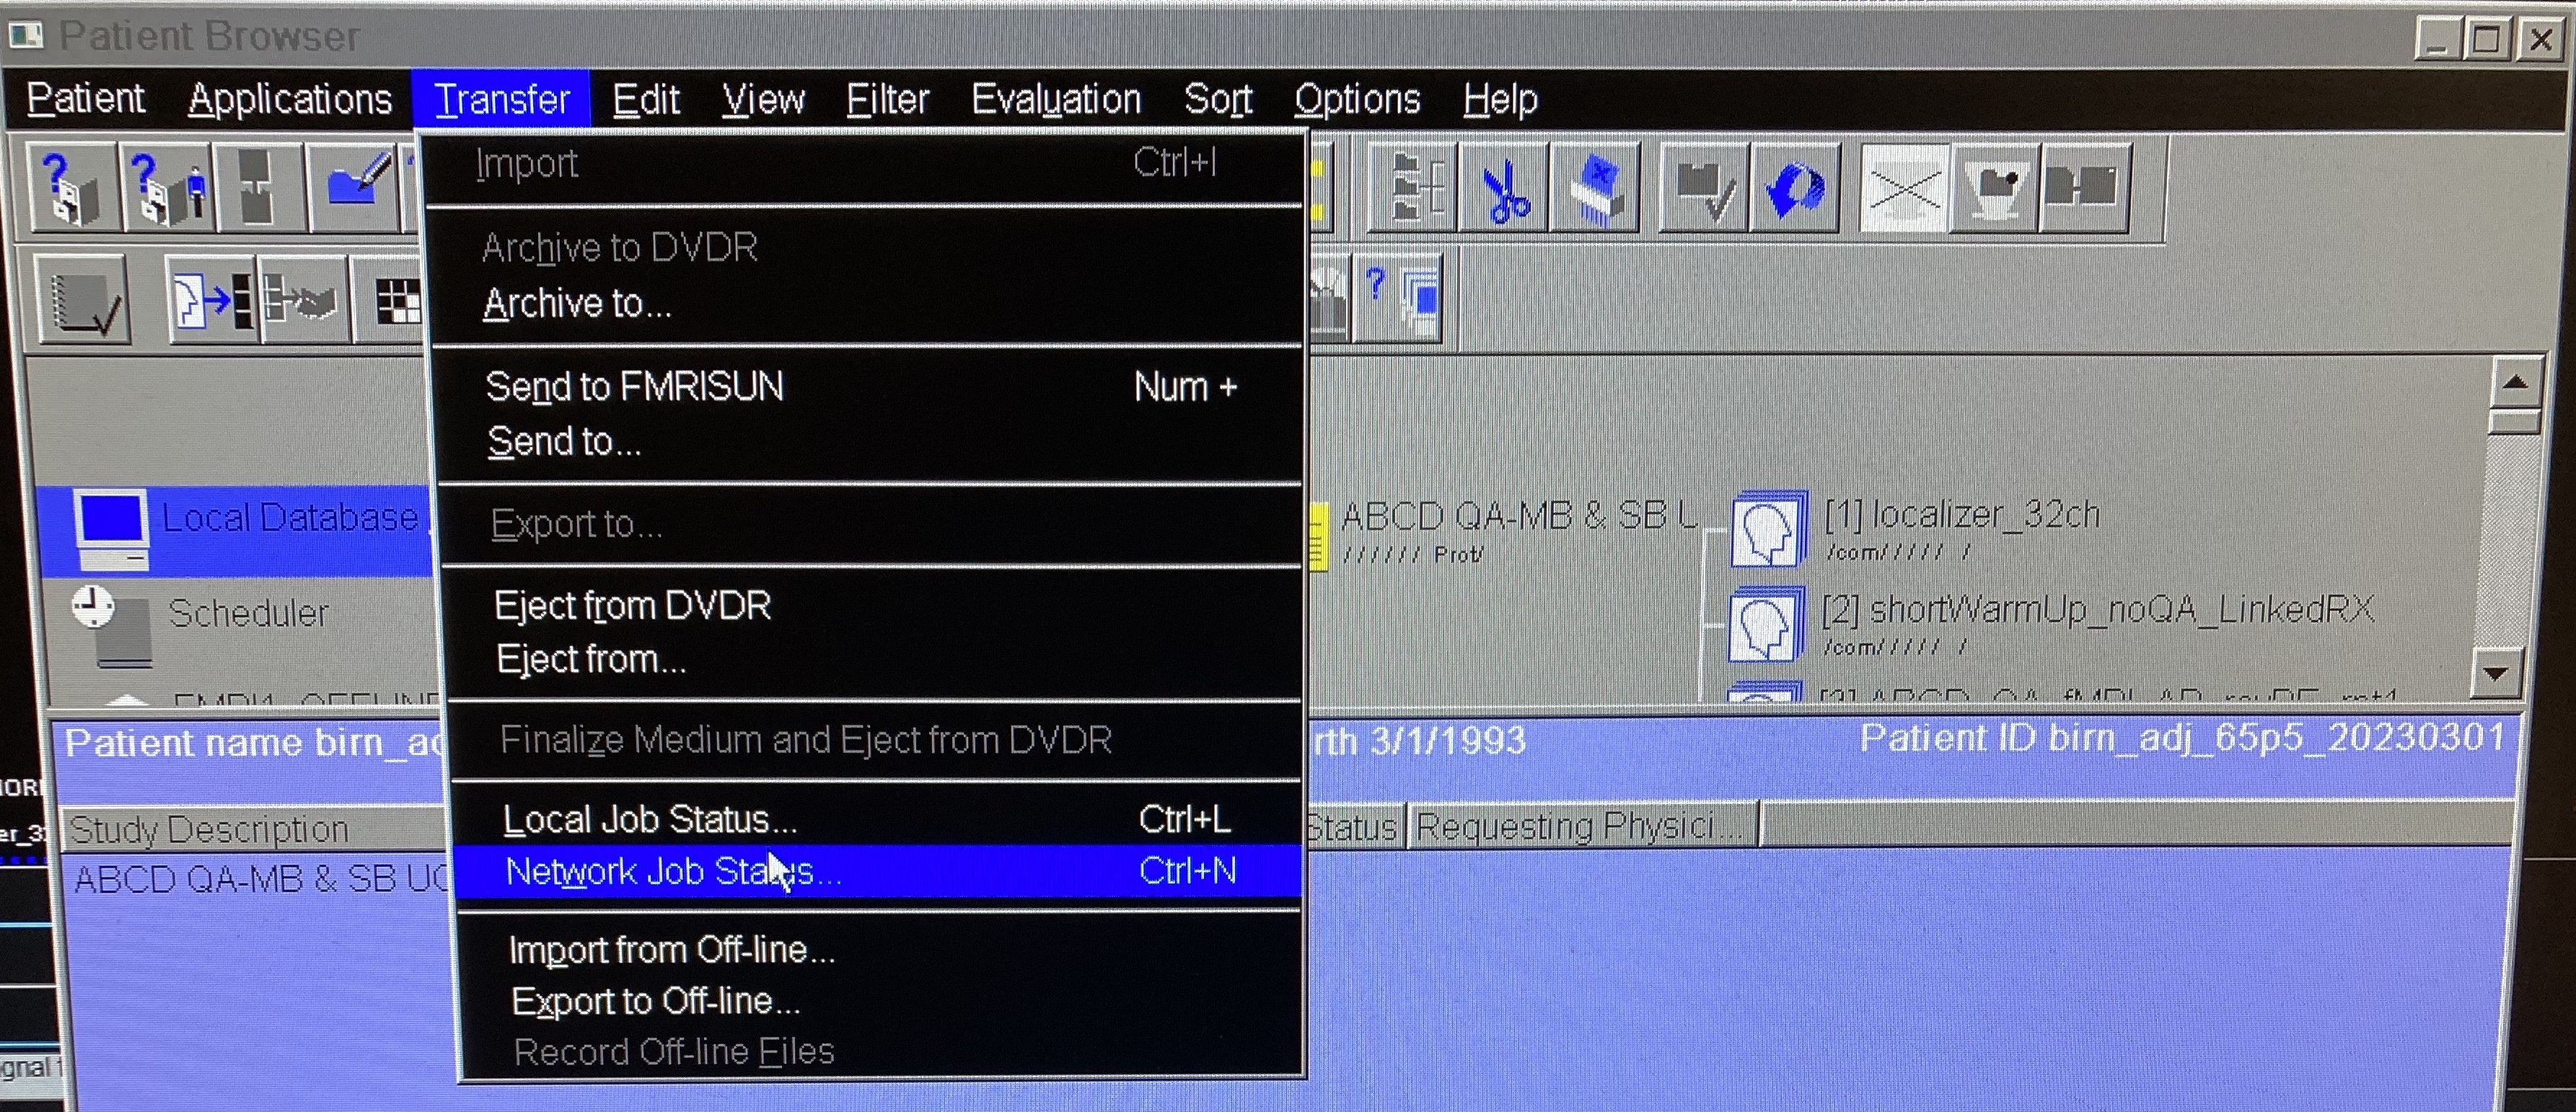
- Open the “Network Job Status” GUI from the menu bar at the top of the Patient Browser window.
Transfer > Network Job Status
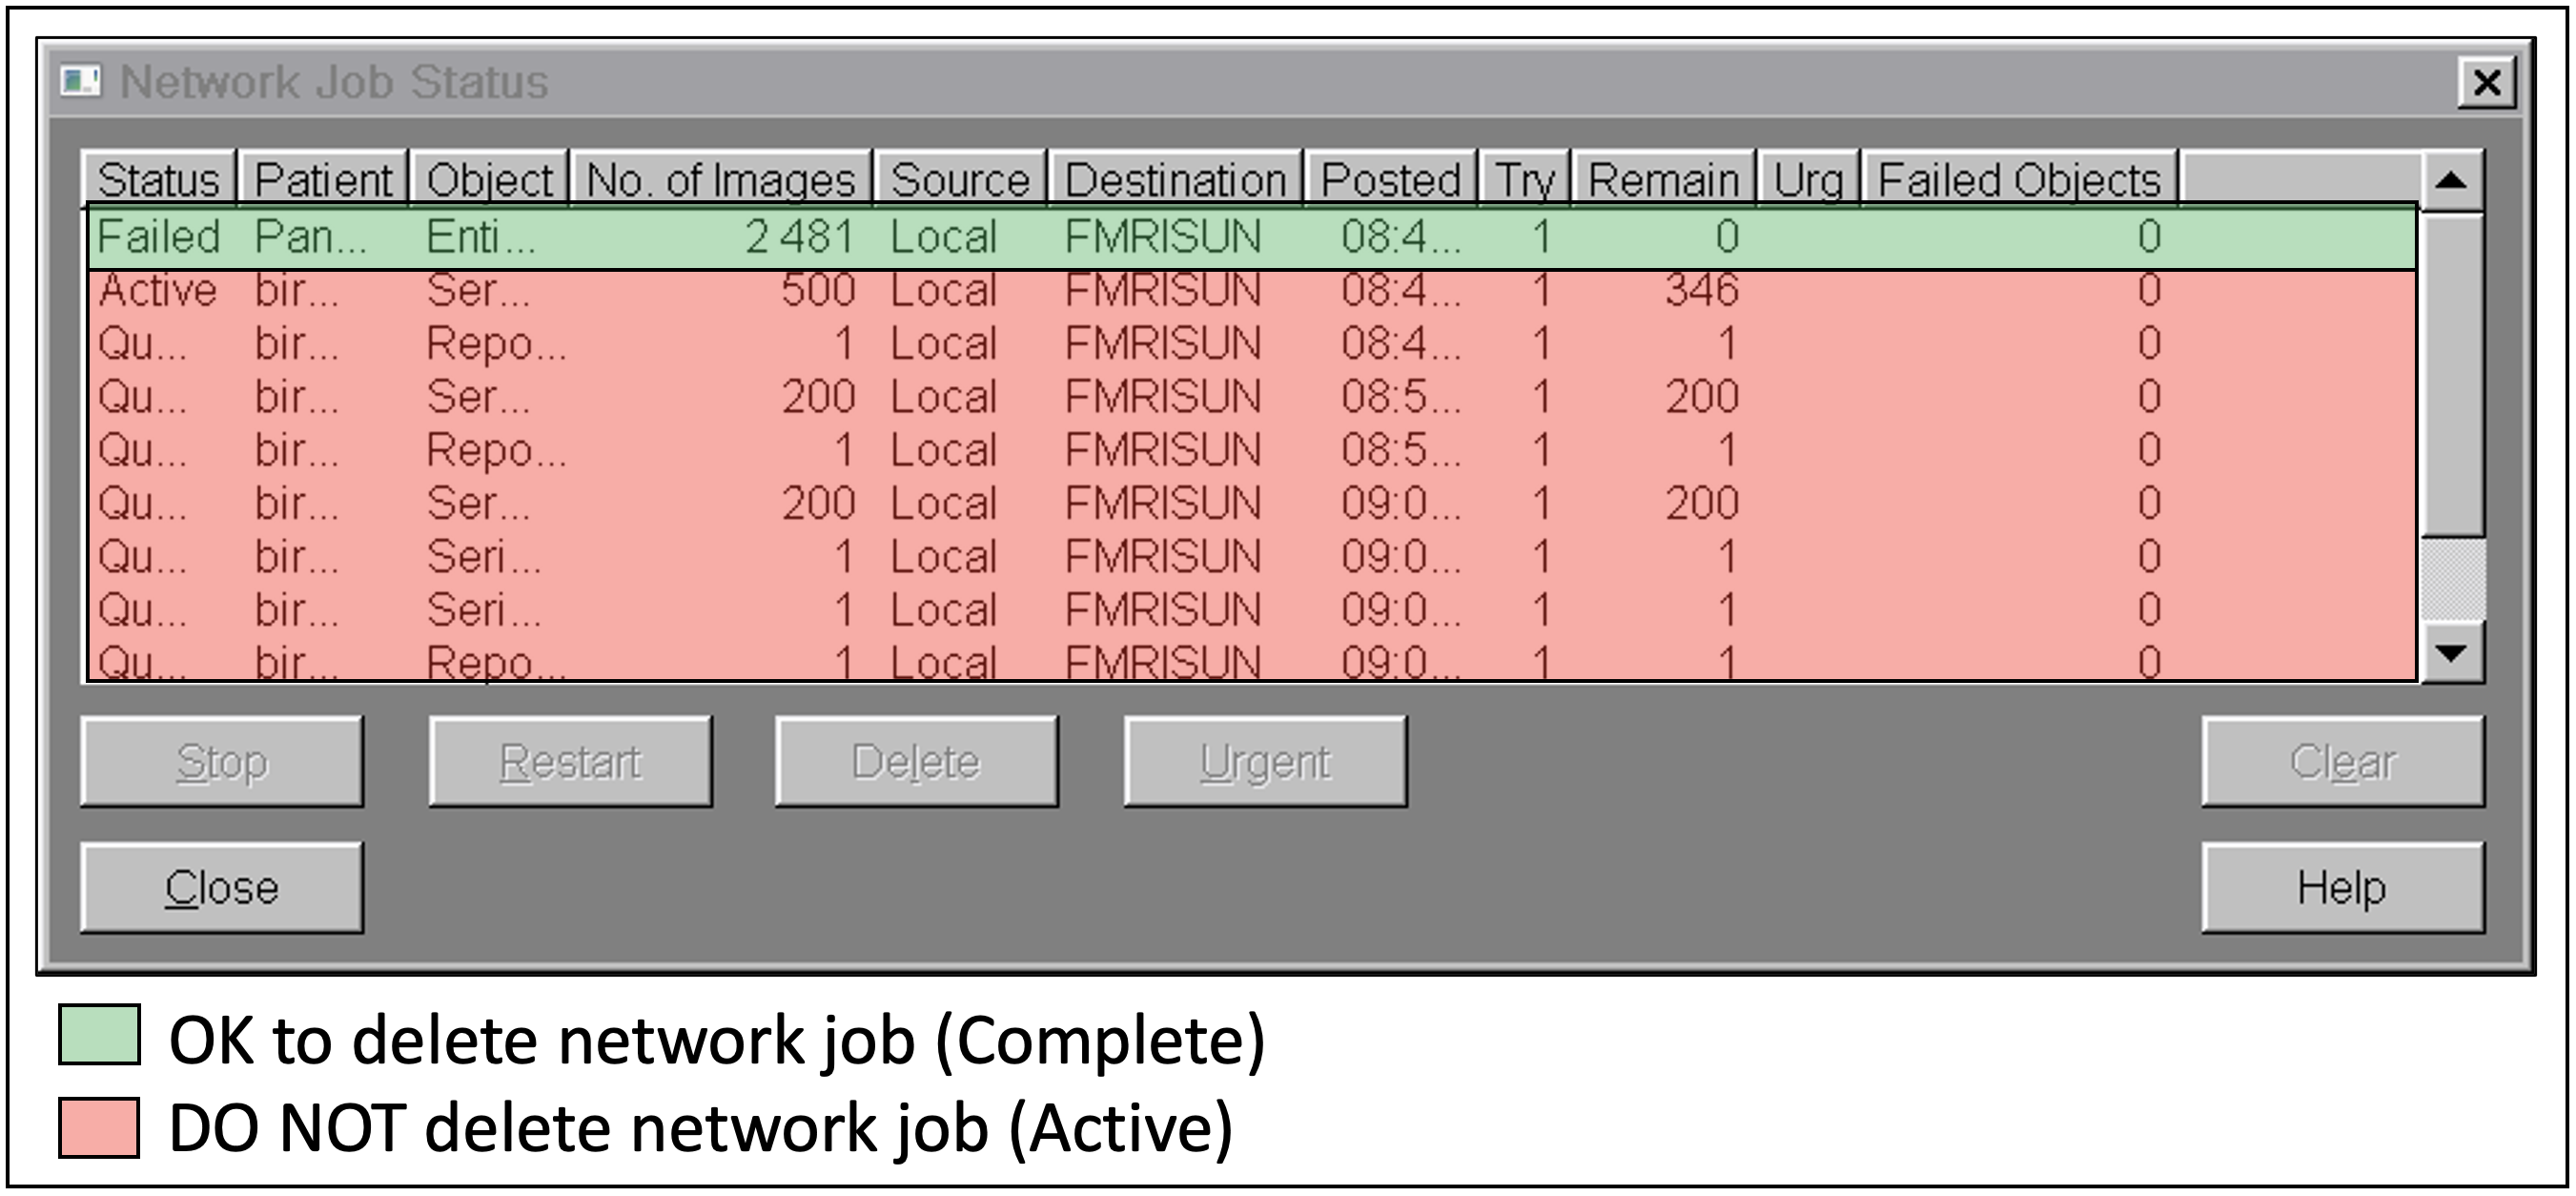
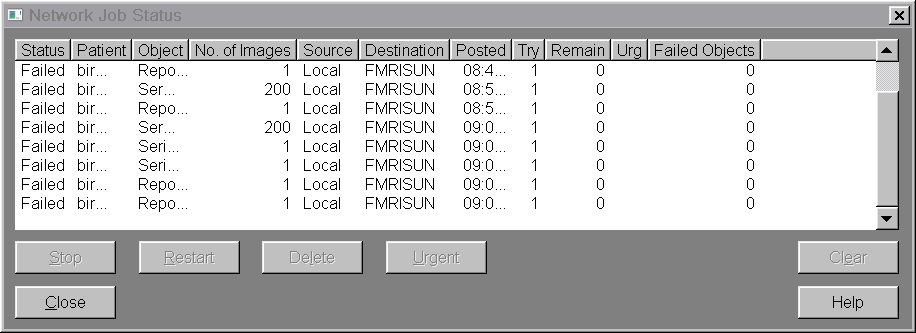
The Network Job Status window will show the status of all data transfers from the scanner computer to cfmridcm (the Mac workstation on the desk next to the scanner computer).
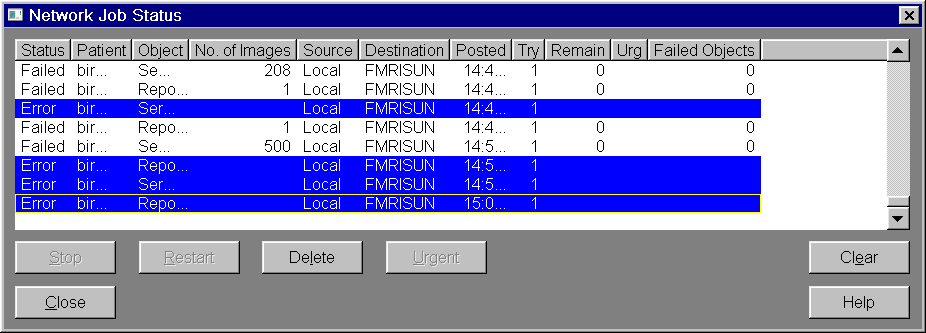
If the “Status” column says “Error”, this is an indication that the data transfer to cfmridcm failed.
Attention
If the Error is not addressed, your final dataset transferred to your server account using cfmricp will be INCOMPLETE
Network Job Status Quirks
While it is counter-intuitive, the status of “Failed” is OK. The cfmridcm system is not confirming the transfer with the scanner console, which leads to this “failed” status but for the purpose of this document, “Failed” = successful transfer.
Regardless of anything in the the Network Job Status window, you should always confirm that the data transferred when you send it from cfmridcm to another server (fmri1, fmri2, etc.).
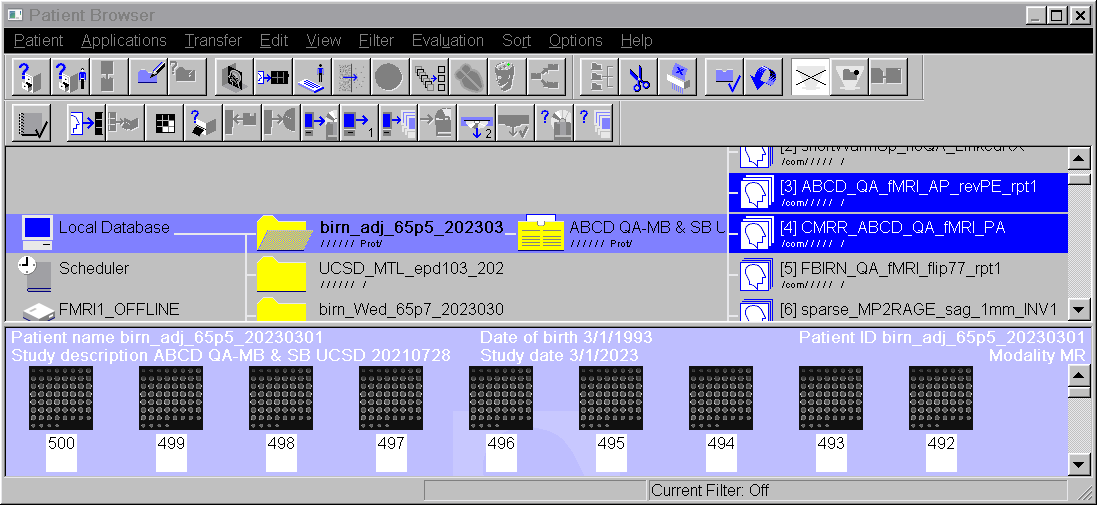
To address the “Error” (incomplete transfer), use the “Patient Browser” to locate your imaging data.
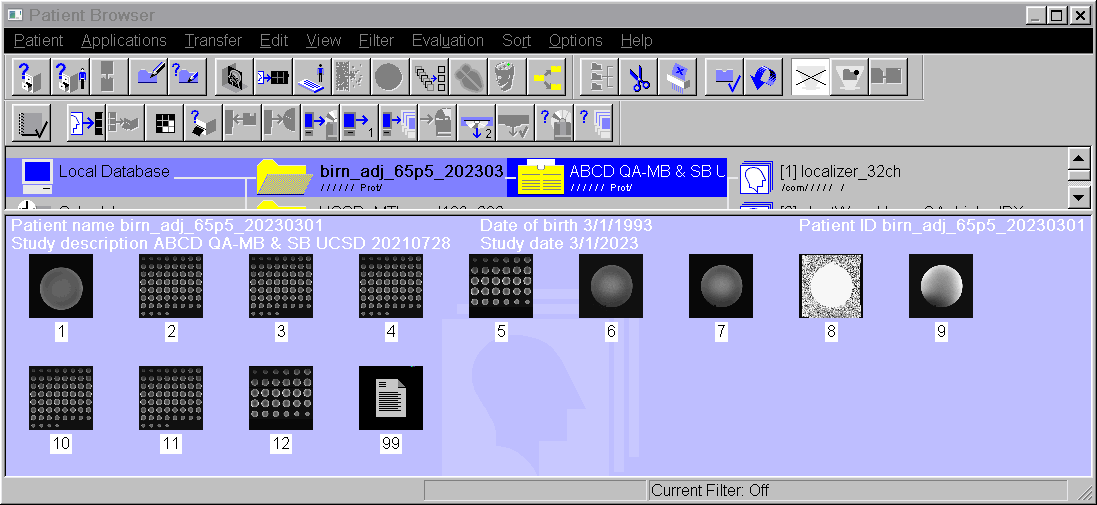
Click on the scans that you were running when the “Clipboard Full” error occurred.
- Re-transfer the scans to cfmridcm
Patient Browser > Transfer > Send to CFMRIDCM (formerly FMRISUN)
Note: Make sure the scans you want to transfer are selected in the Patient Browser (highlighted in blue).
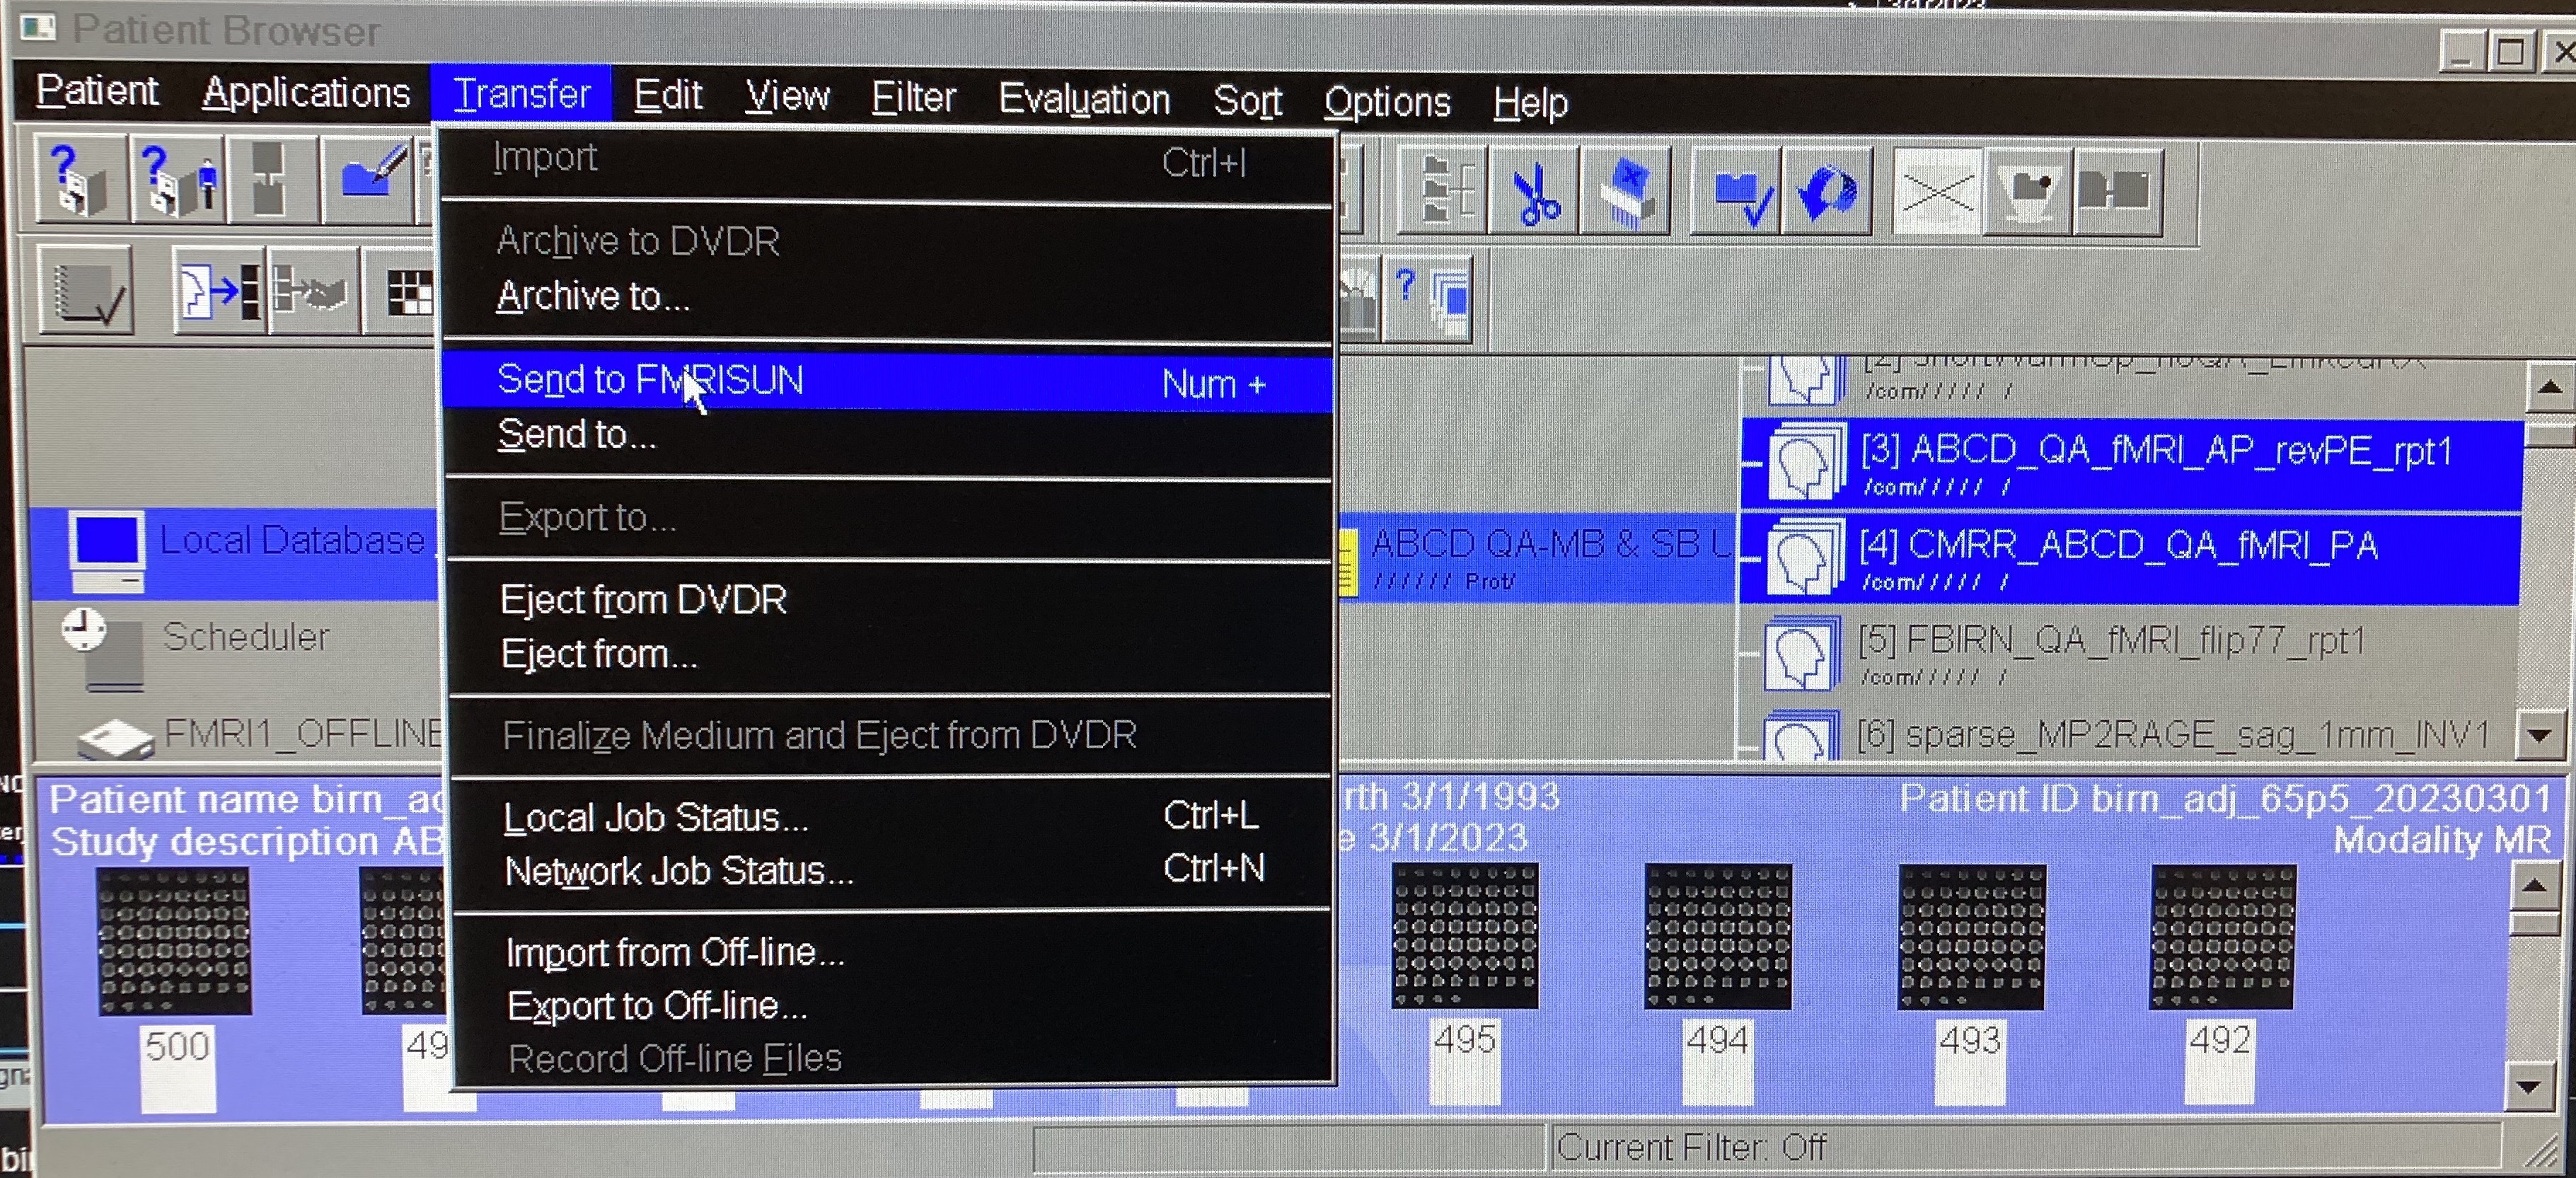
- Return to the Network Job Status window
Patient Browser > Transfer > Network Job Status
After a few seconds you should see a new job initiated in the window.
To track the progress of the transfer, you can monitor the “No. of Images” and the “Remain” columns.
The “Remain” column should count down from the total number (3,344 in this example) to 0.

Attention
If you ever encounter a ”Clipboard Full” error while scanning, it is very important that you carefully review your data after the scan session (within the next 24 hours or so) to ensure that nothing is missing. If files are missing from the cfmridcm location & ultimately your session transfer using cfmricp, when they are deleted from the scanner (this can occur within a few days), there is no way to recover them.
Clearing Network Jobs
Preventing the “Clipboard Full” Error?
- Fortunately, there is a proactive step you can take to reduce the likelihood of a “Clipboard Full” error.
Clearing completed network jobs from the queue
- Before you start scanning (or any time during your session), open the Patient Browser using the menu bar at the top of the left monitor.
Patient > Patient Browser
- Open the “Network Job Status” GUI from the menu bar at the top of the Patient Browser window.
Transfer > Network Job Status

Identify all transfers that are complete.
The status column will state “Failed” on all successfully completed transfers.
Network Job Status Quirks
While it is counter-intuitive, the status of “Failed” is OK. The cfmridcm system is not confirming the transfer with the scanner console, which leads to this “failed” status but for the purpose of this document, “Failed” = successful transfer.
Regardless of anything in the the Network Job Status window, you should always confirm that the data transferred when you send it from cfmridcm to another server (fmri1, fmri2, etc.).
Select all complete, inactive jobs (control-click or shift-click to select multiple jobs).
Click on “Delete” to remove these jobs from the Network Job Status queue.
DO NOT select any active transfers (see section below) when deleting jobs.
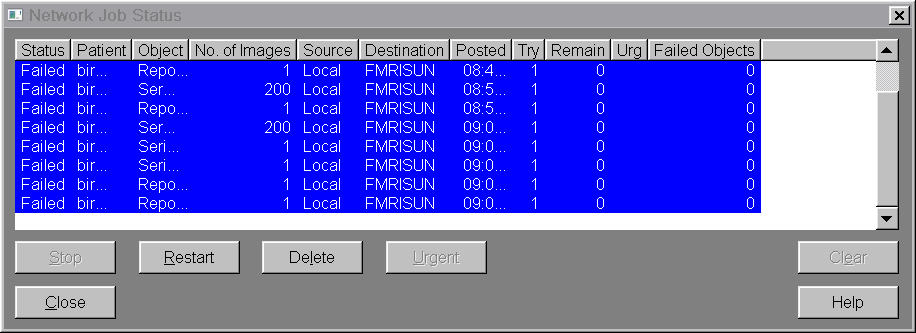
Avoid any job with a status of “Queued”, “Spooling”, “Active”, or “Error” when you are clearing out network jobs.
If you accidentally delete a job with any status other than Failed (AKA Complete), you will stop active transfers and the data will need to be re-transferred.