Multi-Planar Reconstruction
MPR Instructions for the Siemens Prisma
If your protocol requires Multi-Planar Reconstruction (MPR) of structural data to accurately position your imaging prescription (e.g., single-voxel spectroscopy), please follow the instructions below to effectively complete the MPR process on the Siemens Prisma at CFMRI
Open the patient browser using the menu bar (“Patient > Patient Browser”)
Select your exam in the local database
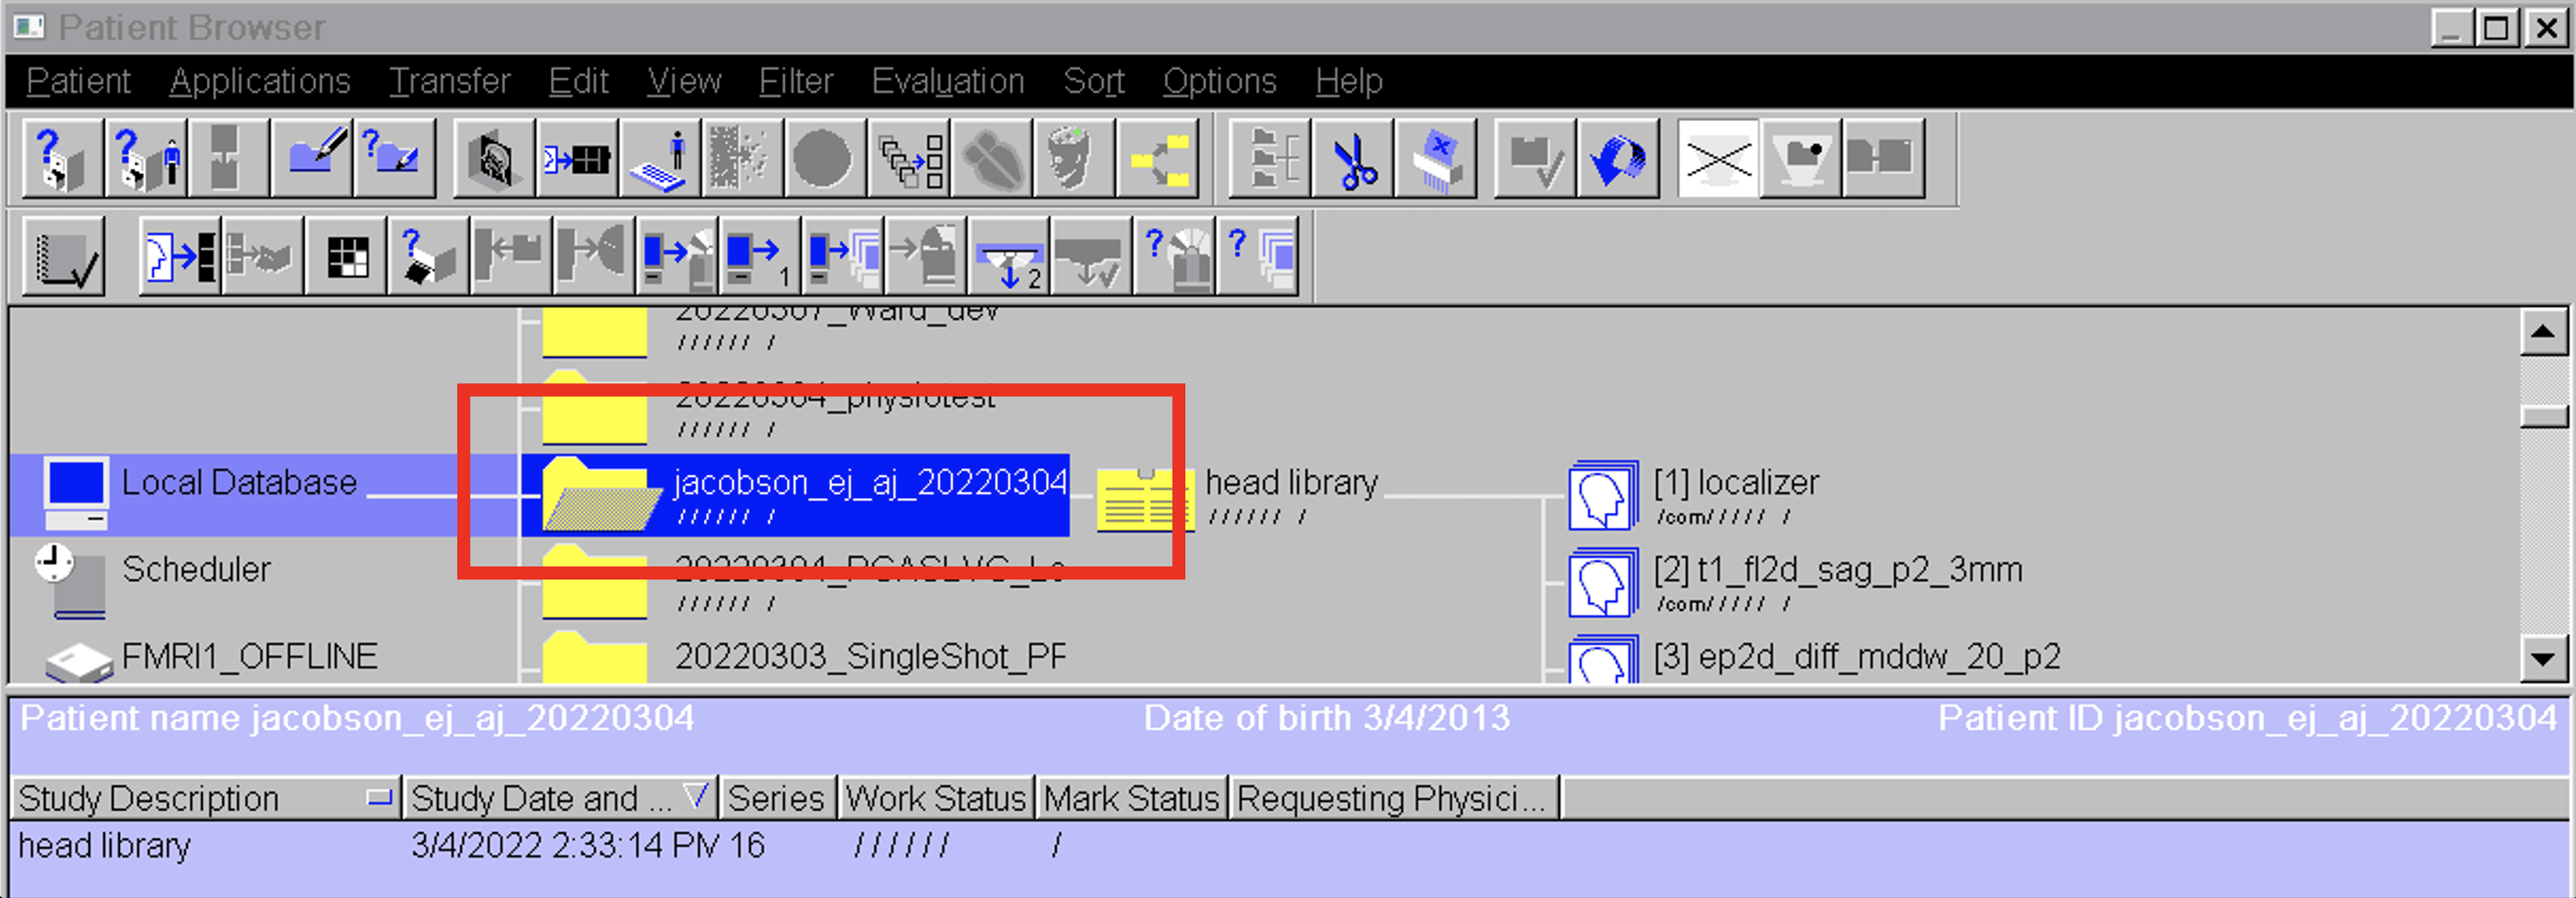
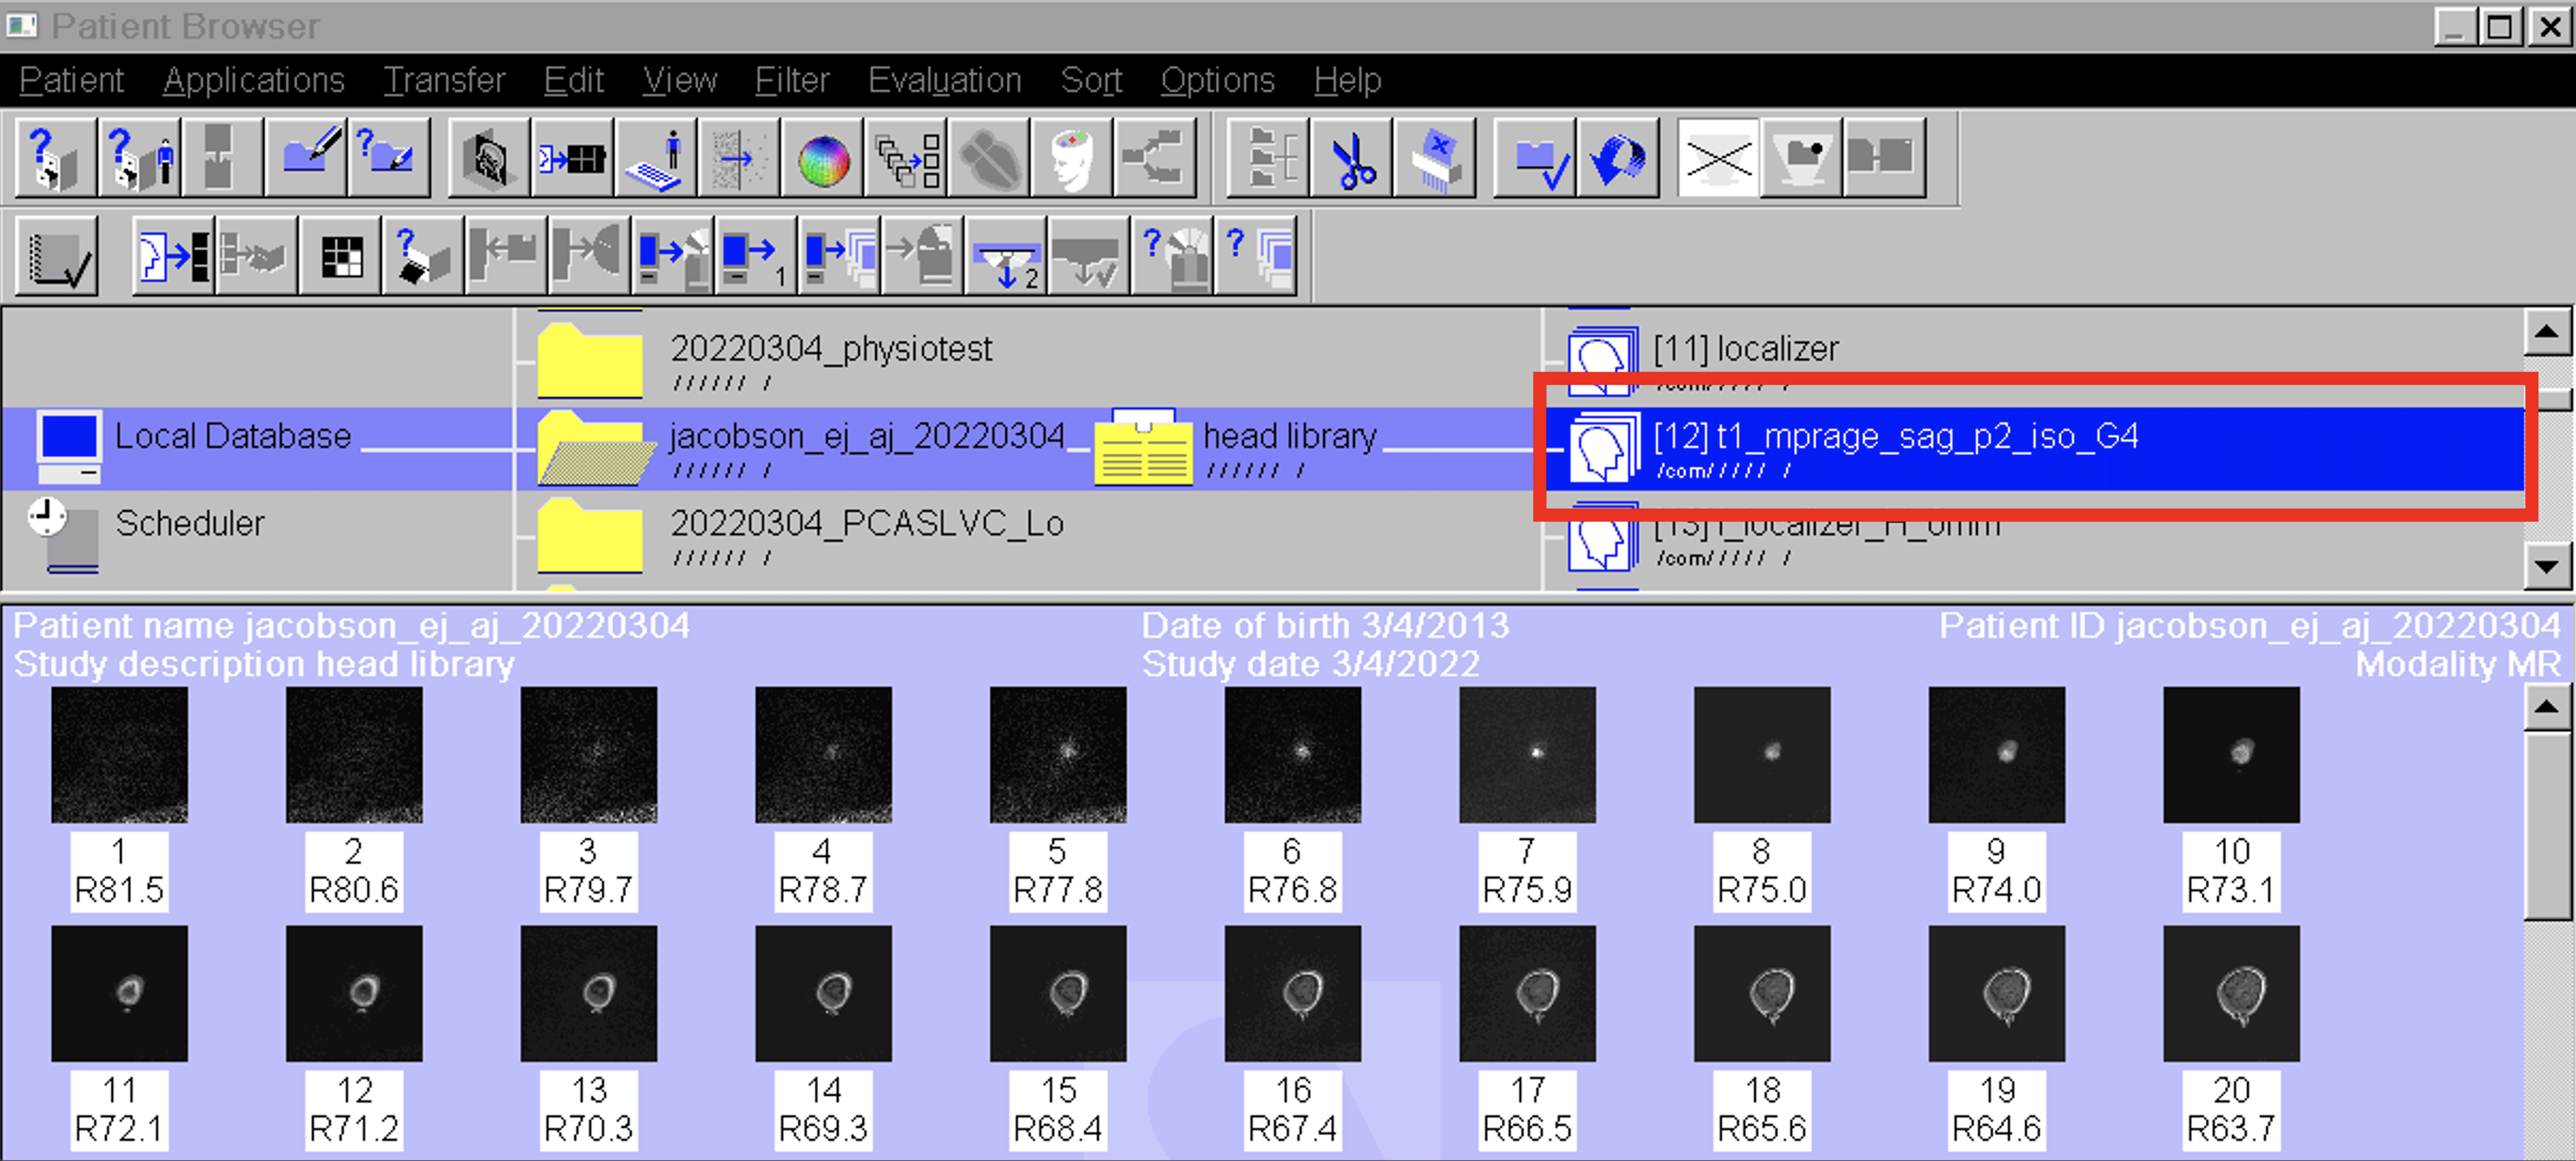
Select the appropriate dataset from the exam
This is typically a sagittal T1 or T2 dataset
From the patient browser window (while your T1 or T2 is highlighted), select “Applications > 3D > MPR”
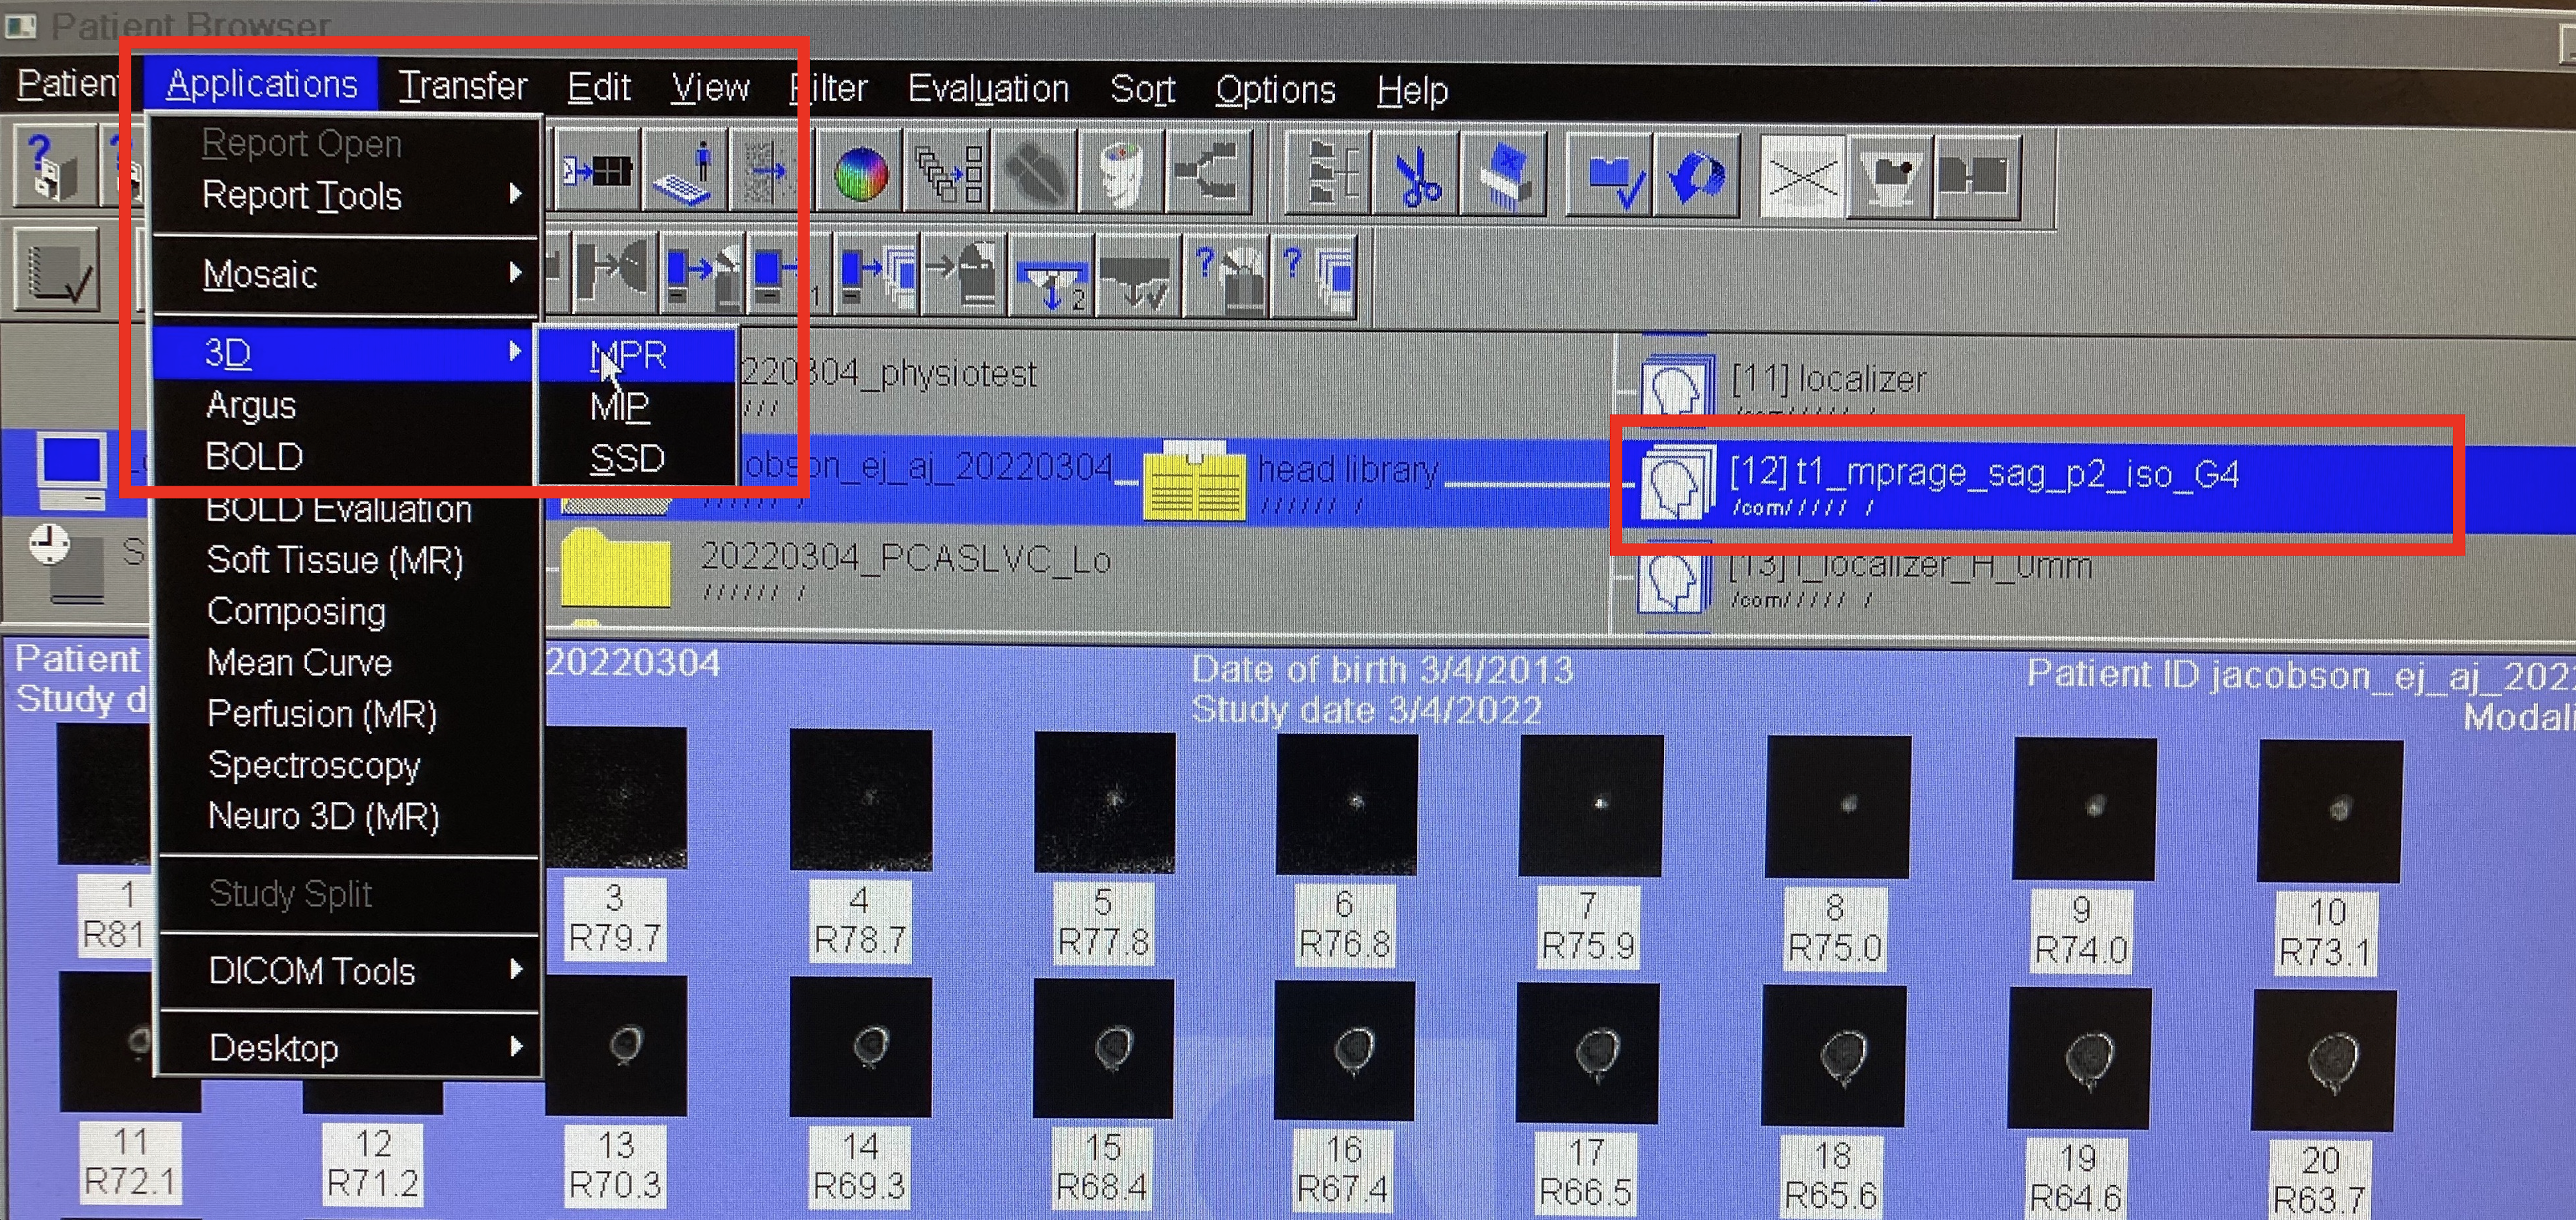
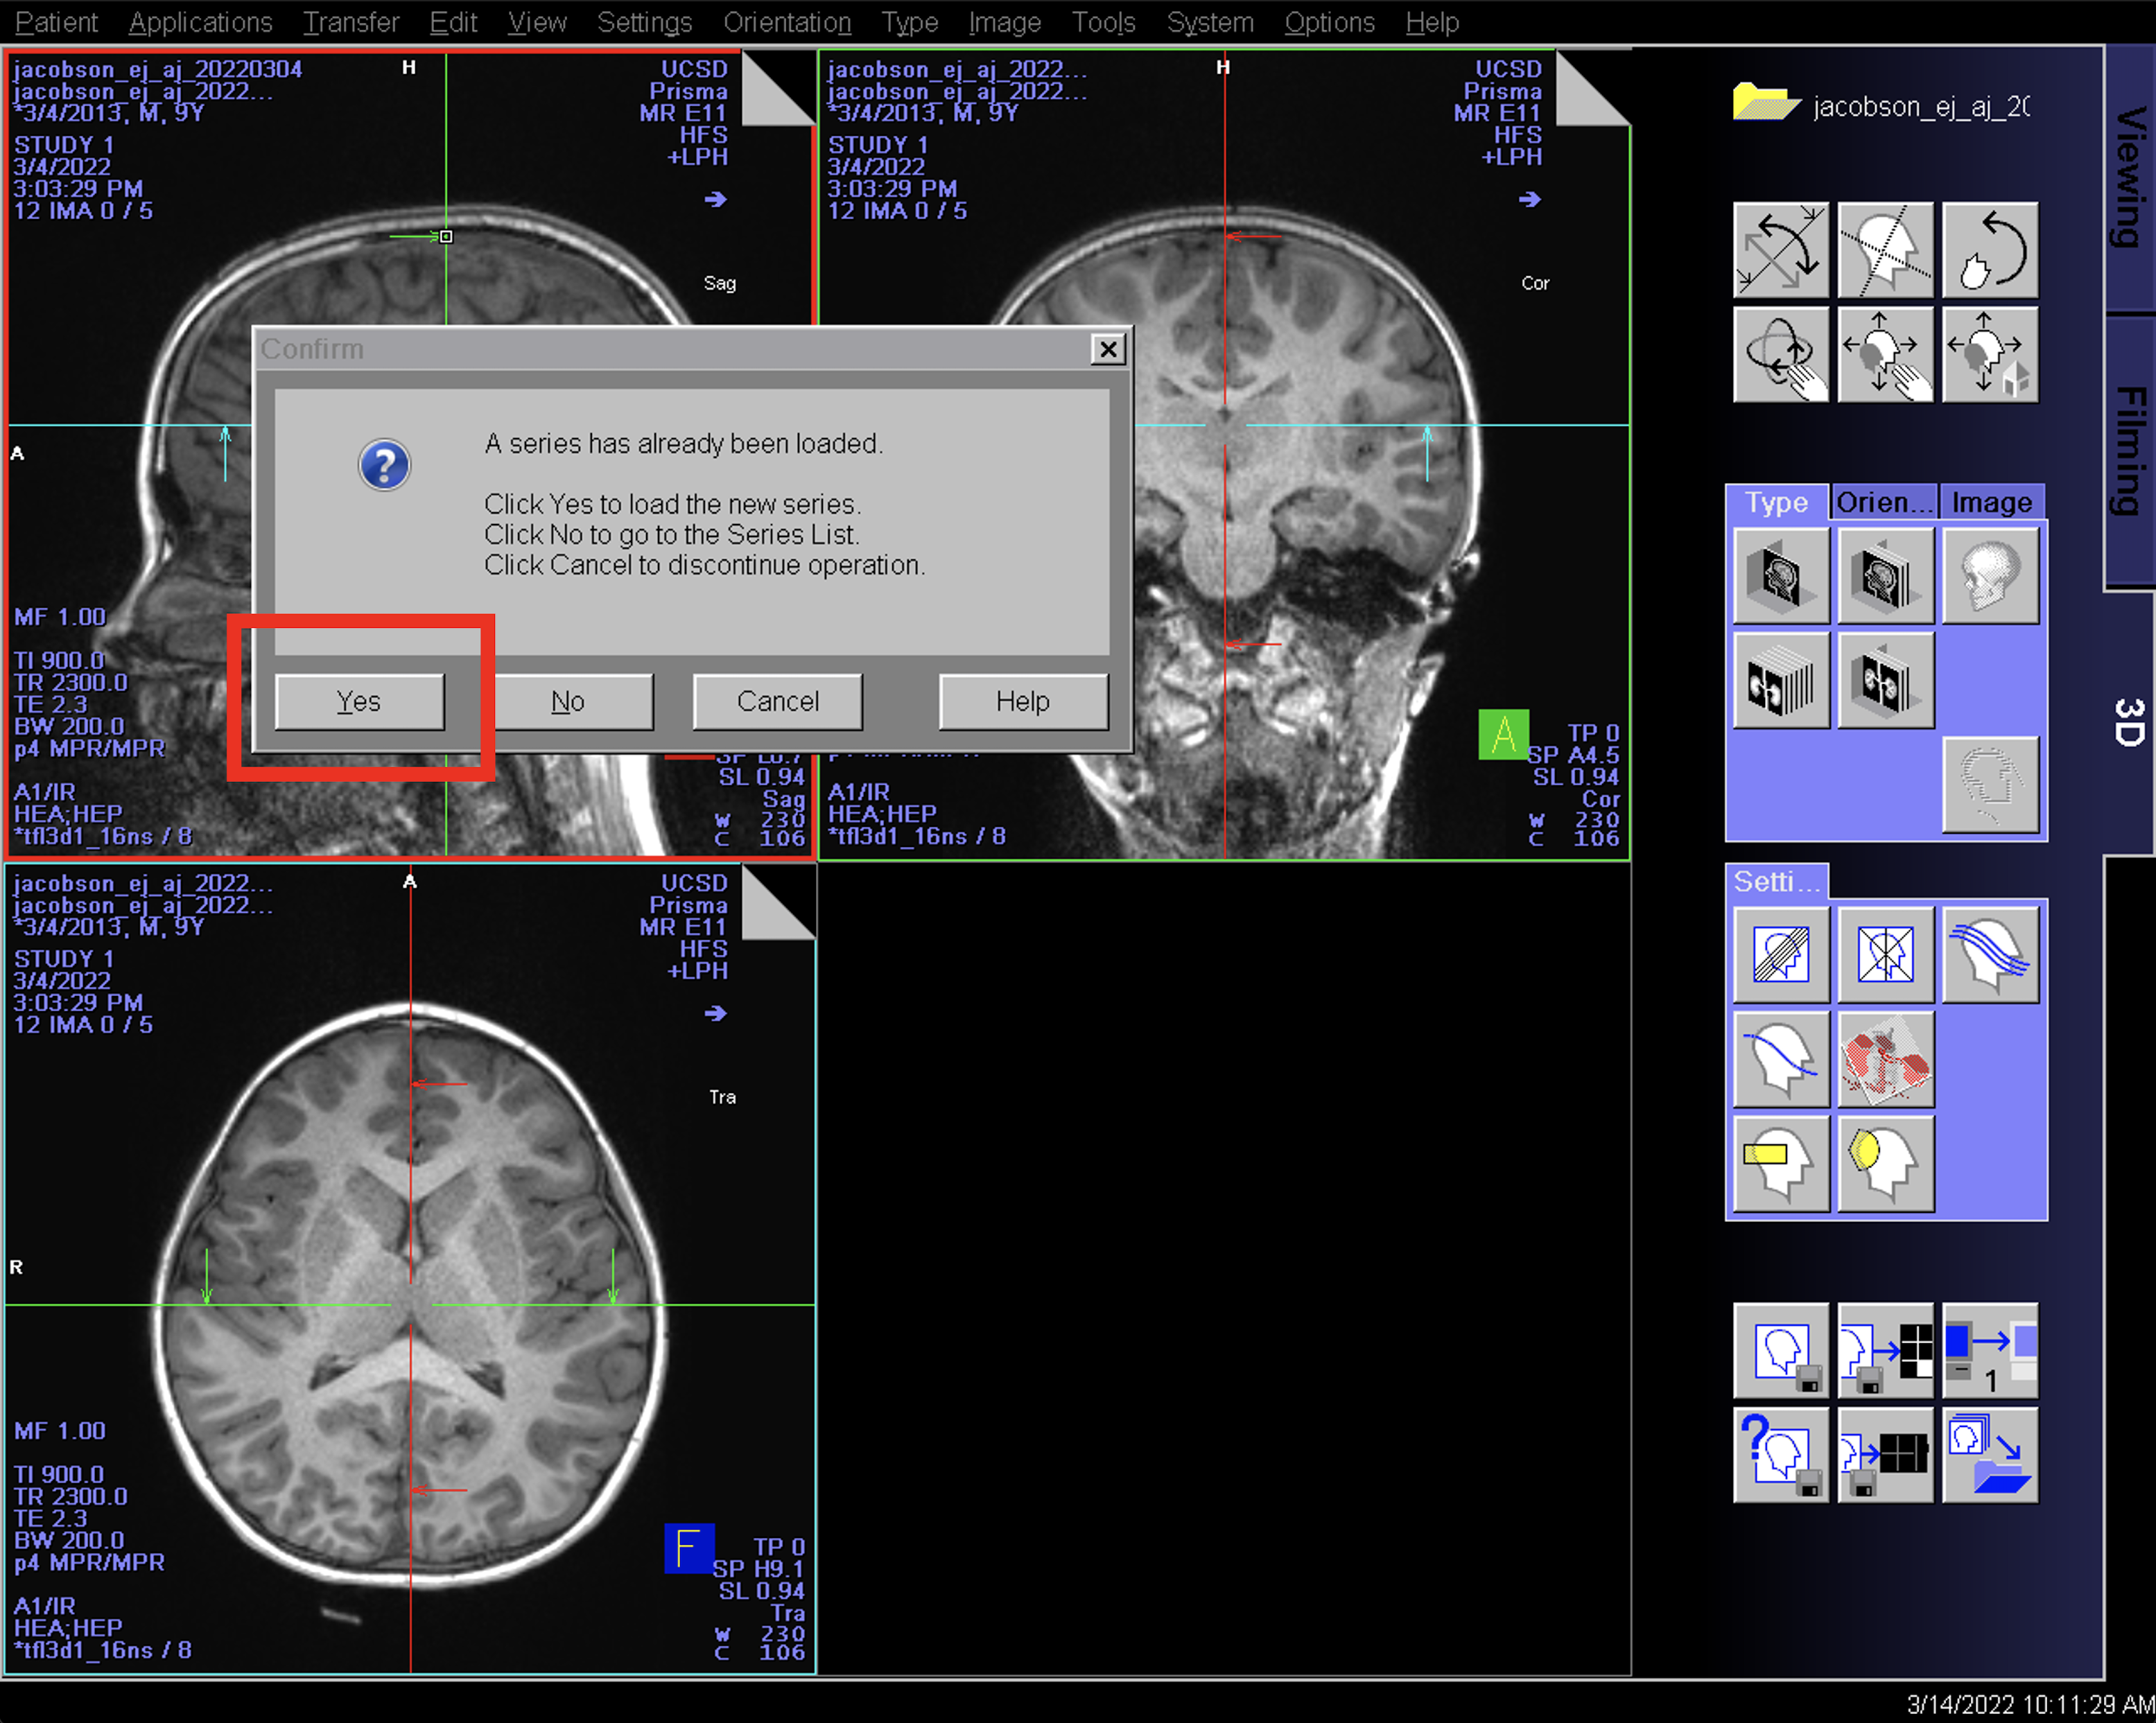
A window may appear asking if you want to load the new series
Select “Yes”
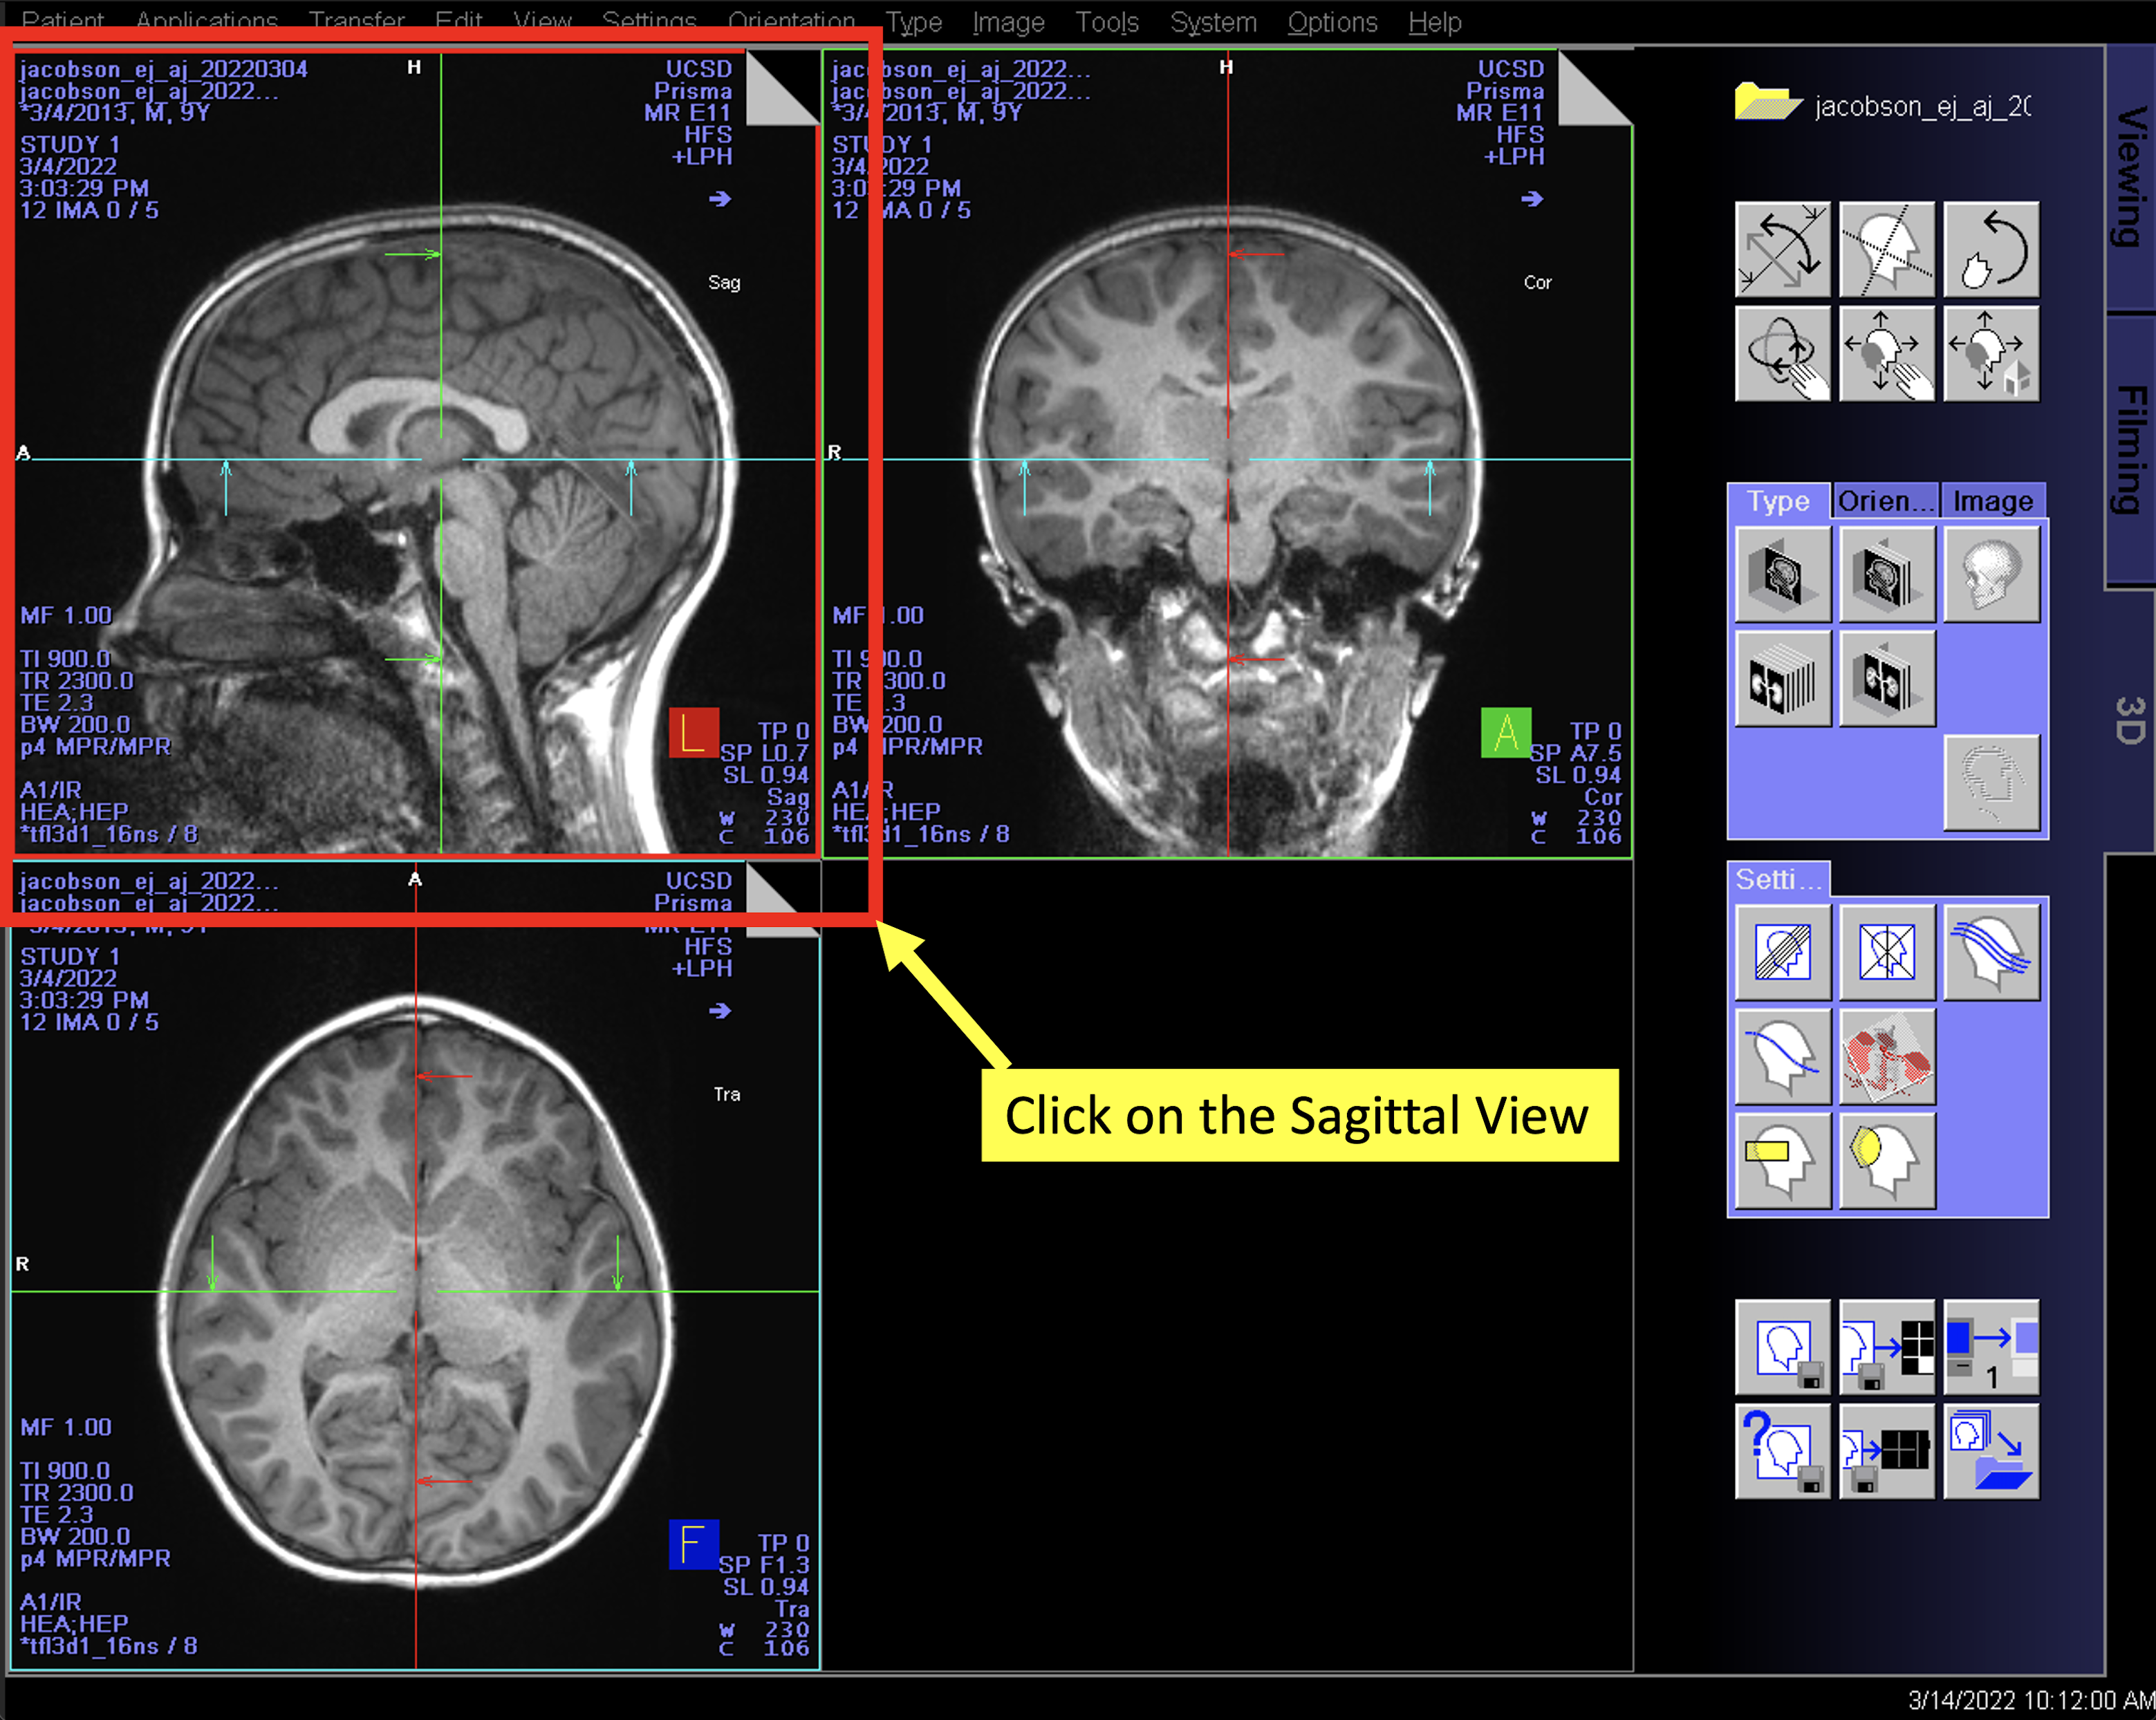
Select the sagittal view in the 3D viewer task card
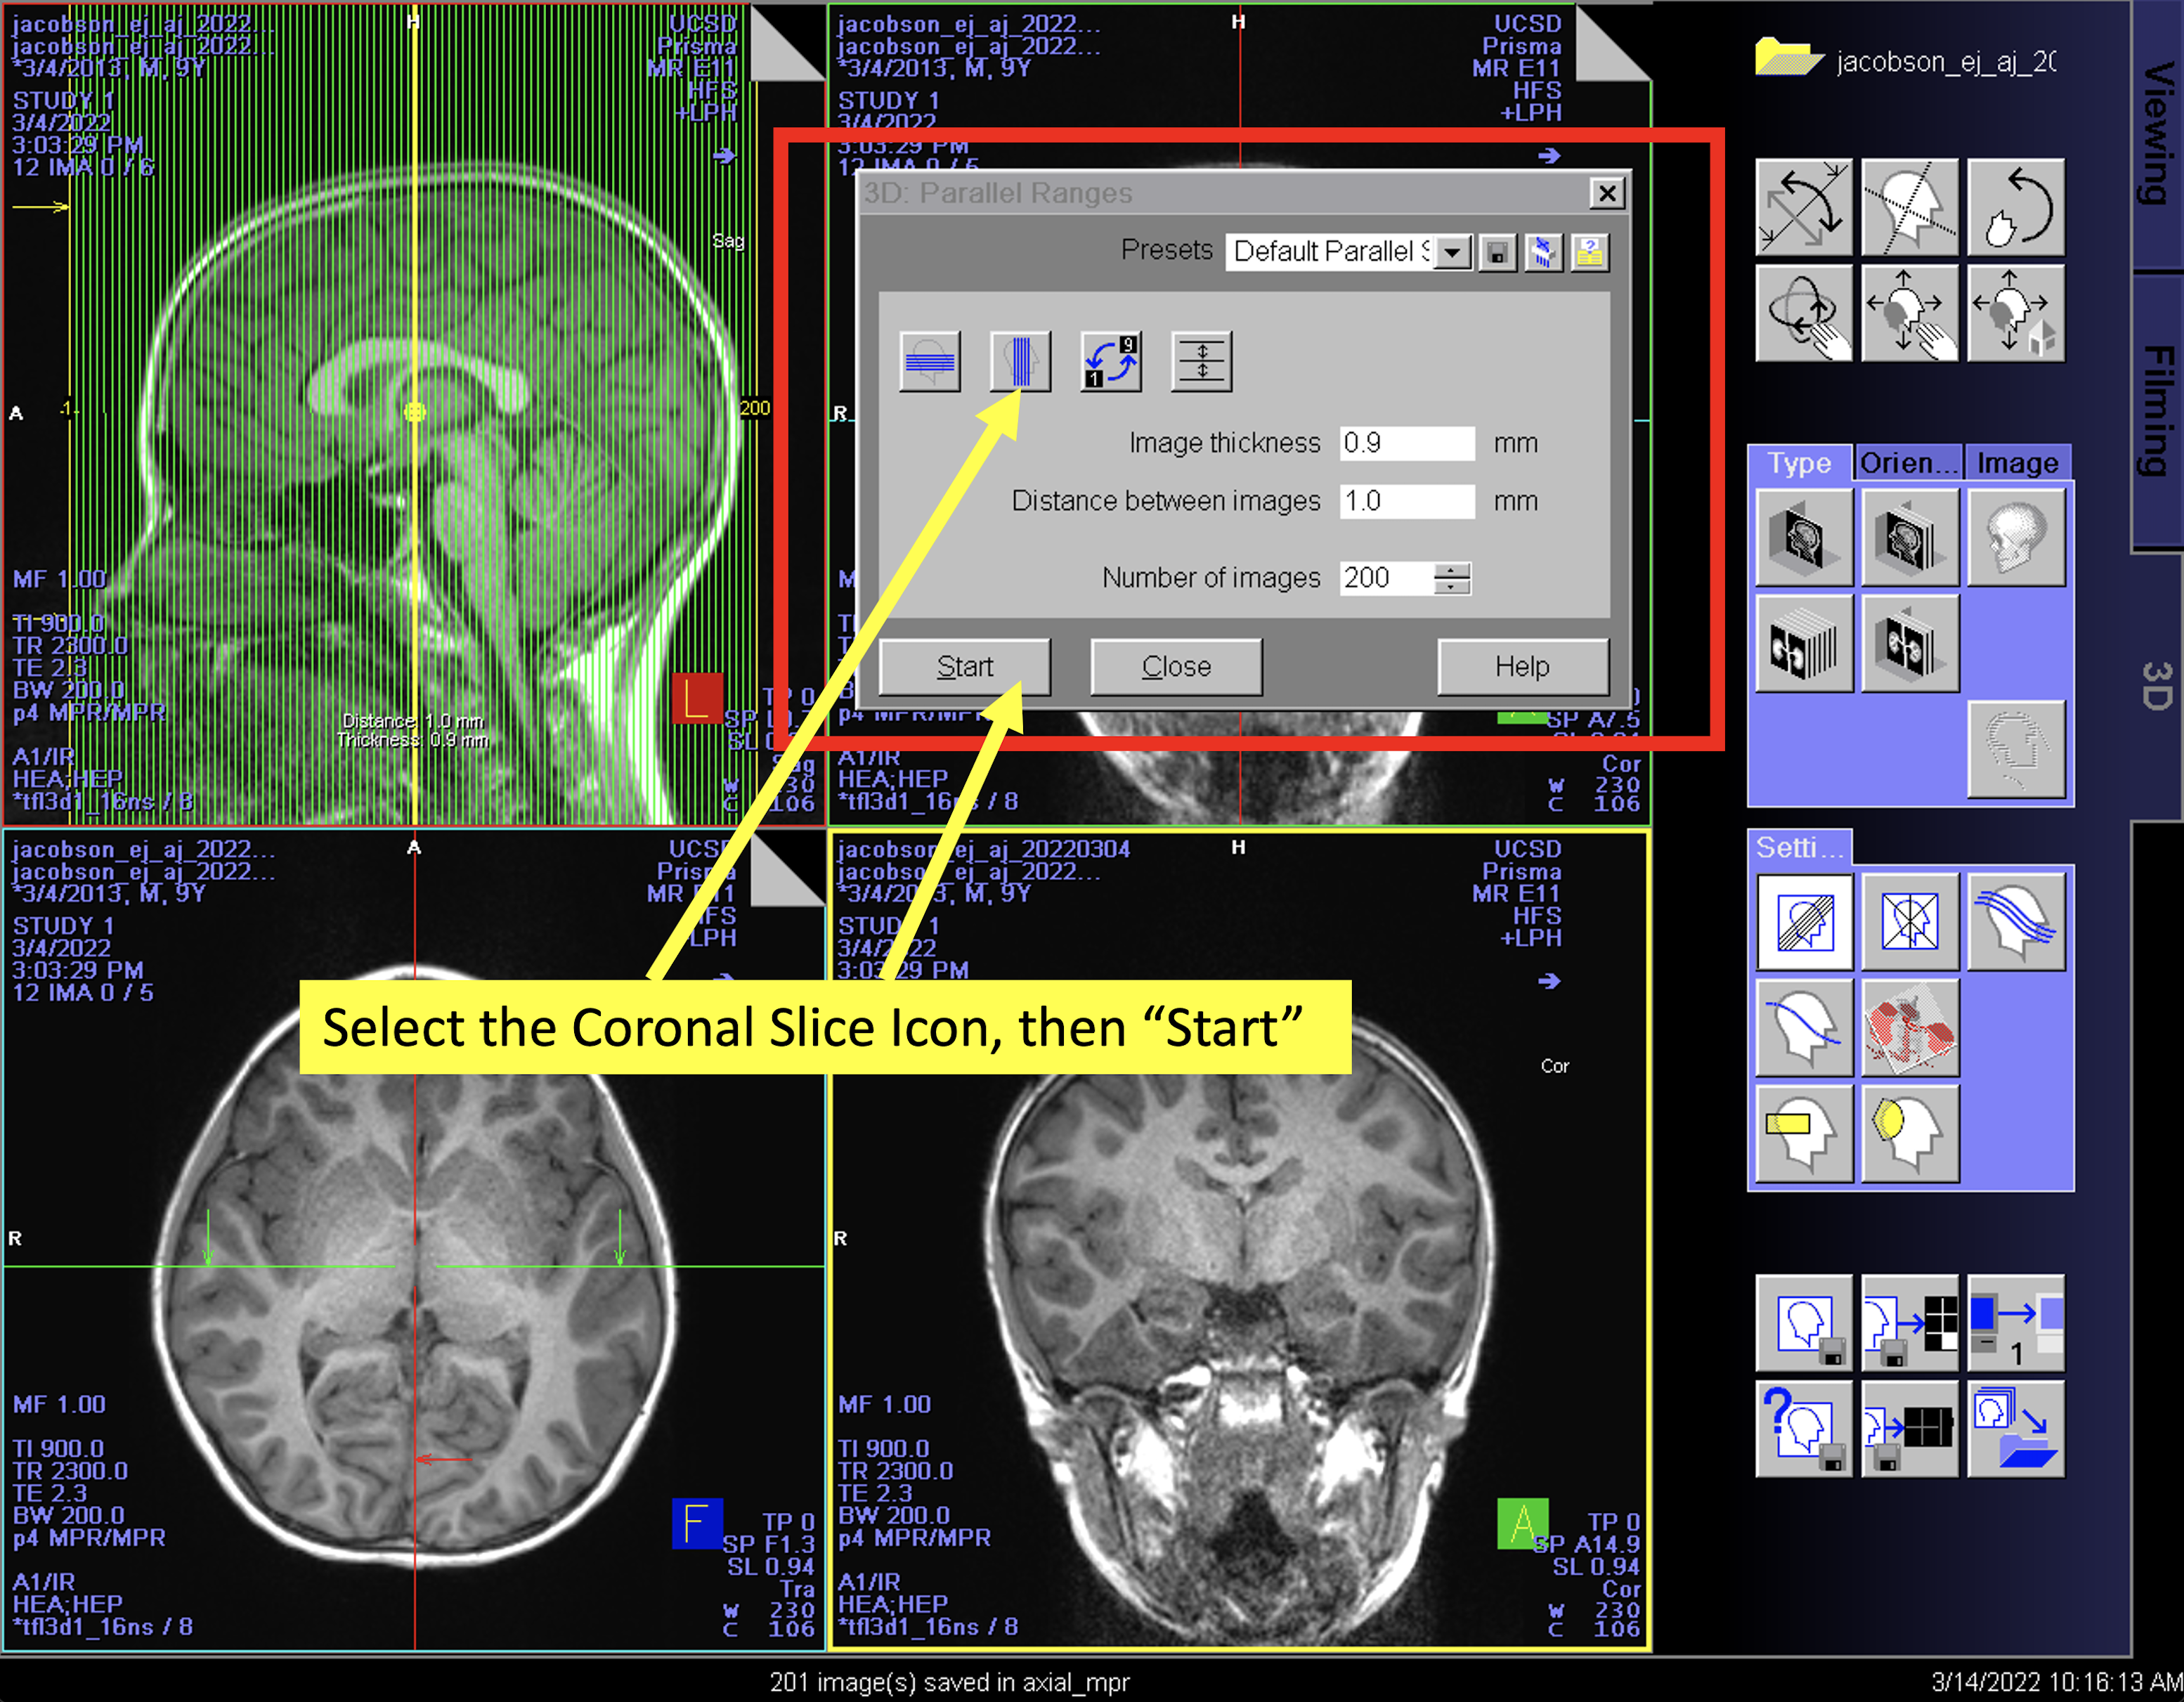
Use the parallel range icon to open the “3D Parallel Ranges” GUI
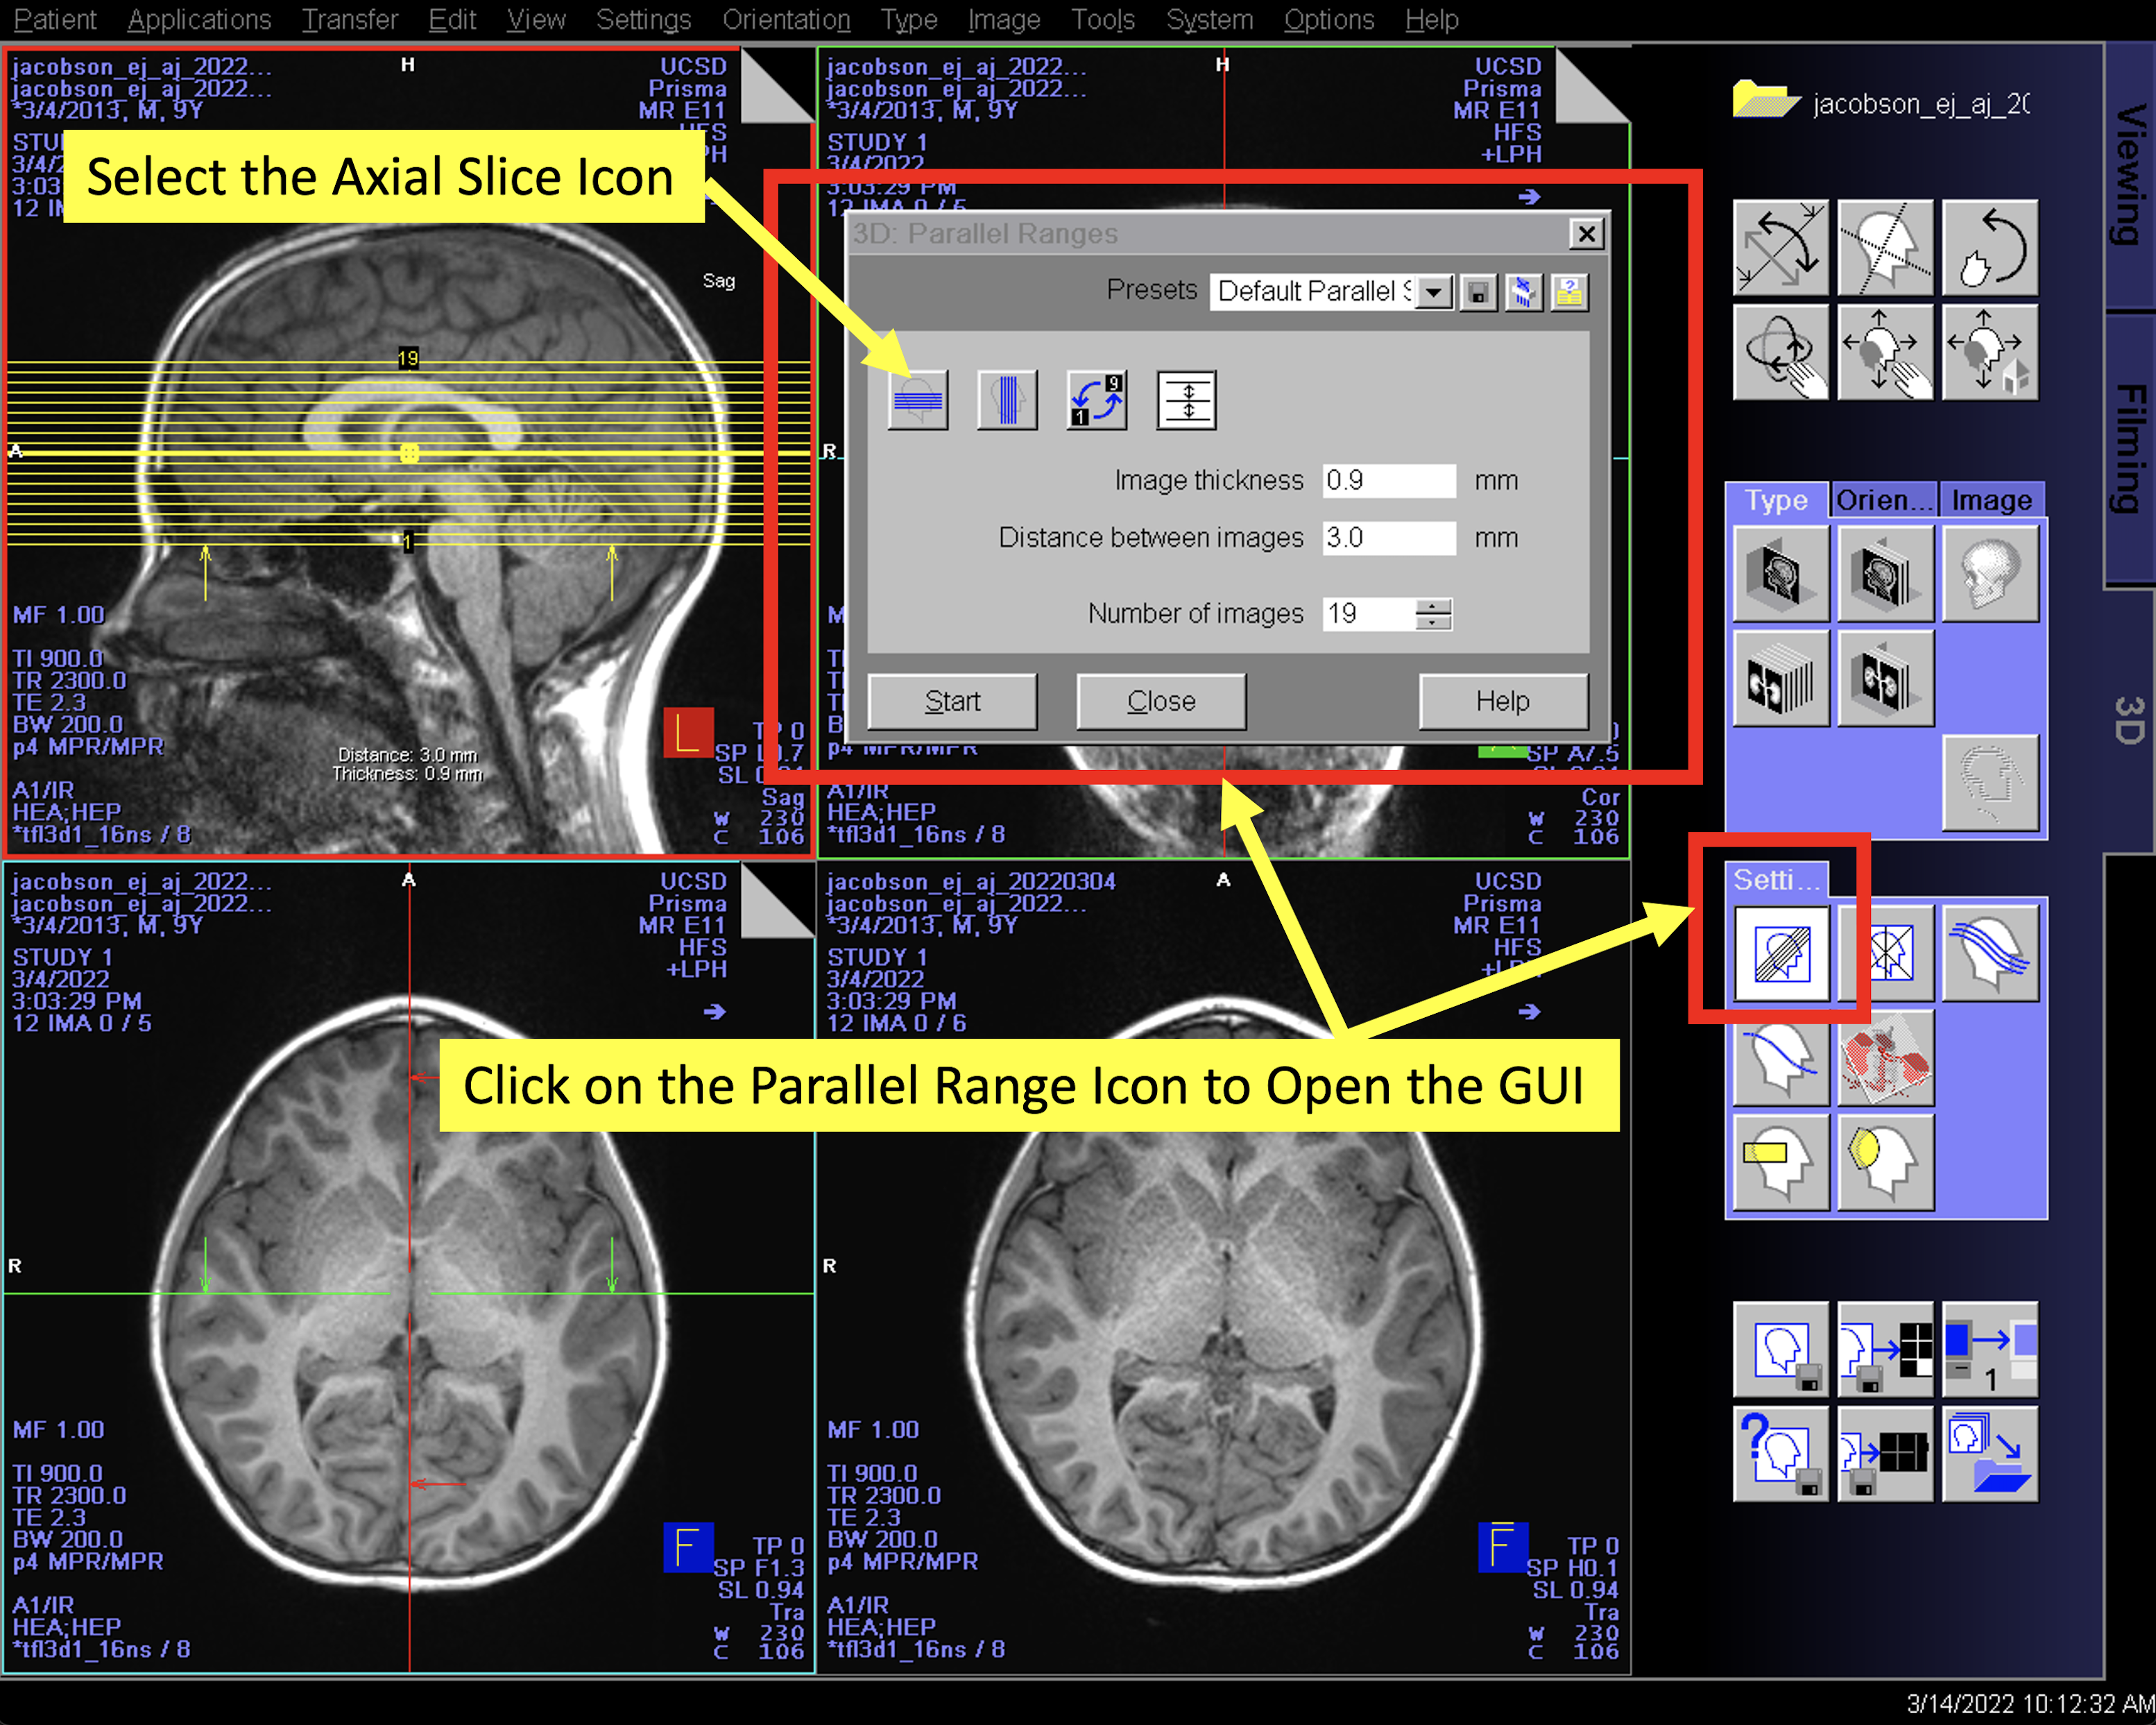
Select the axial slice icon
NOTE: Make sure the “Presets” field is on the default setting
Deselect the icon shown below (this gives you more flexibility when configuring up your MPR)
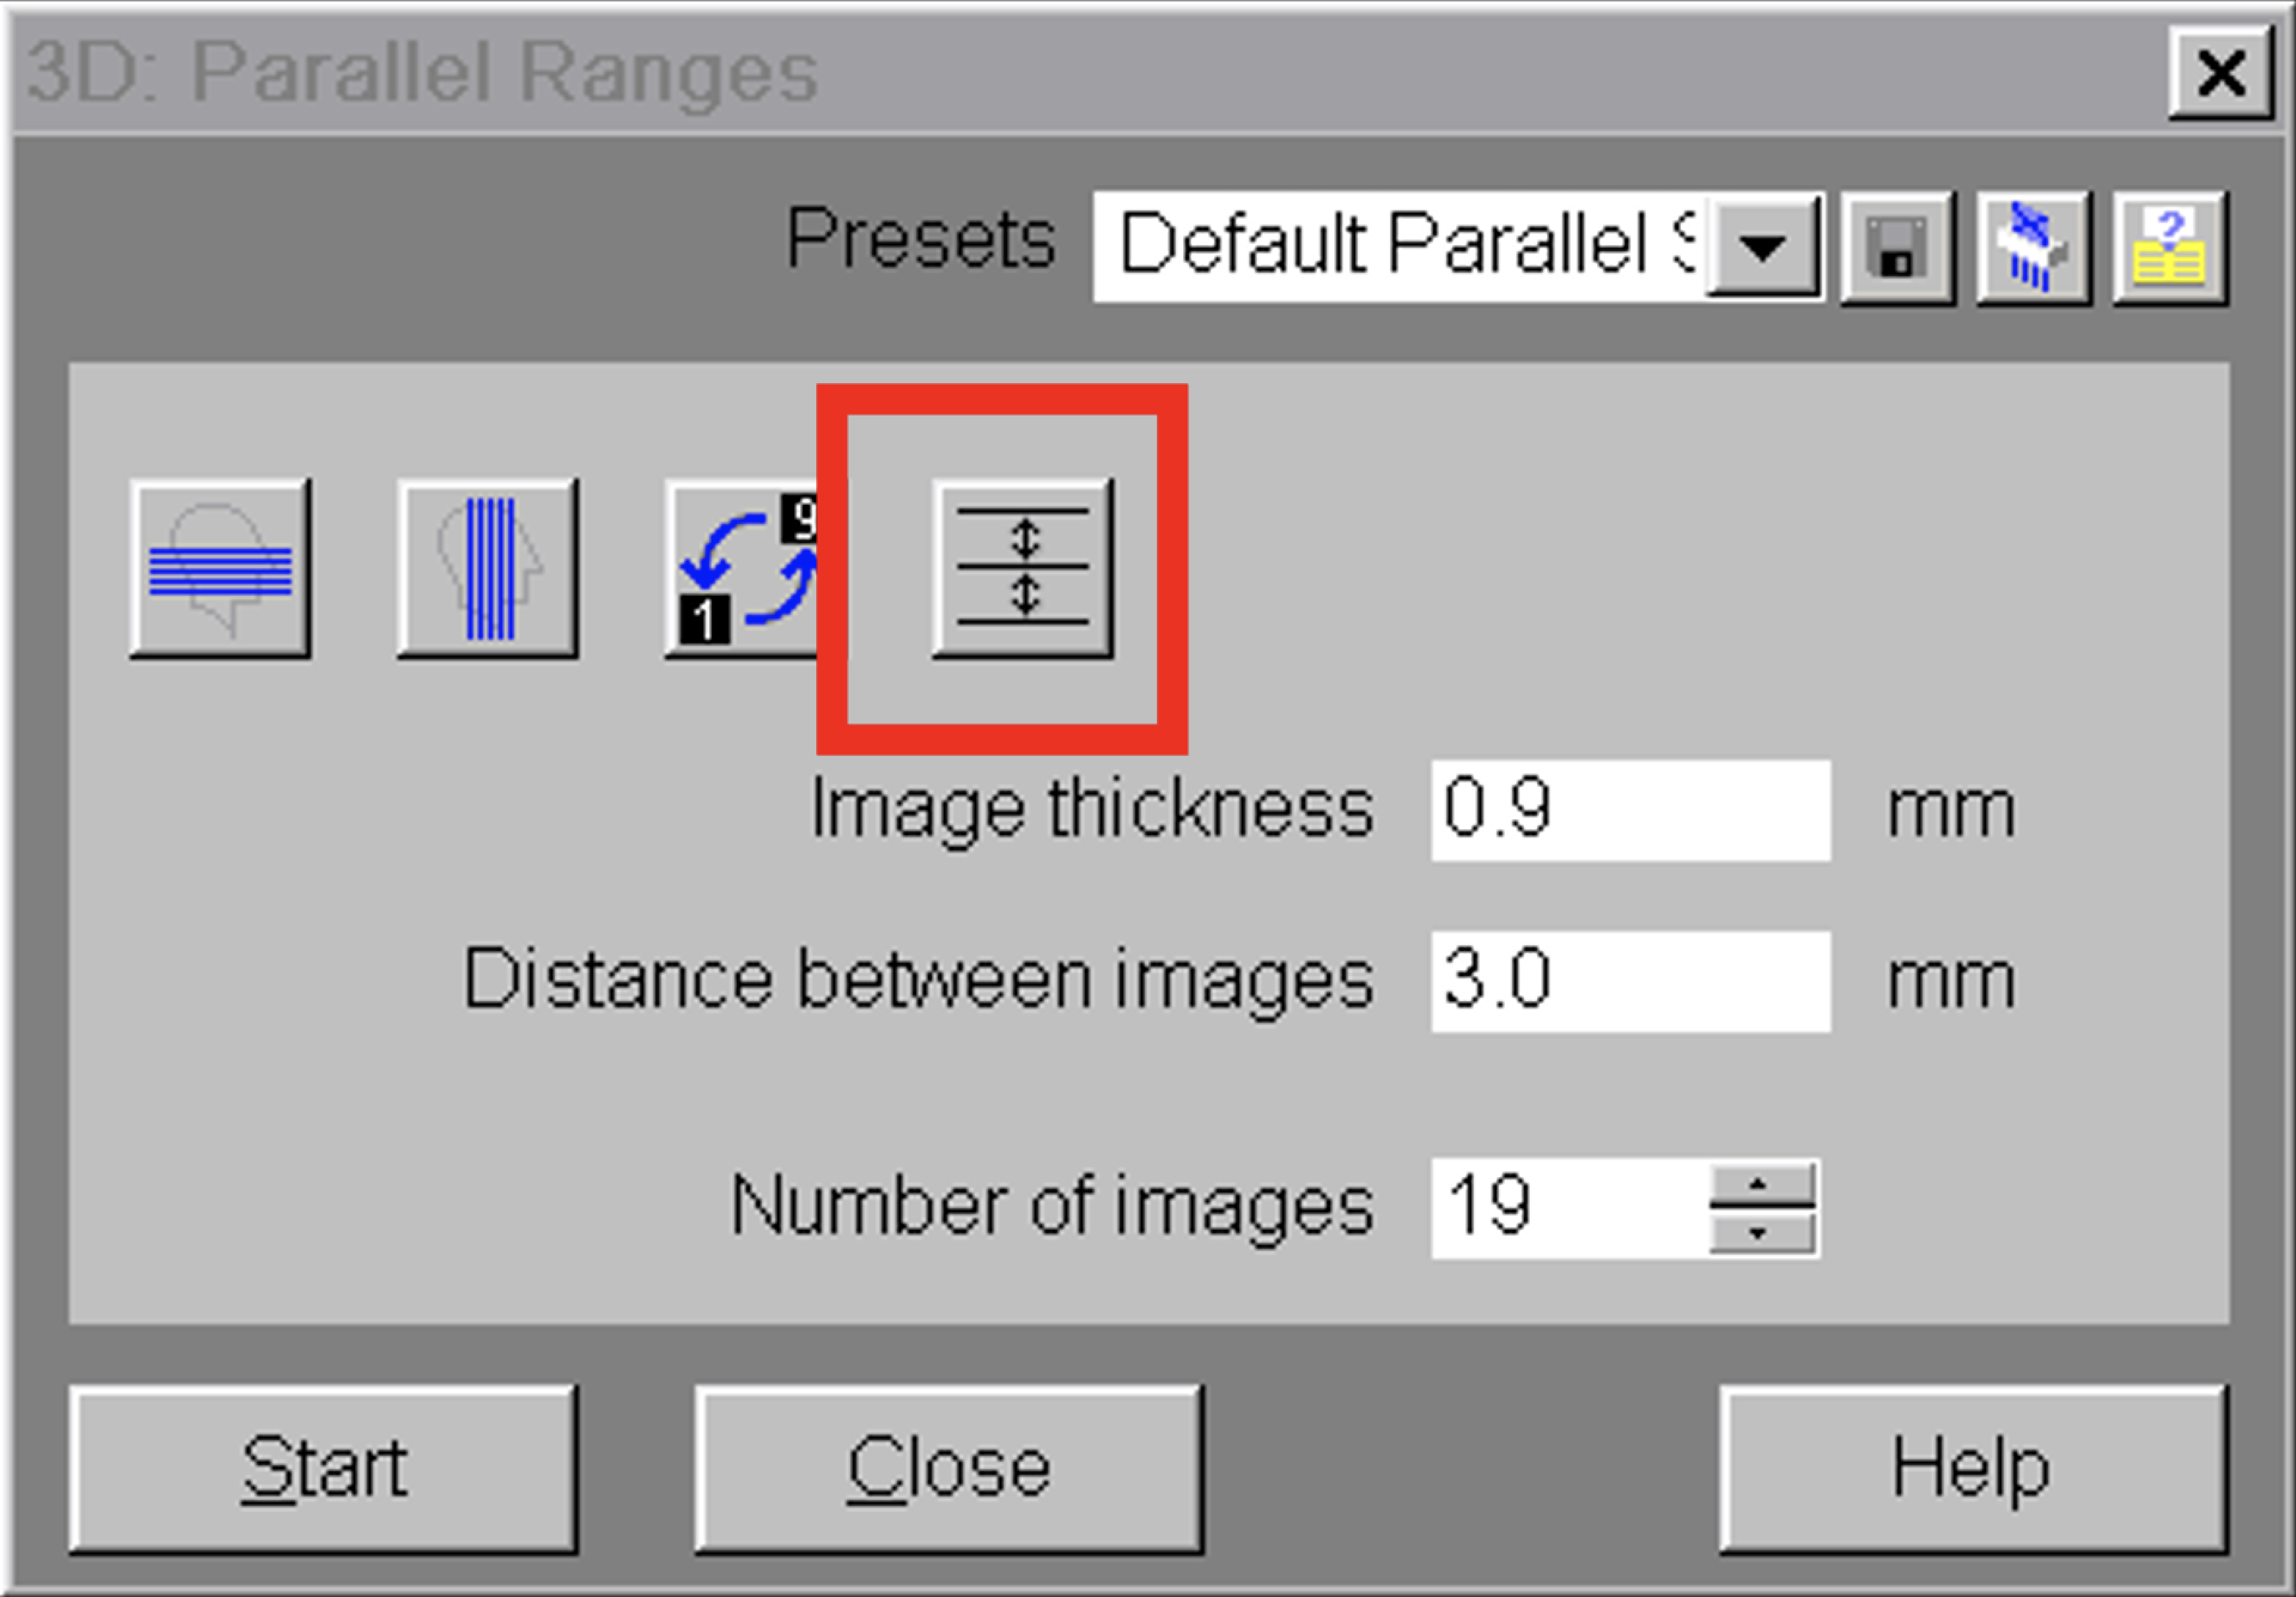
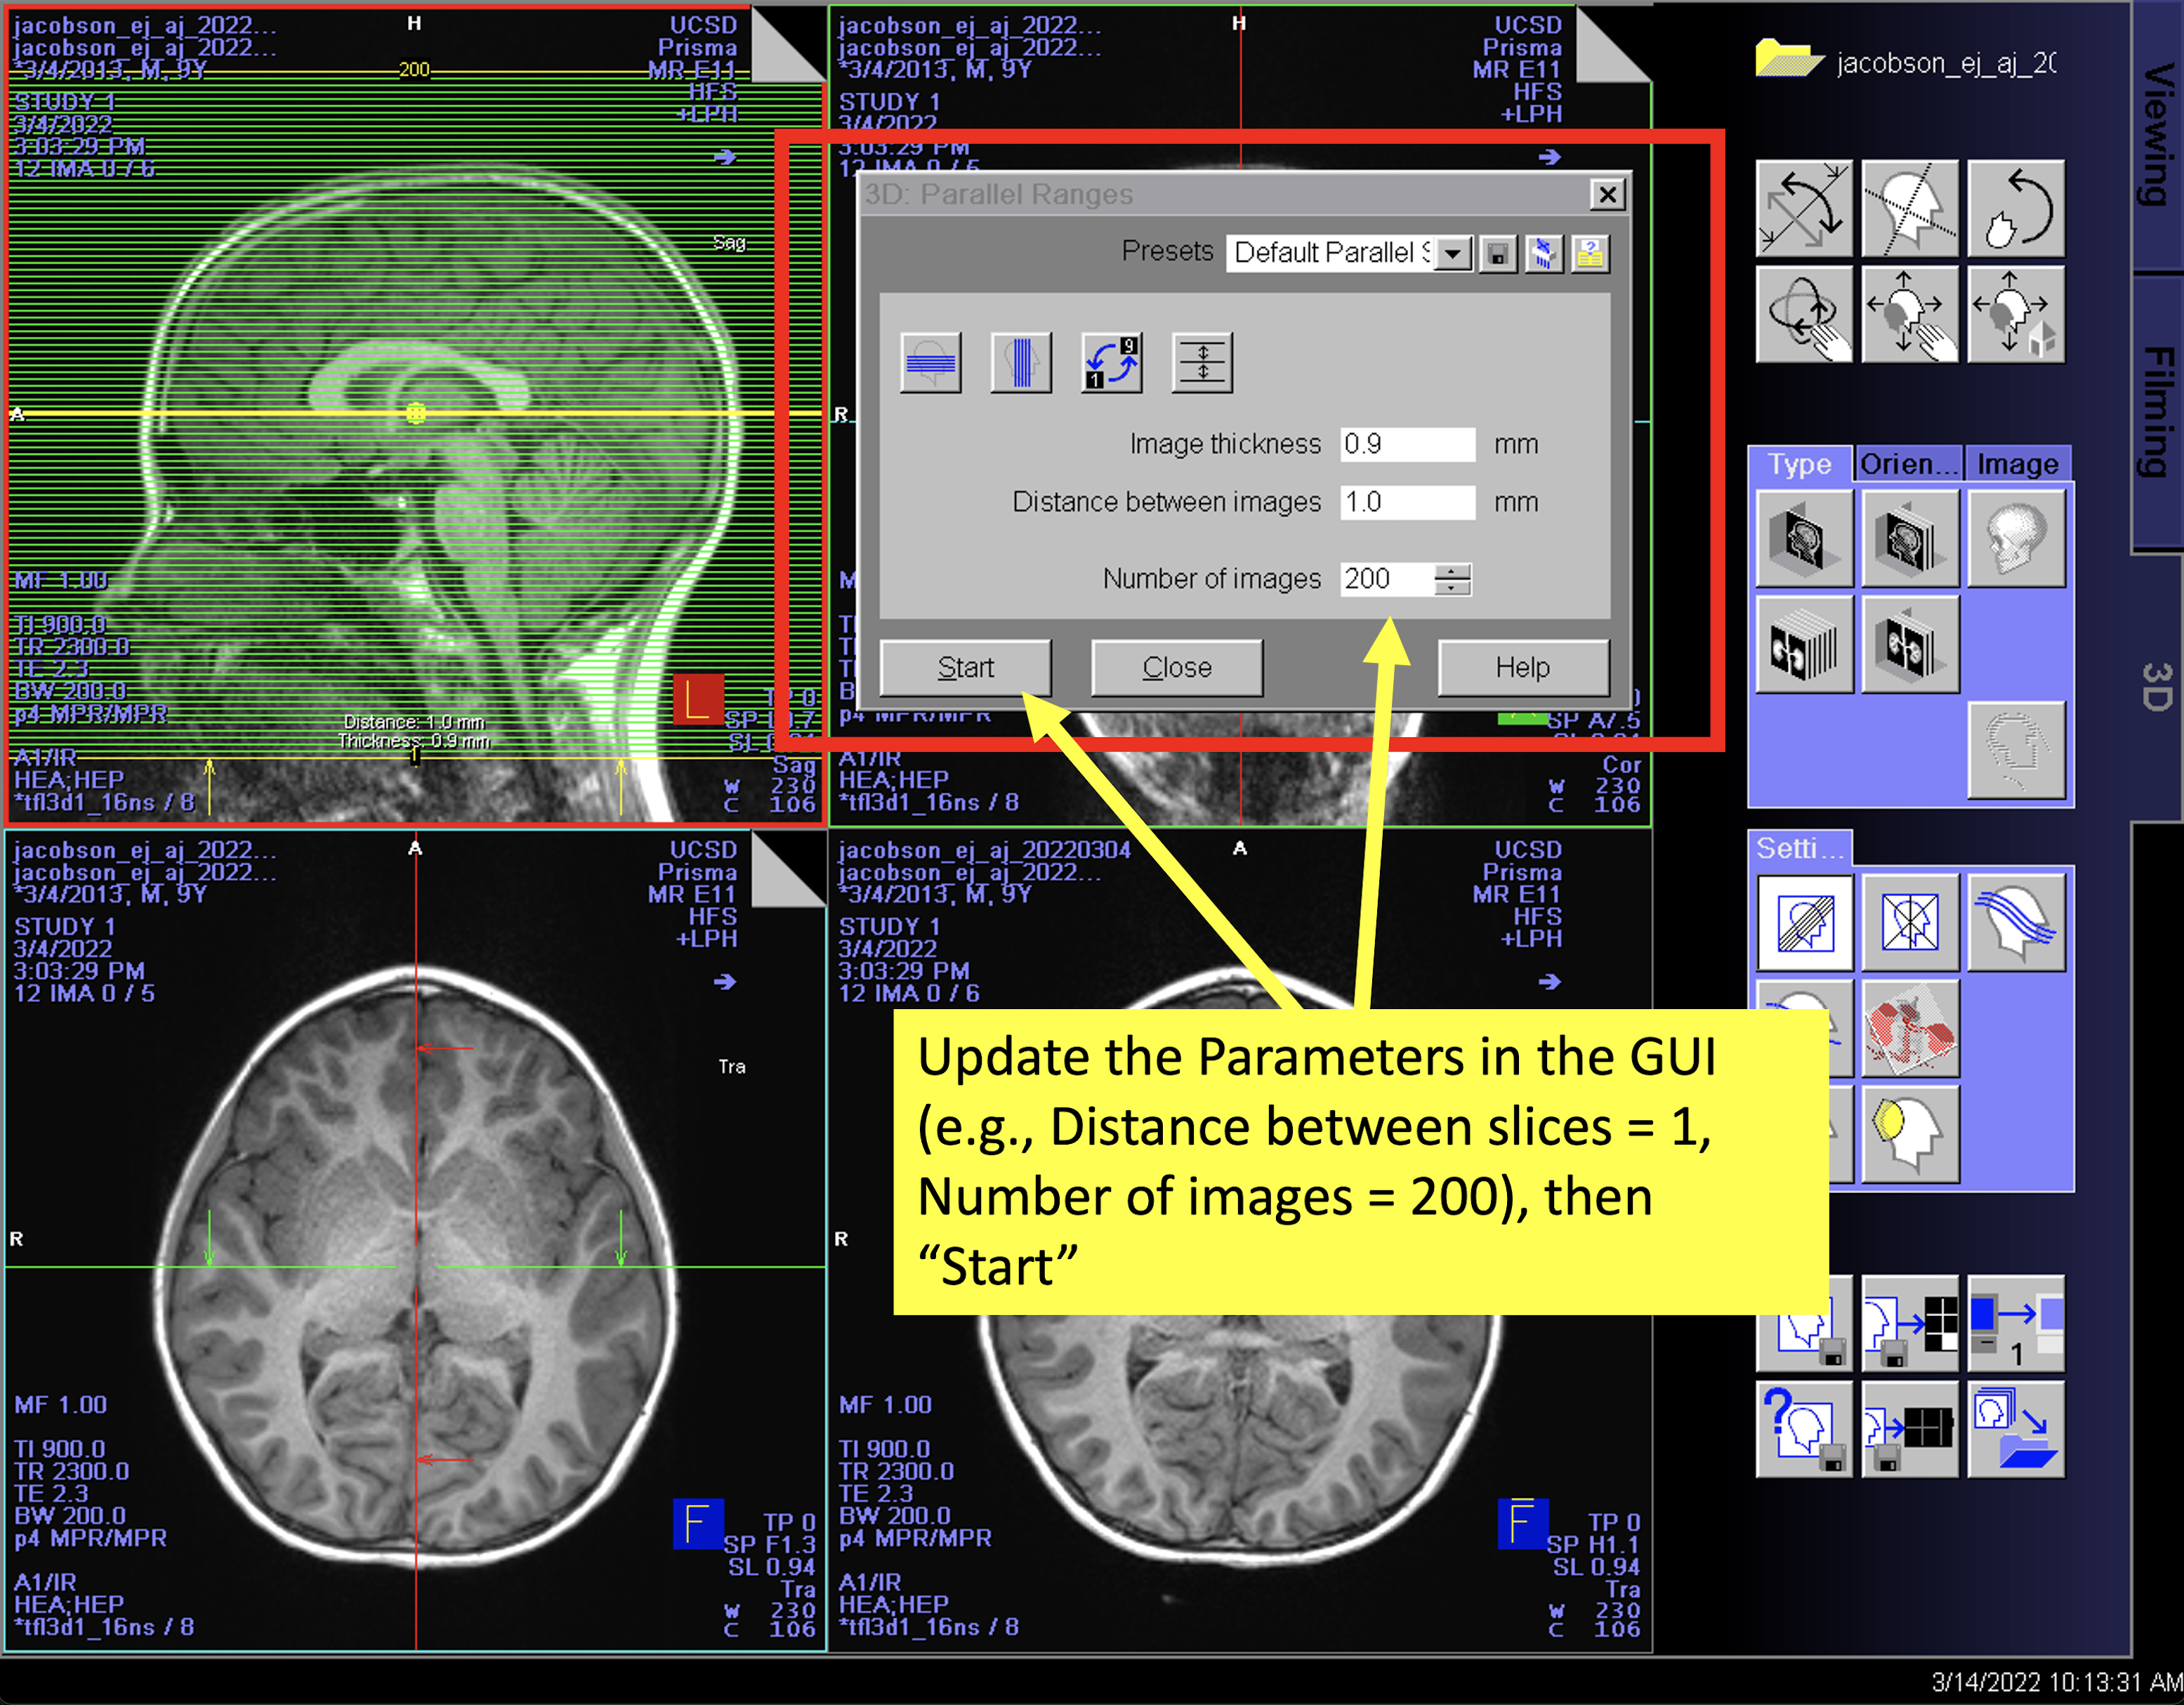
Update the parameters in the GUI to ensure appropriate coverage
In general, using an “image thickness” of ~1 mm, a “distance between images” of 1 mm, and ~200 “images” (slices) provides ample coverage of the brain
After updating the parameters in the GUI, hit “Start”
Use the menu bar (“Patient > Save As”) to save the reconstructed axial data
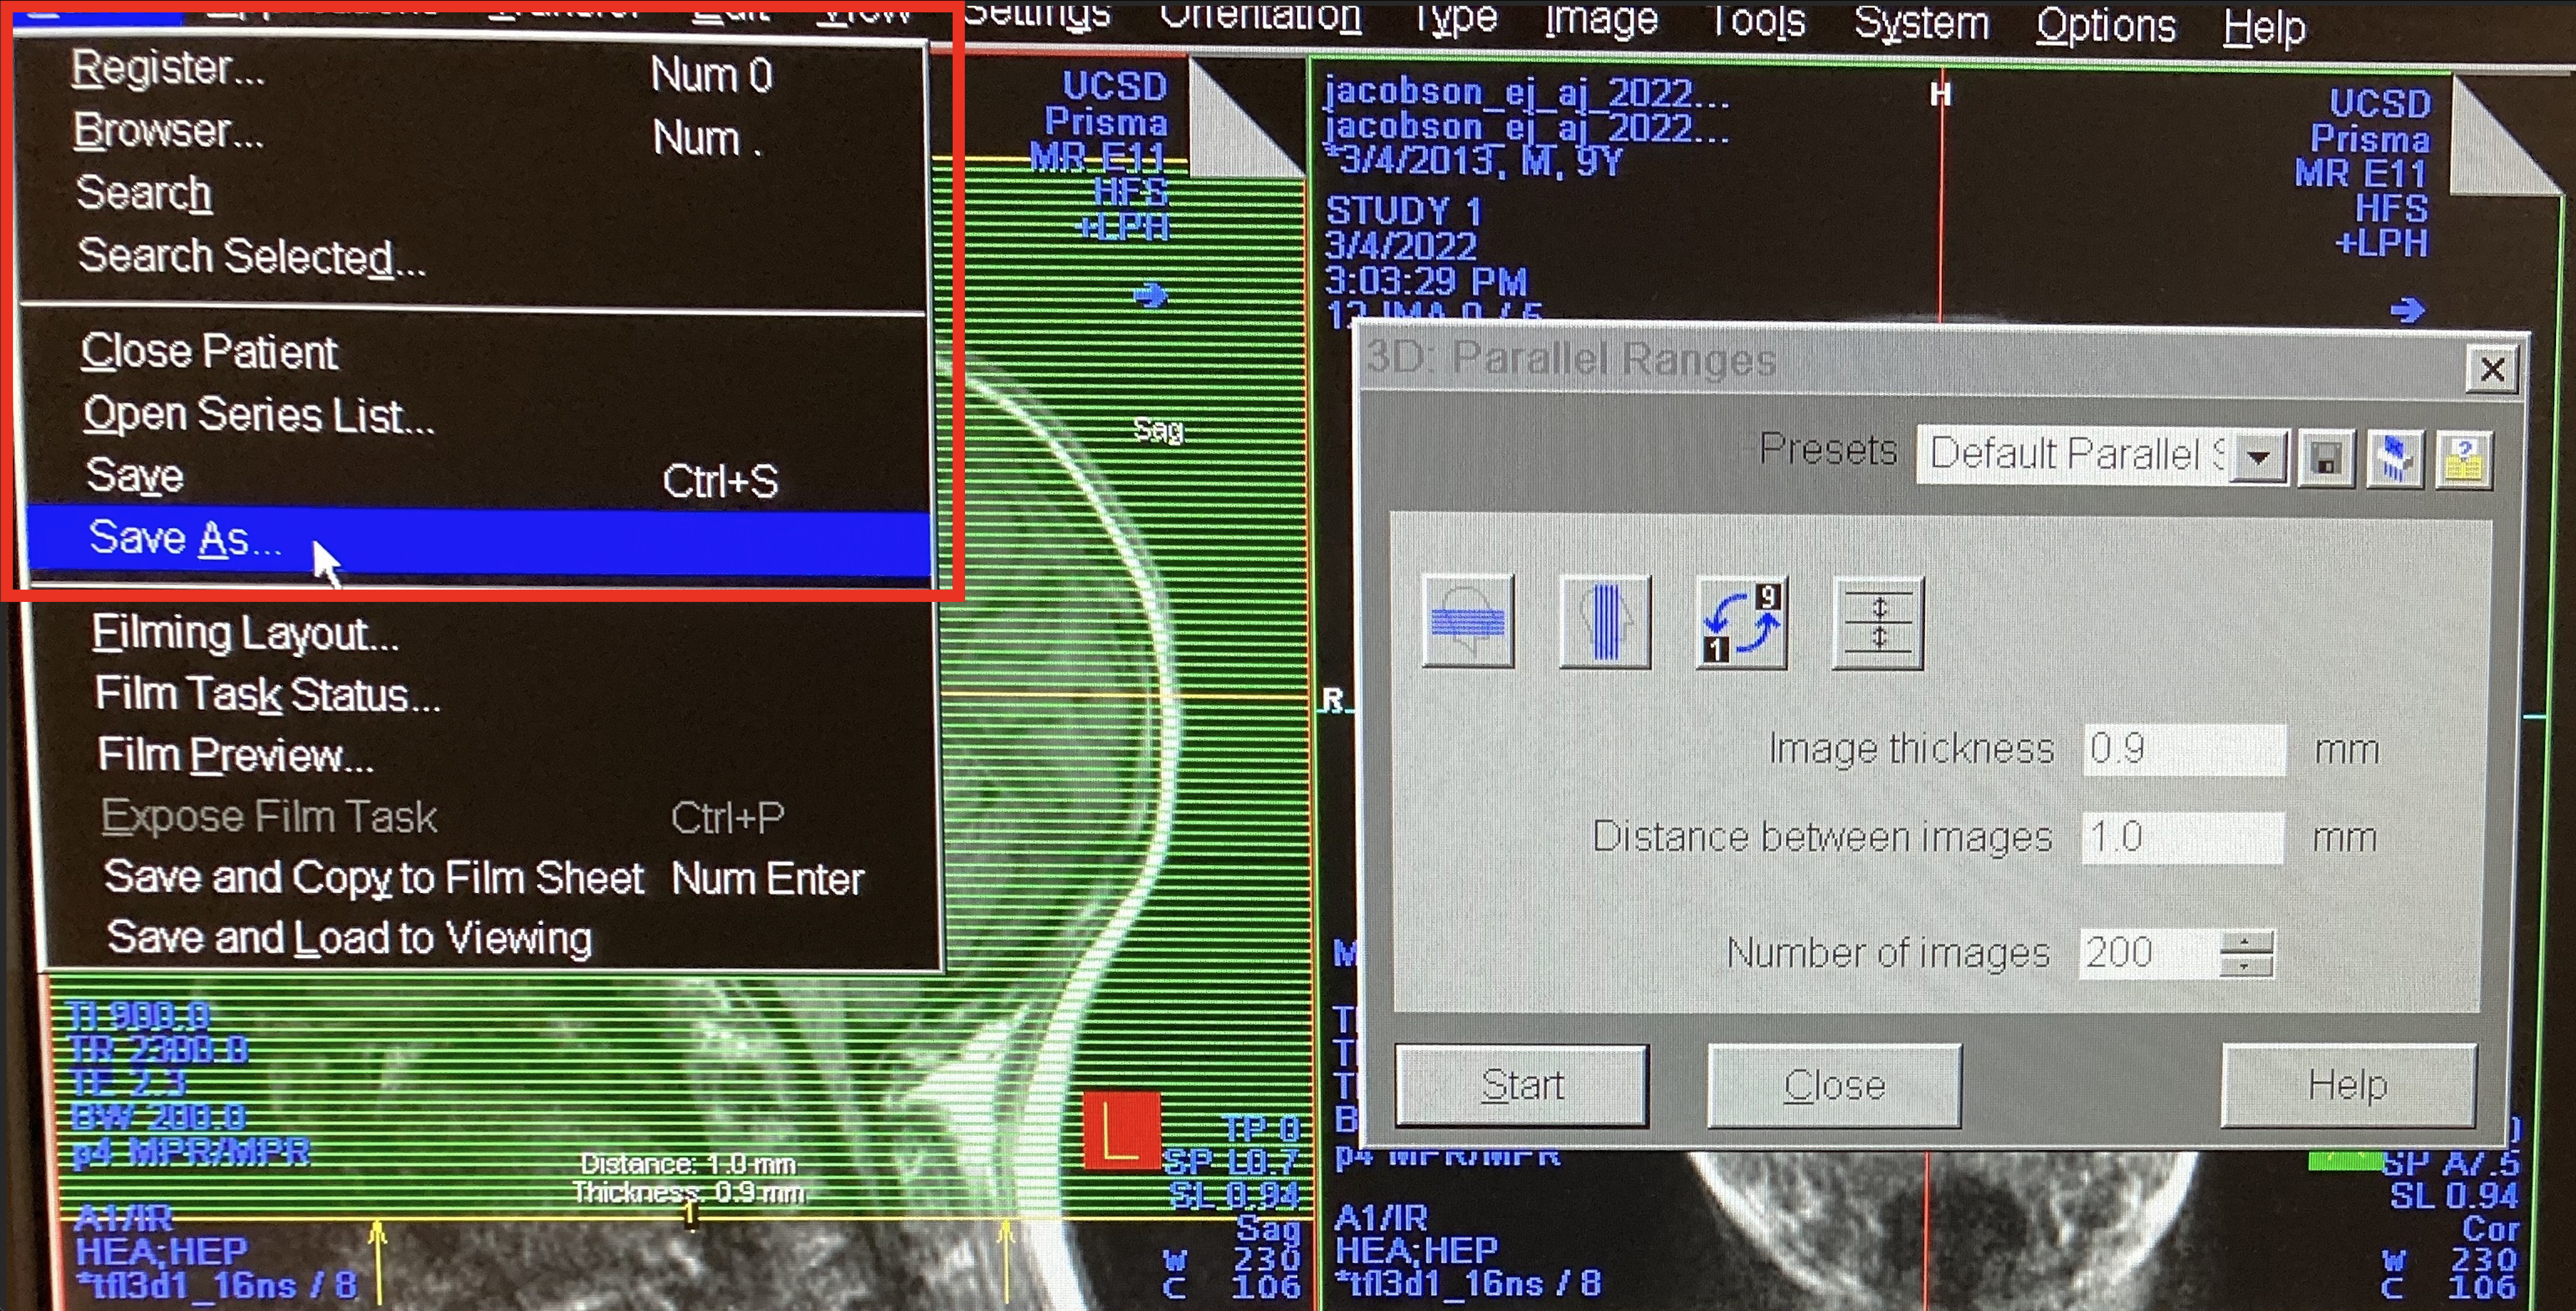
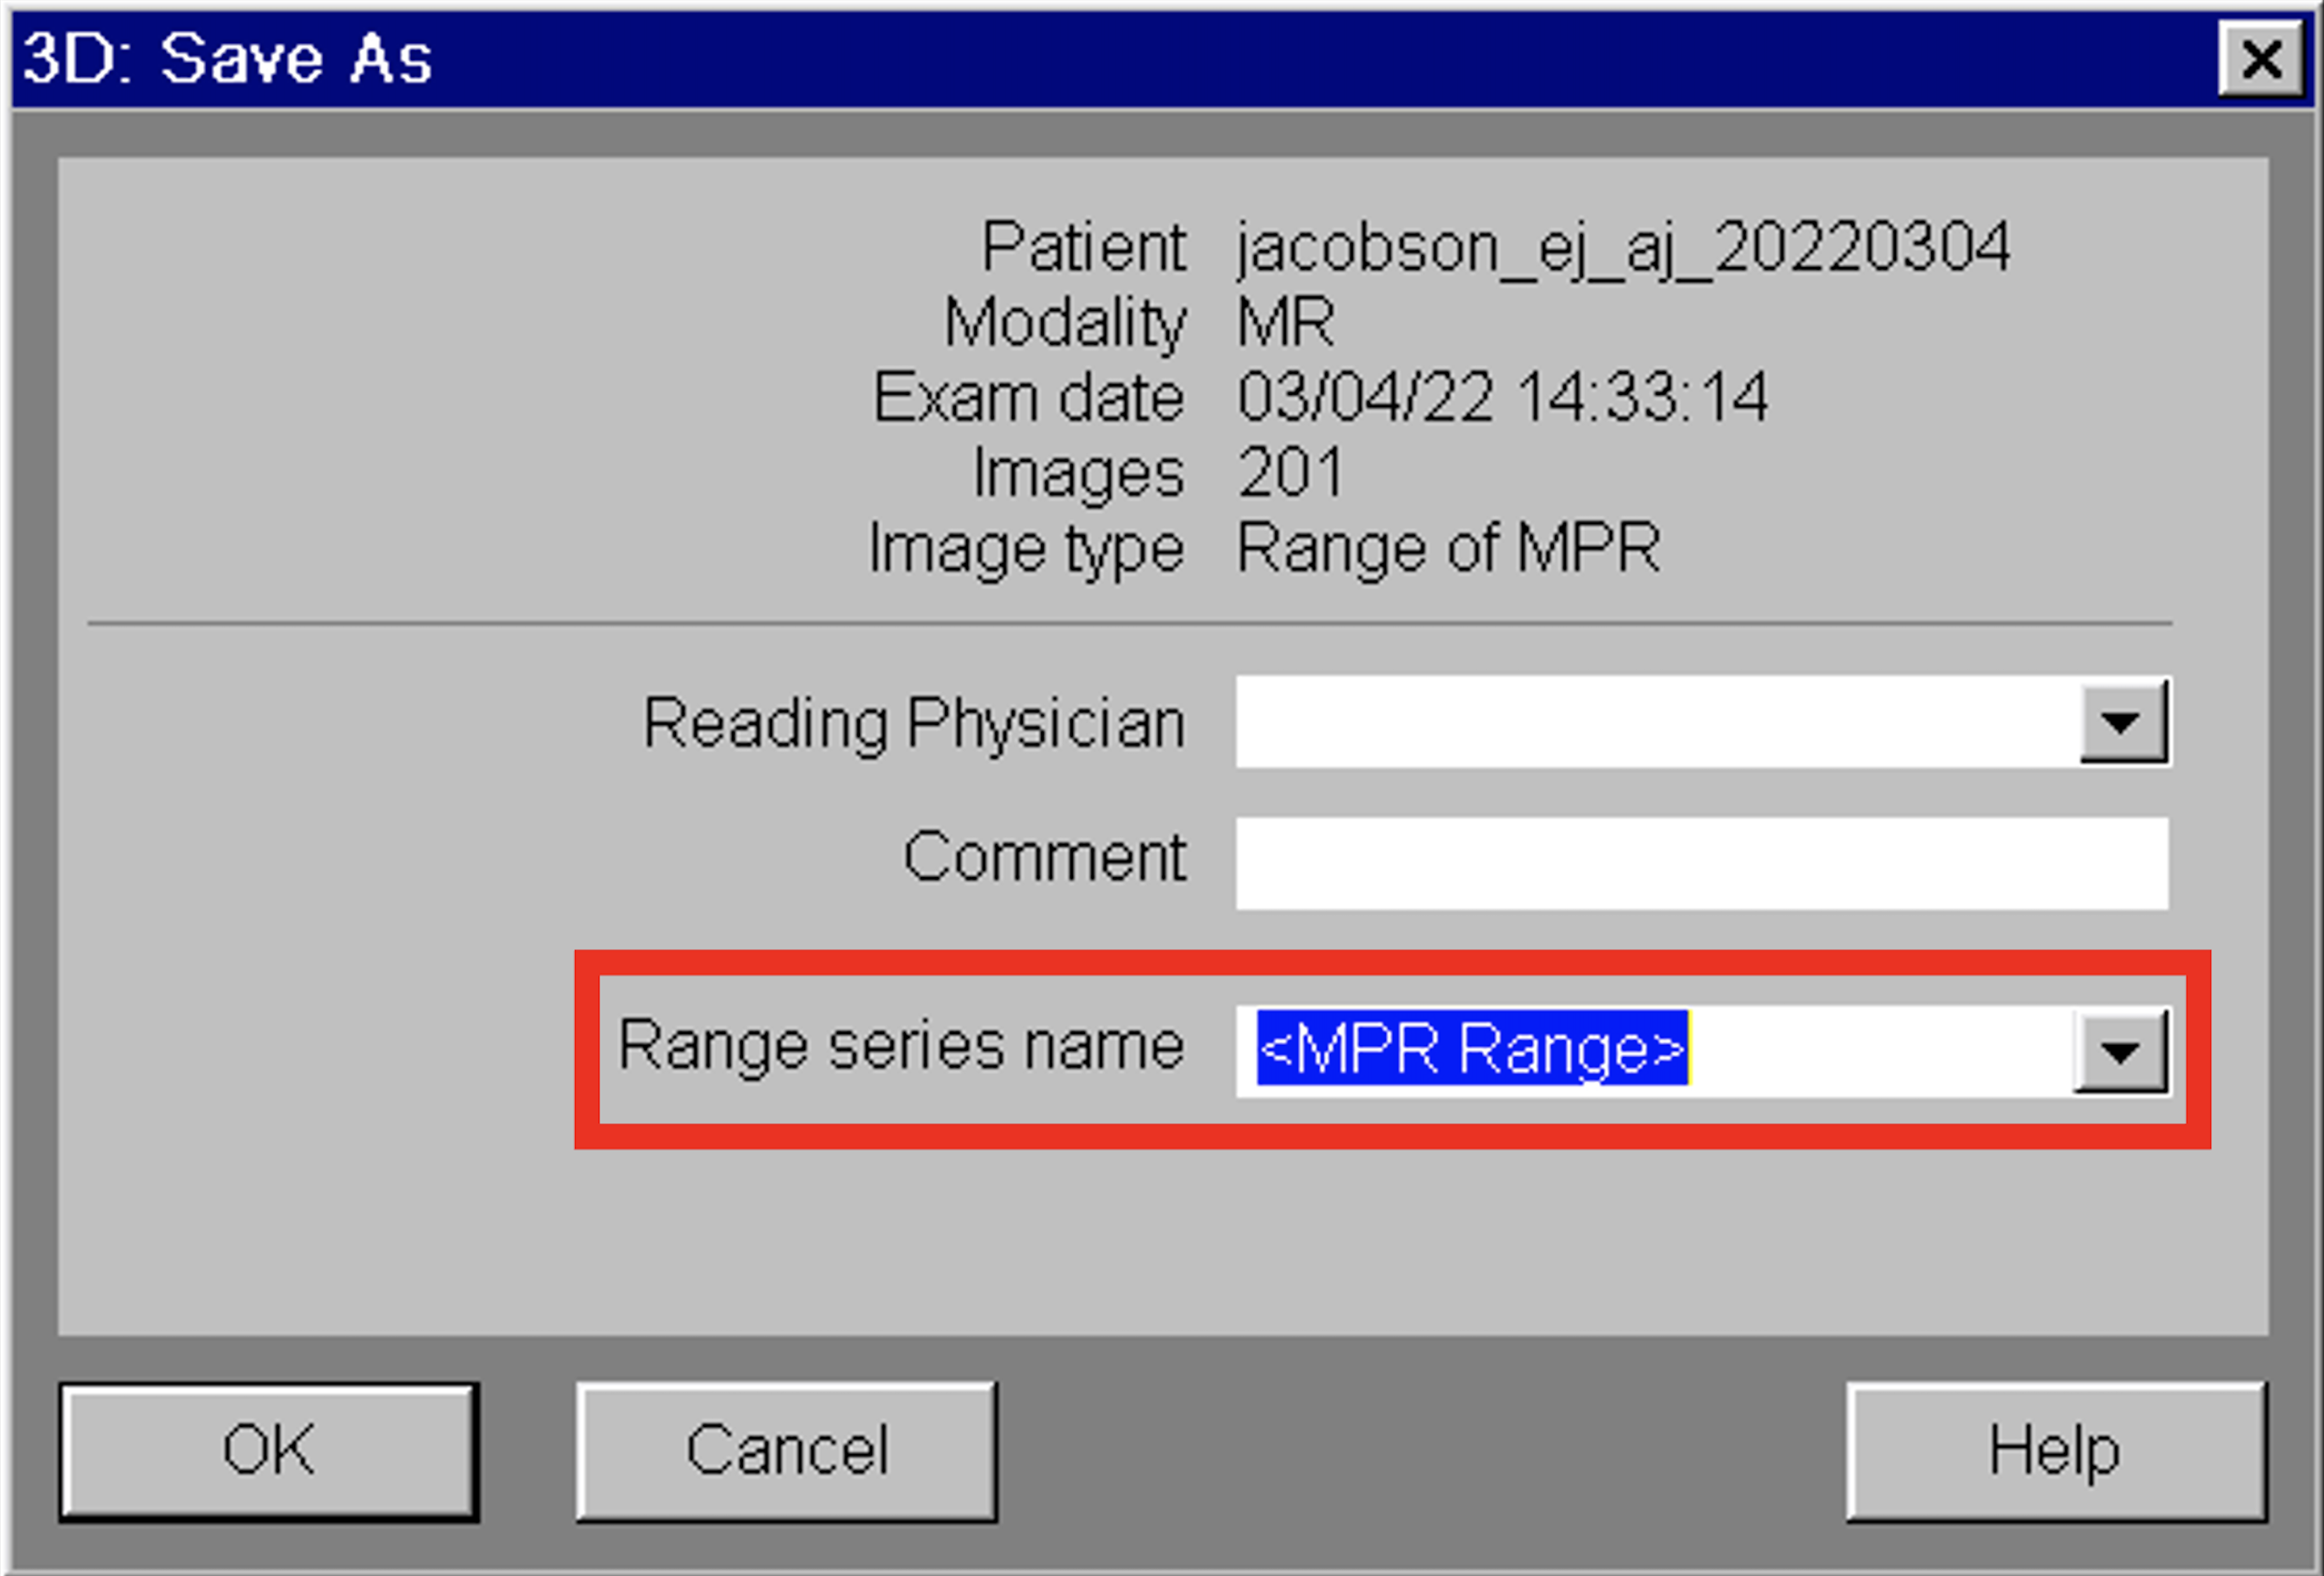
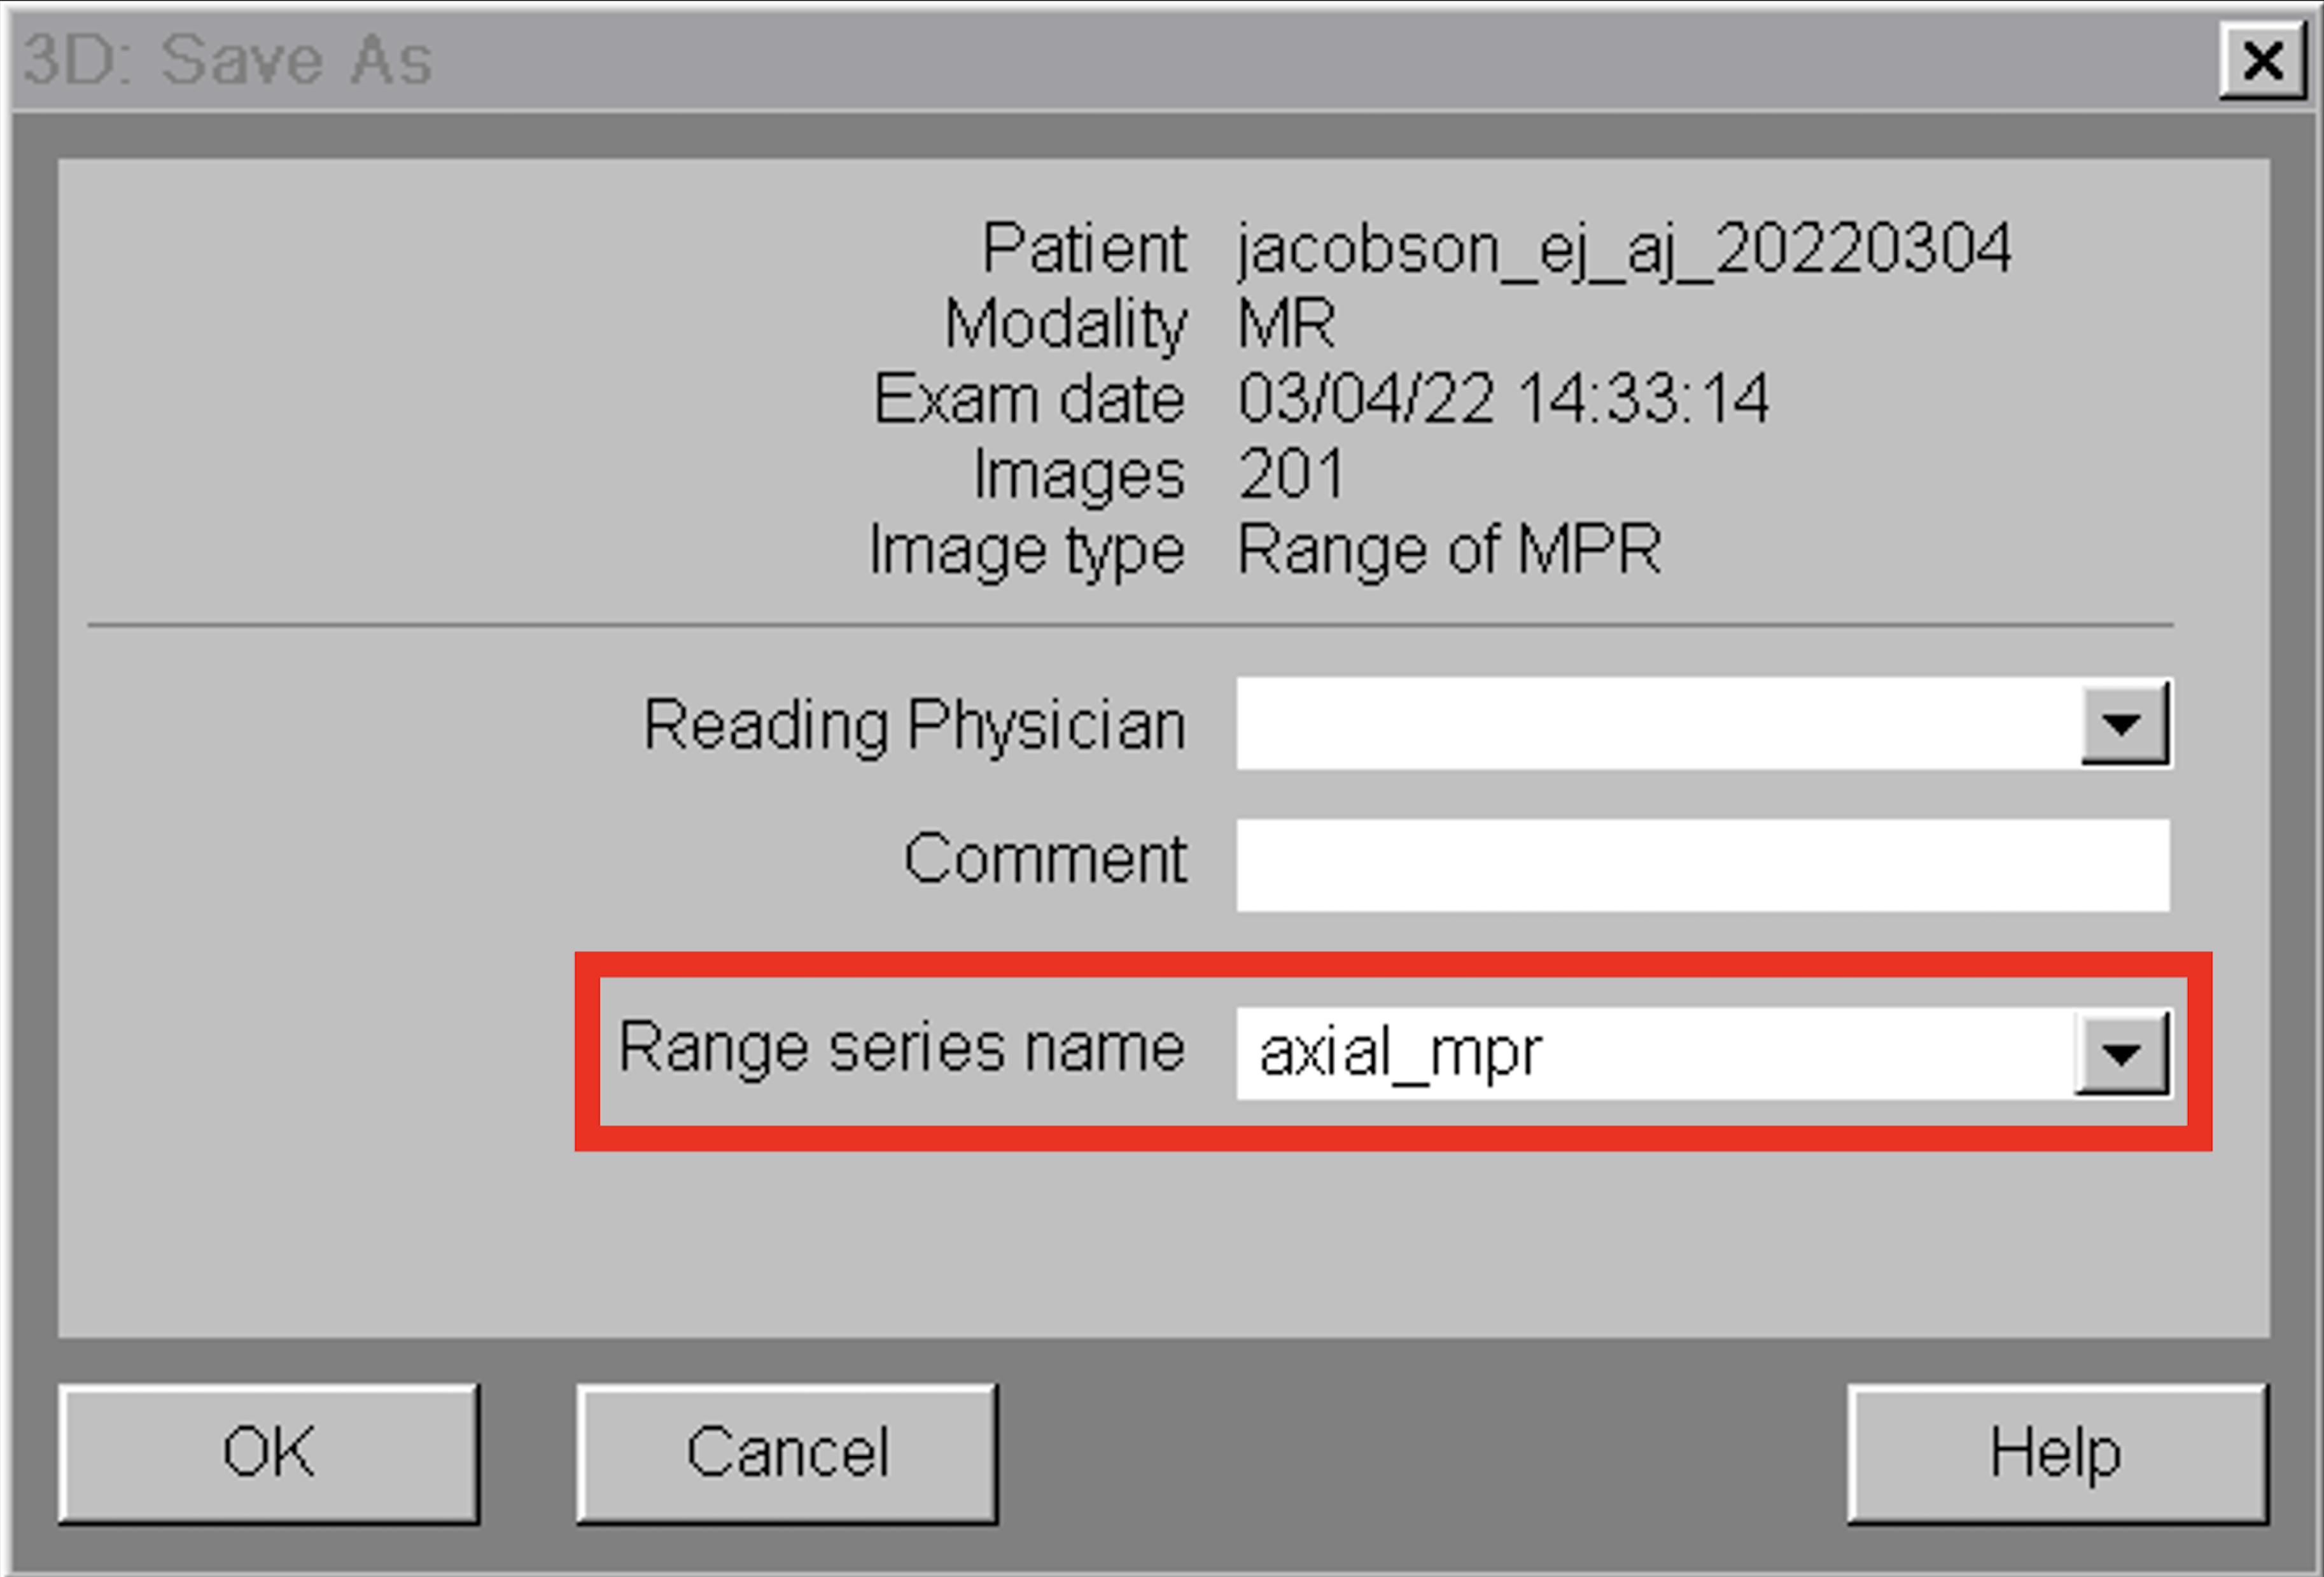
Update the name of the new dataset to reflect the plane of the reconstructed images (default series name is generic “MPR Range”)
Return to the parallel ranges GUI and select the coronal slice icon
The parameters used in the axial recon should auto-populate and are most likely sufficient (check to be sure)
If the coverage is sufficient (green vertical lines on the sagittal image), click “Start”
Use the menu bar (“Patient > Save As”) to save the reconstructed coronal data
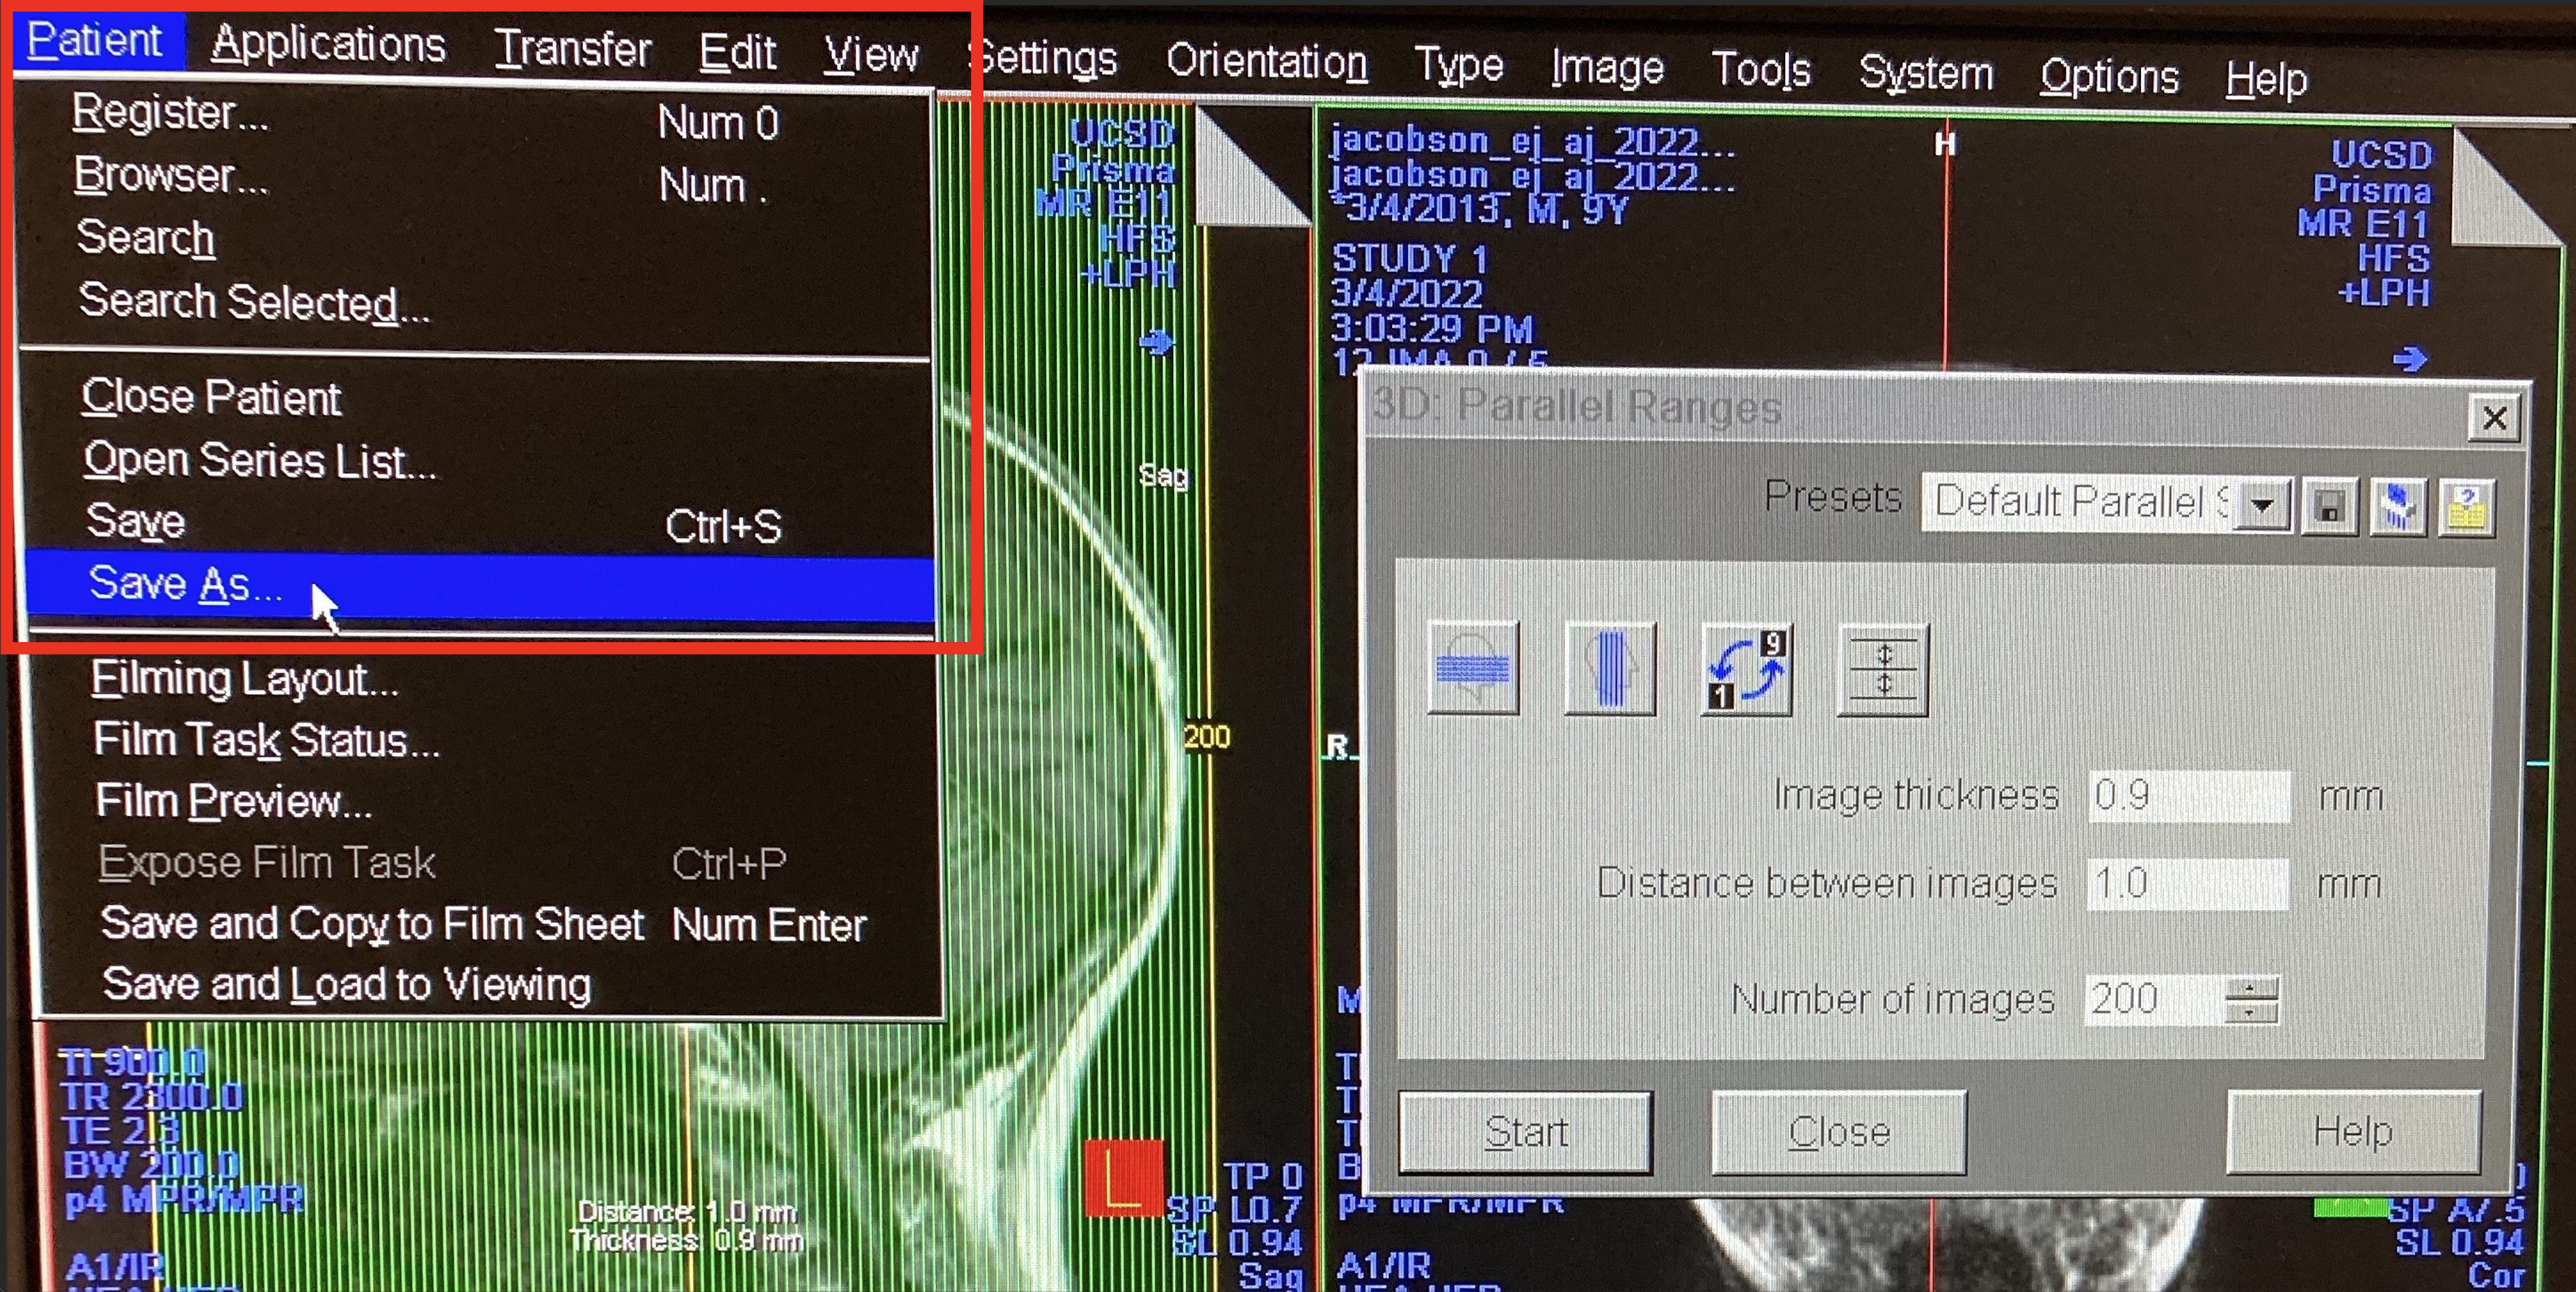
Update the name of the new dataset to reflect the plane of the reconstructed images (default is generic “MPR Range”)


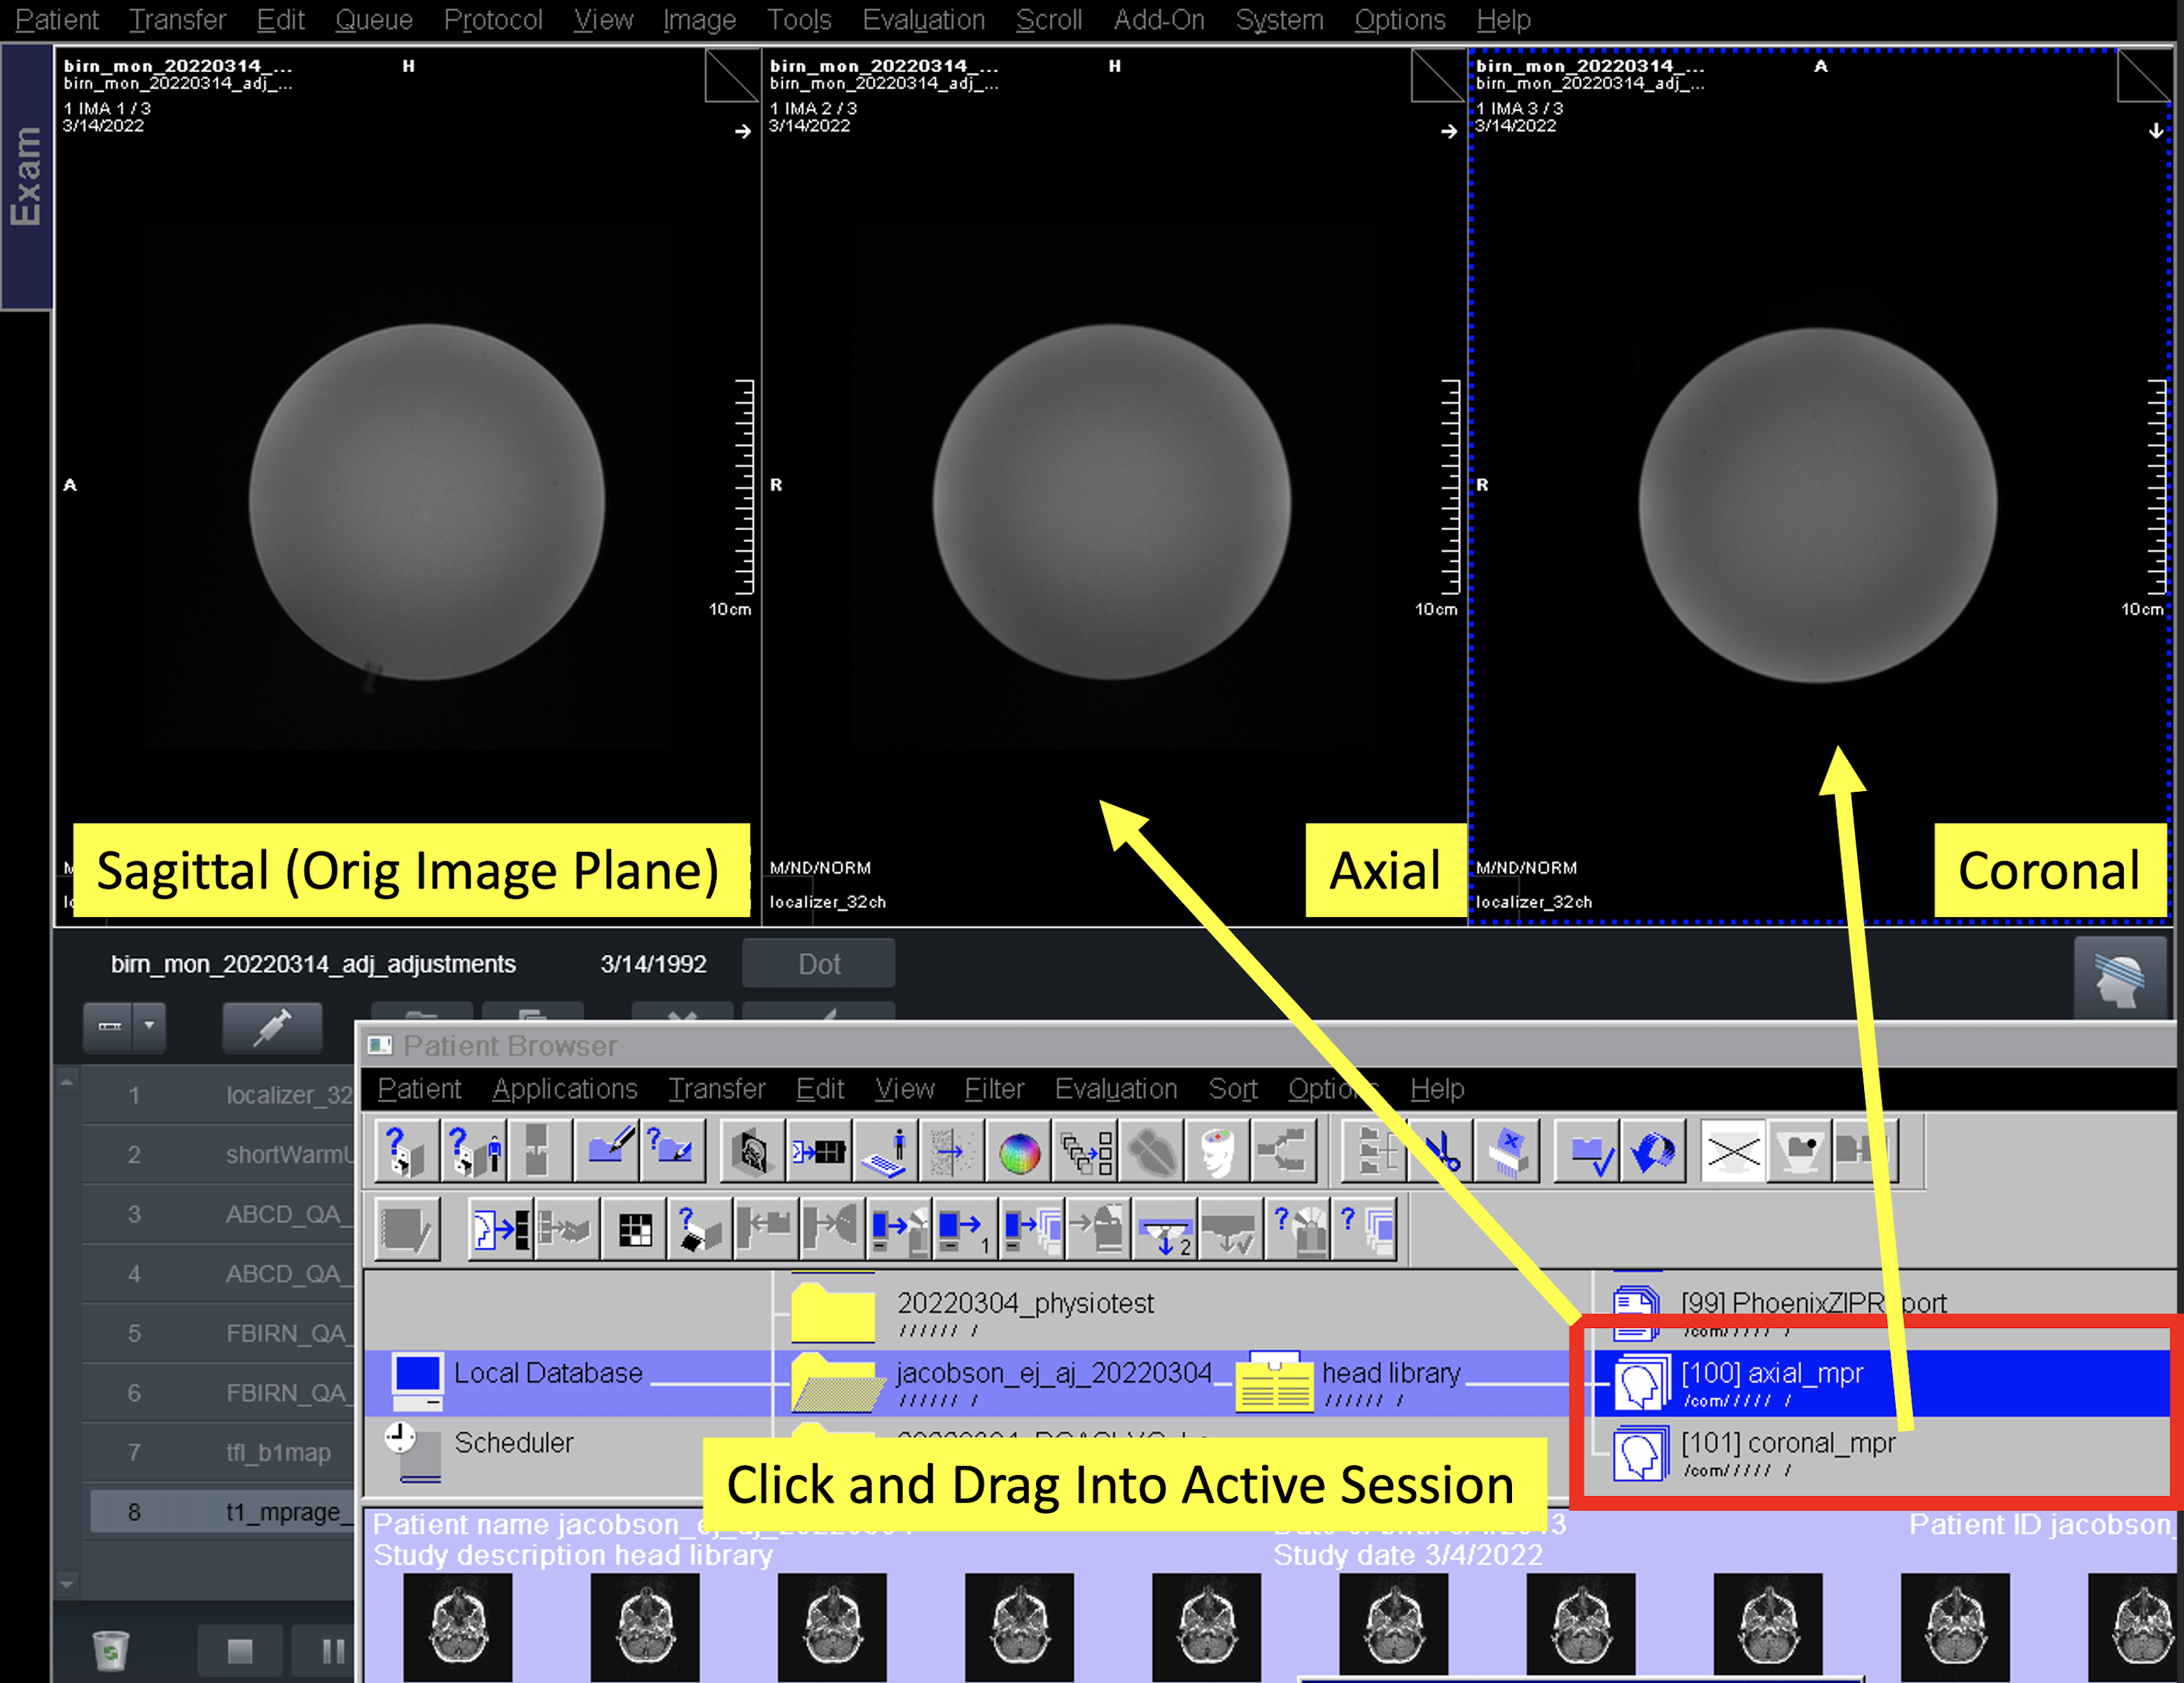
Two new datasets should appear in the patient browser (“axial_mpr” & “coronal_mpr” in the images below)
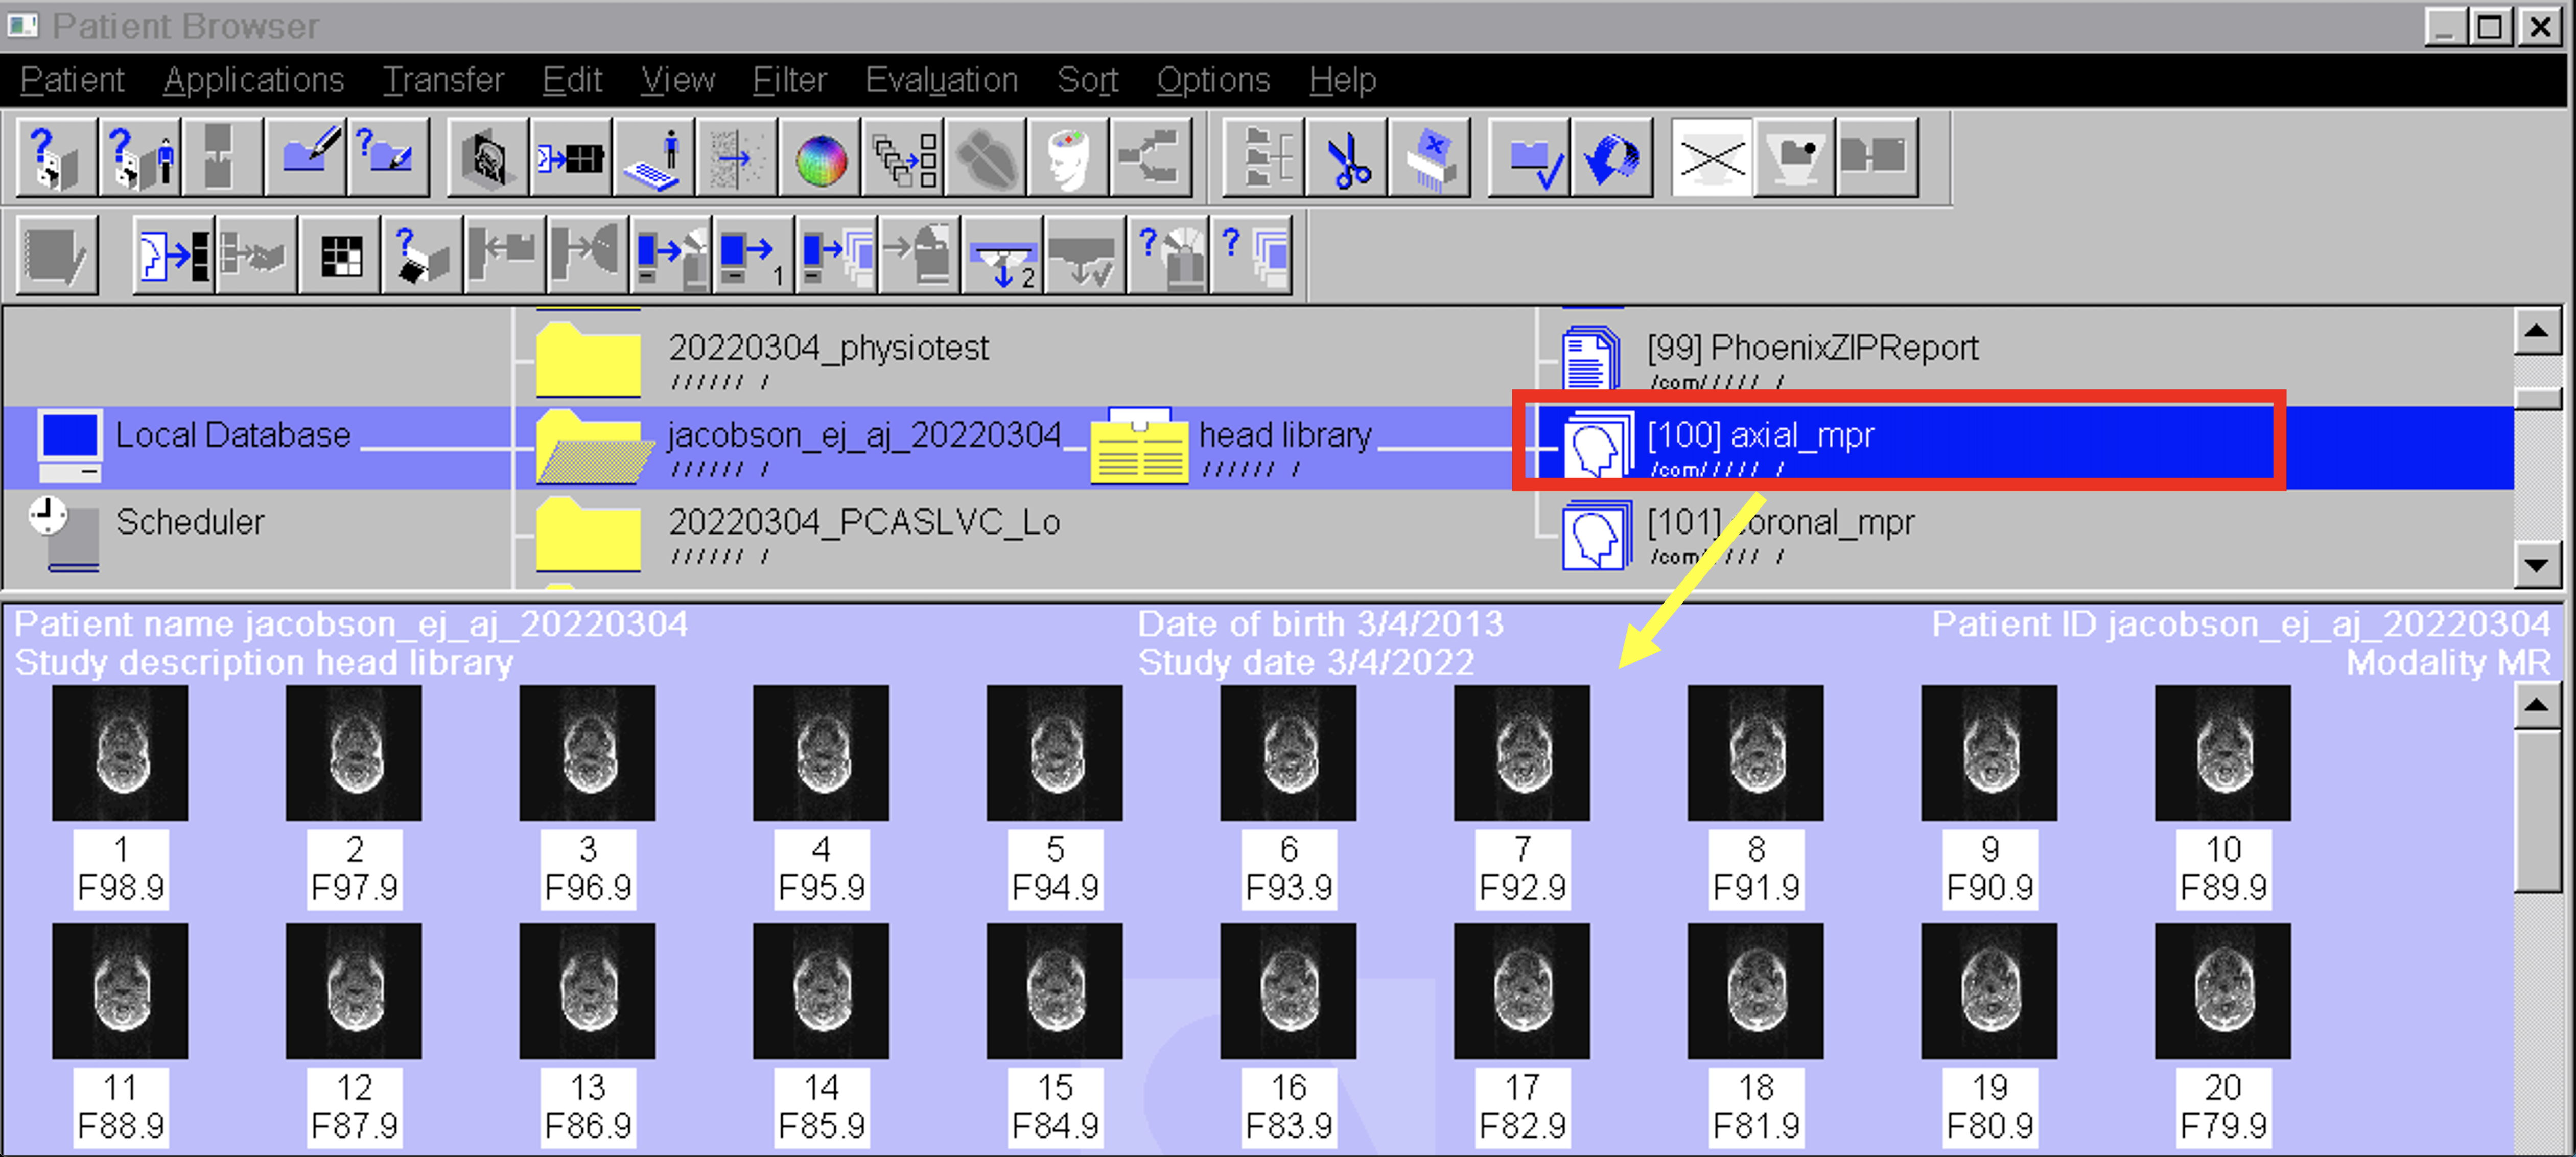
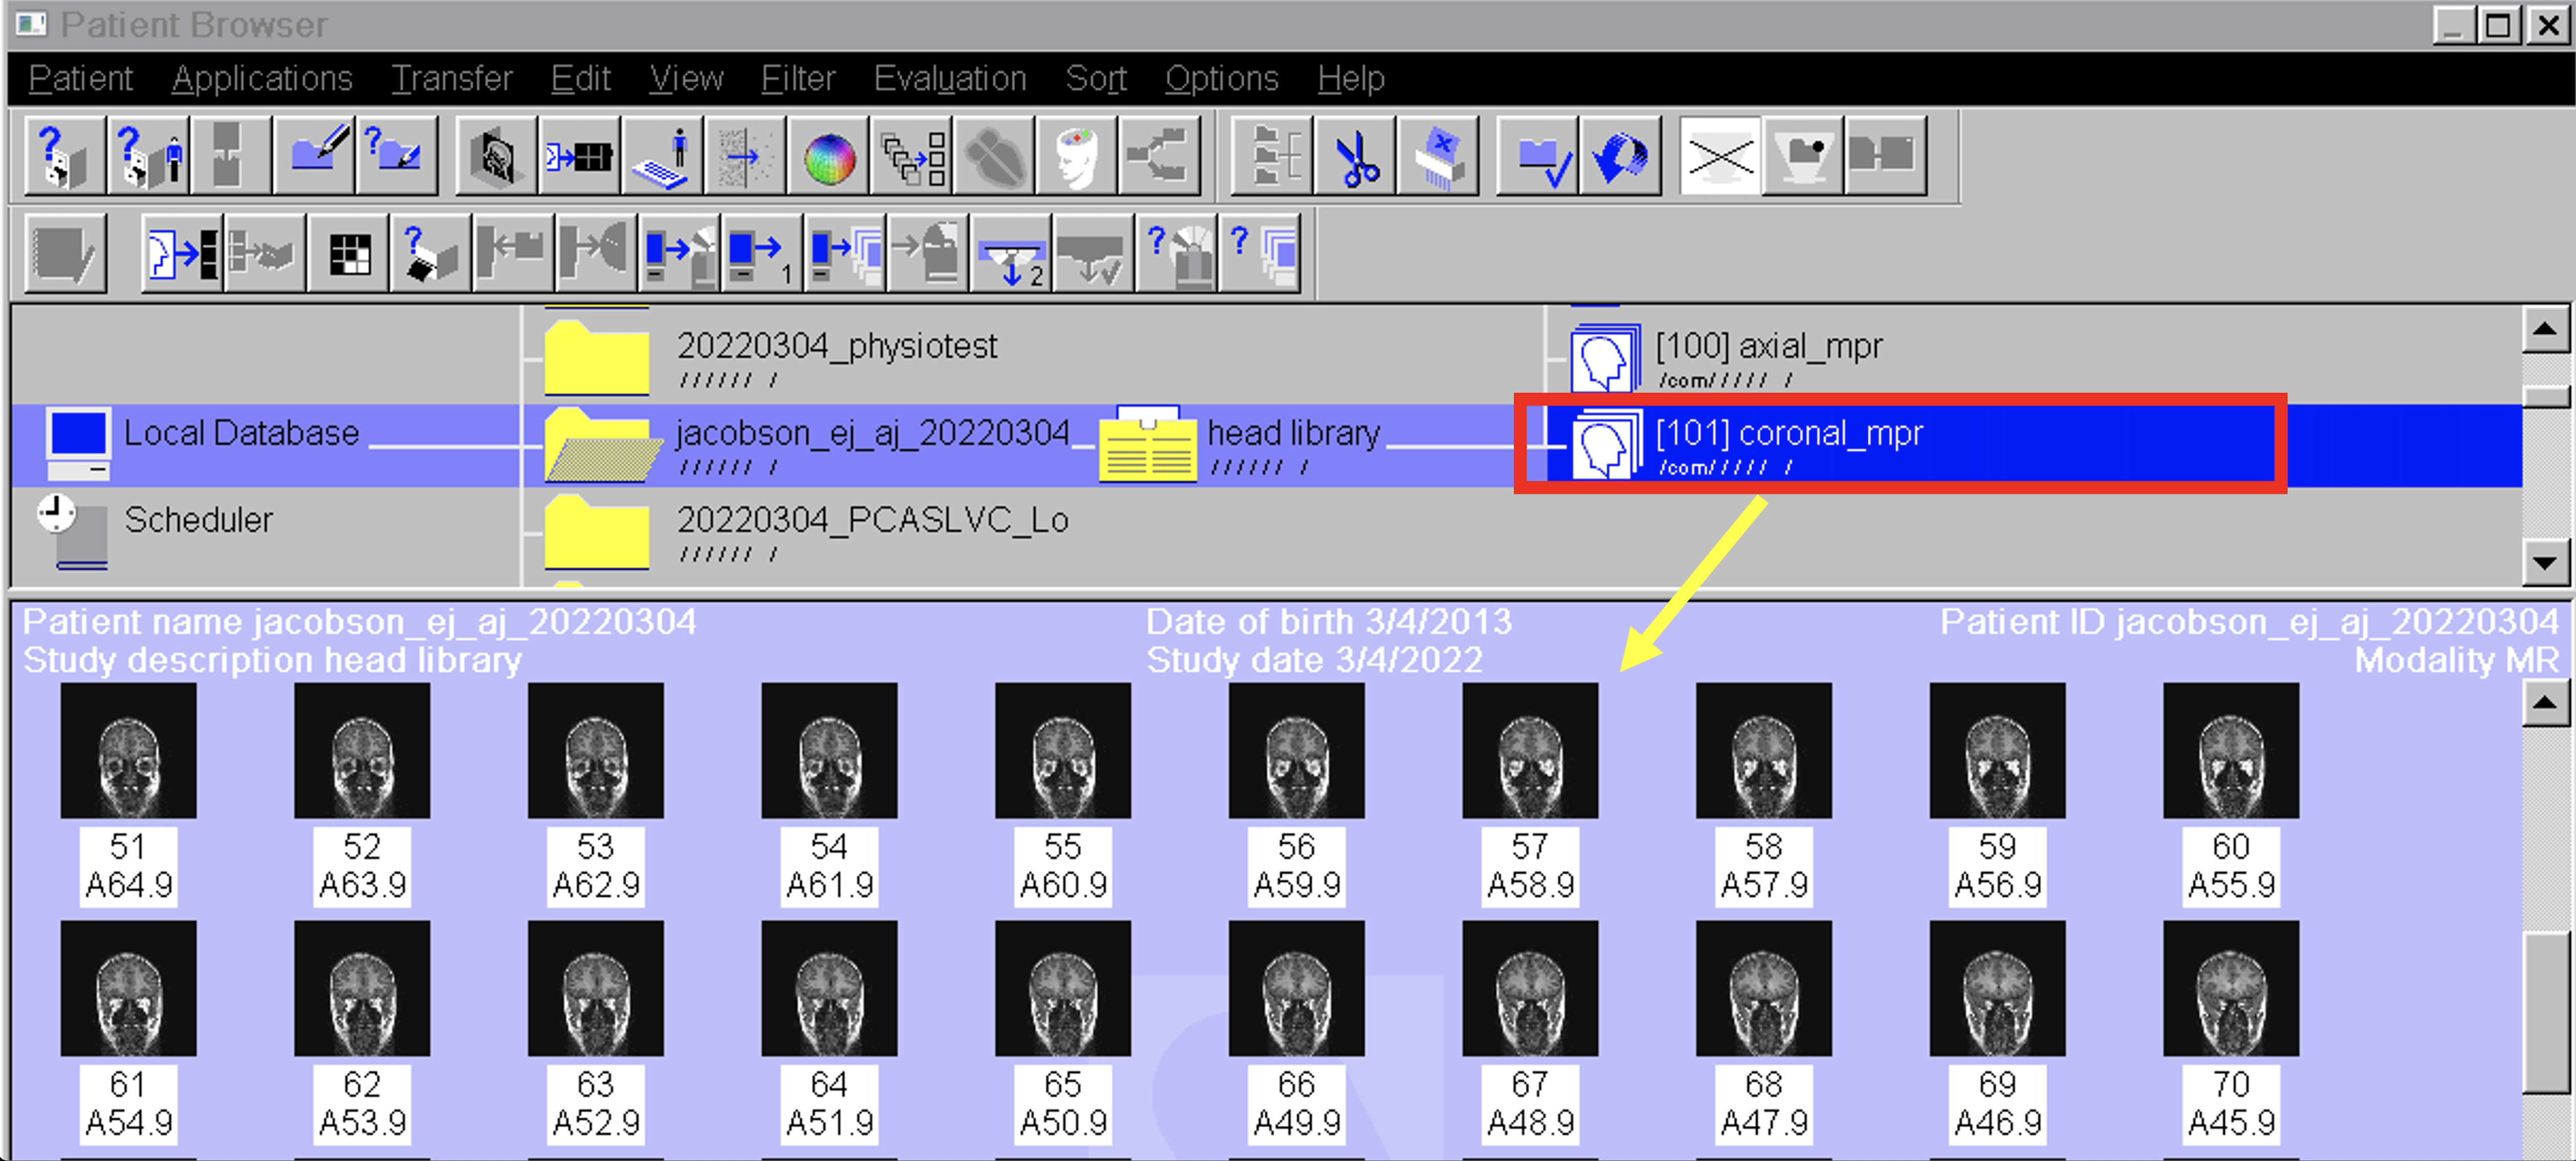
Click and drag the new datasets (and your original sagittal dataset) into your active session
You can now use the sagittal, axial (transversal), and coronal structural data to accurately position your scan prescription
The image below is meant to guide your procedure but displays a phantom scan instead of human data