ASL Scanning
Please contact cfmri@ucsd.edu for any questions about this page.
Head Positioning
PCASL labeling is dependent on the angle between the feeding arteries (the left/right ICAs and left/right VAs) and the labeling plane. Positioning the PCASL labeling plane perpendicular to the direction of blood flow gives optimal labeling. Since the feeding arteries are generally oriented in the S-I (or head-foot) direction, and the PCASL labeling plane is positioned axially, the head should be consistently positioned so the neck is relatively straight in the S-I position. As general guidance, try to avoid severe rear head tilts in the sagittal view. In the coronal and axial views, try to make the center-line as straight as possible.
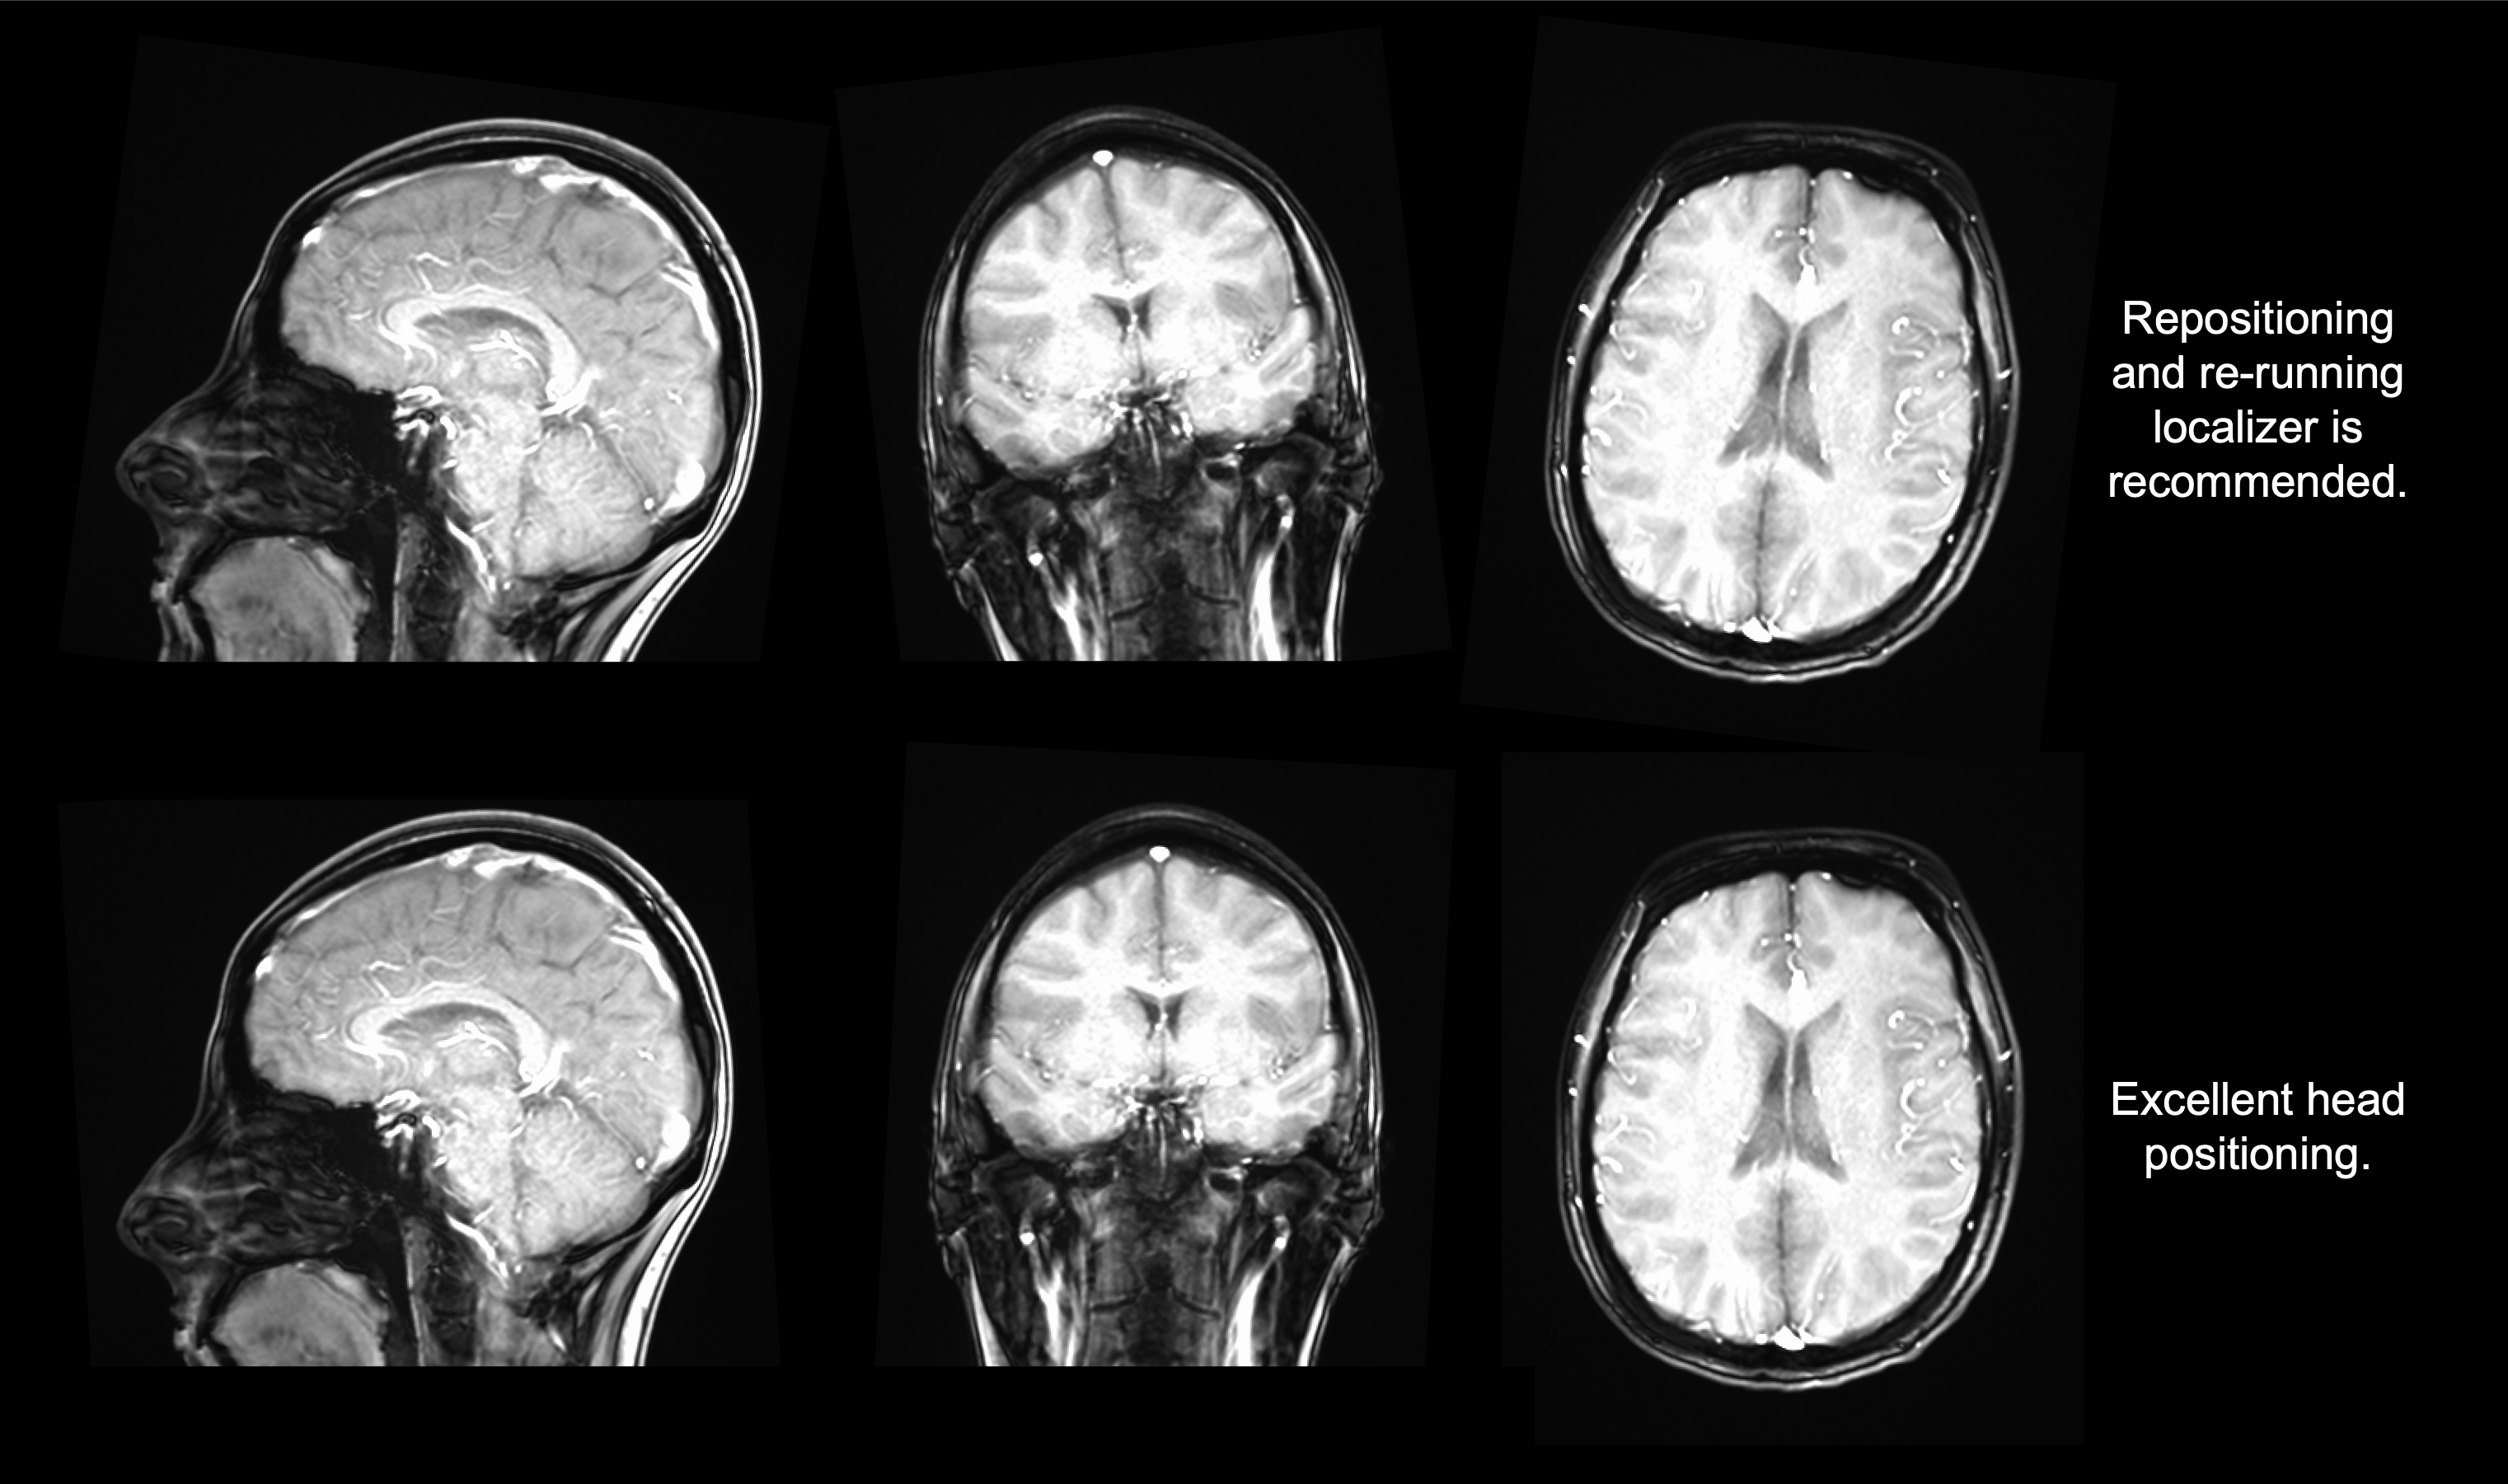
In cases of poor positioning, you may need to ask your subject to readjust and re-run the localizer, but this is typically worth the initial investment of a few additional minutes for better image quality in your session.
You may also avoid repositioning issues by visually inspecting their position before sending the subject into the scanner. You can:
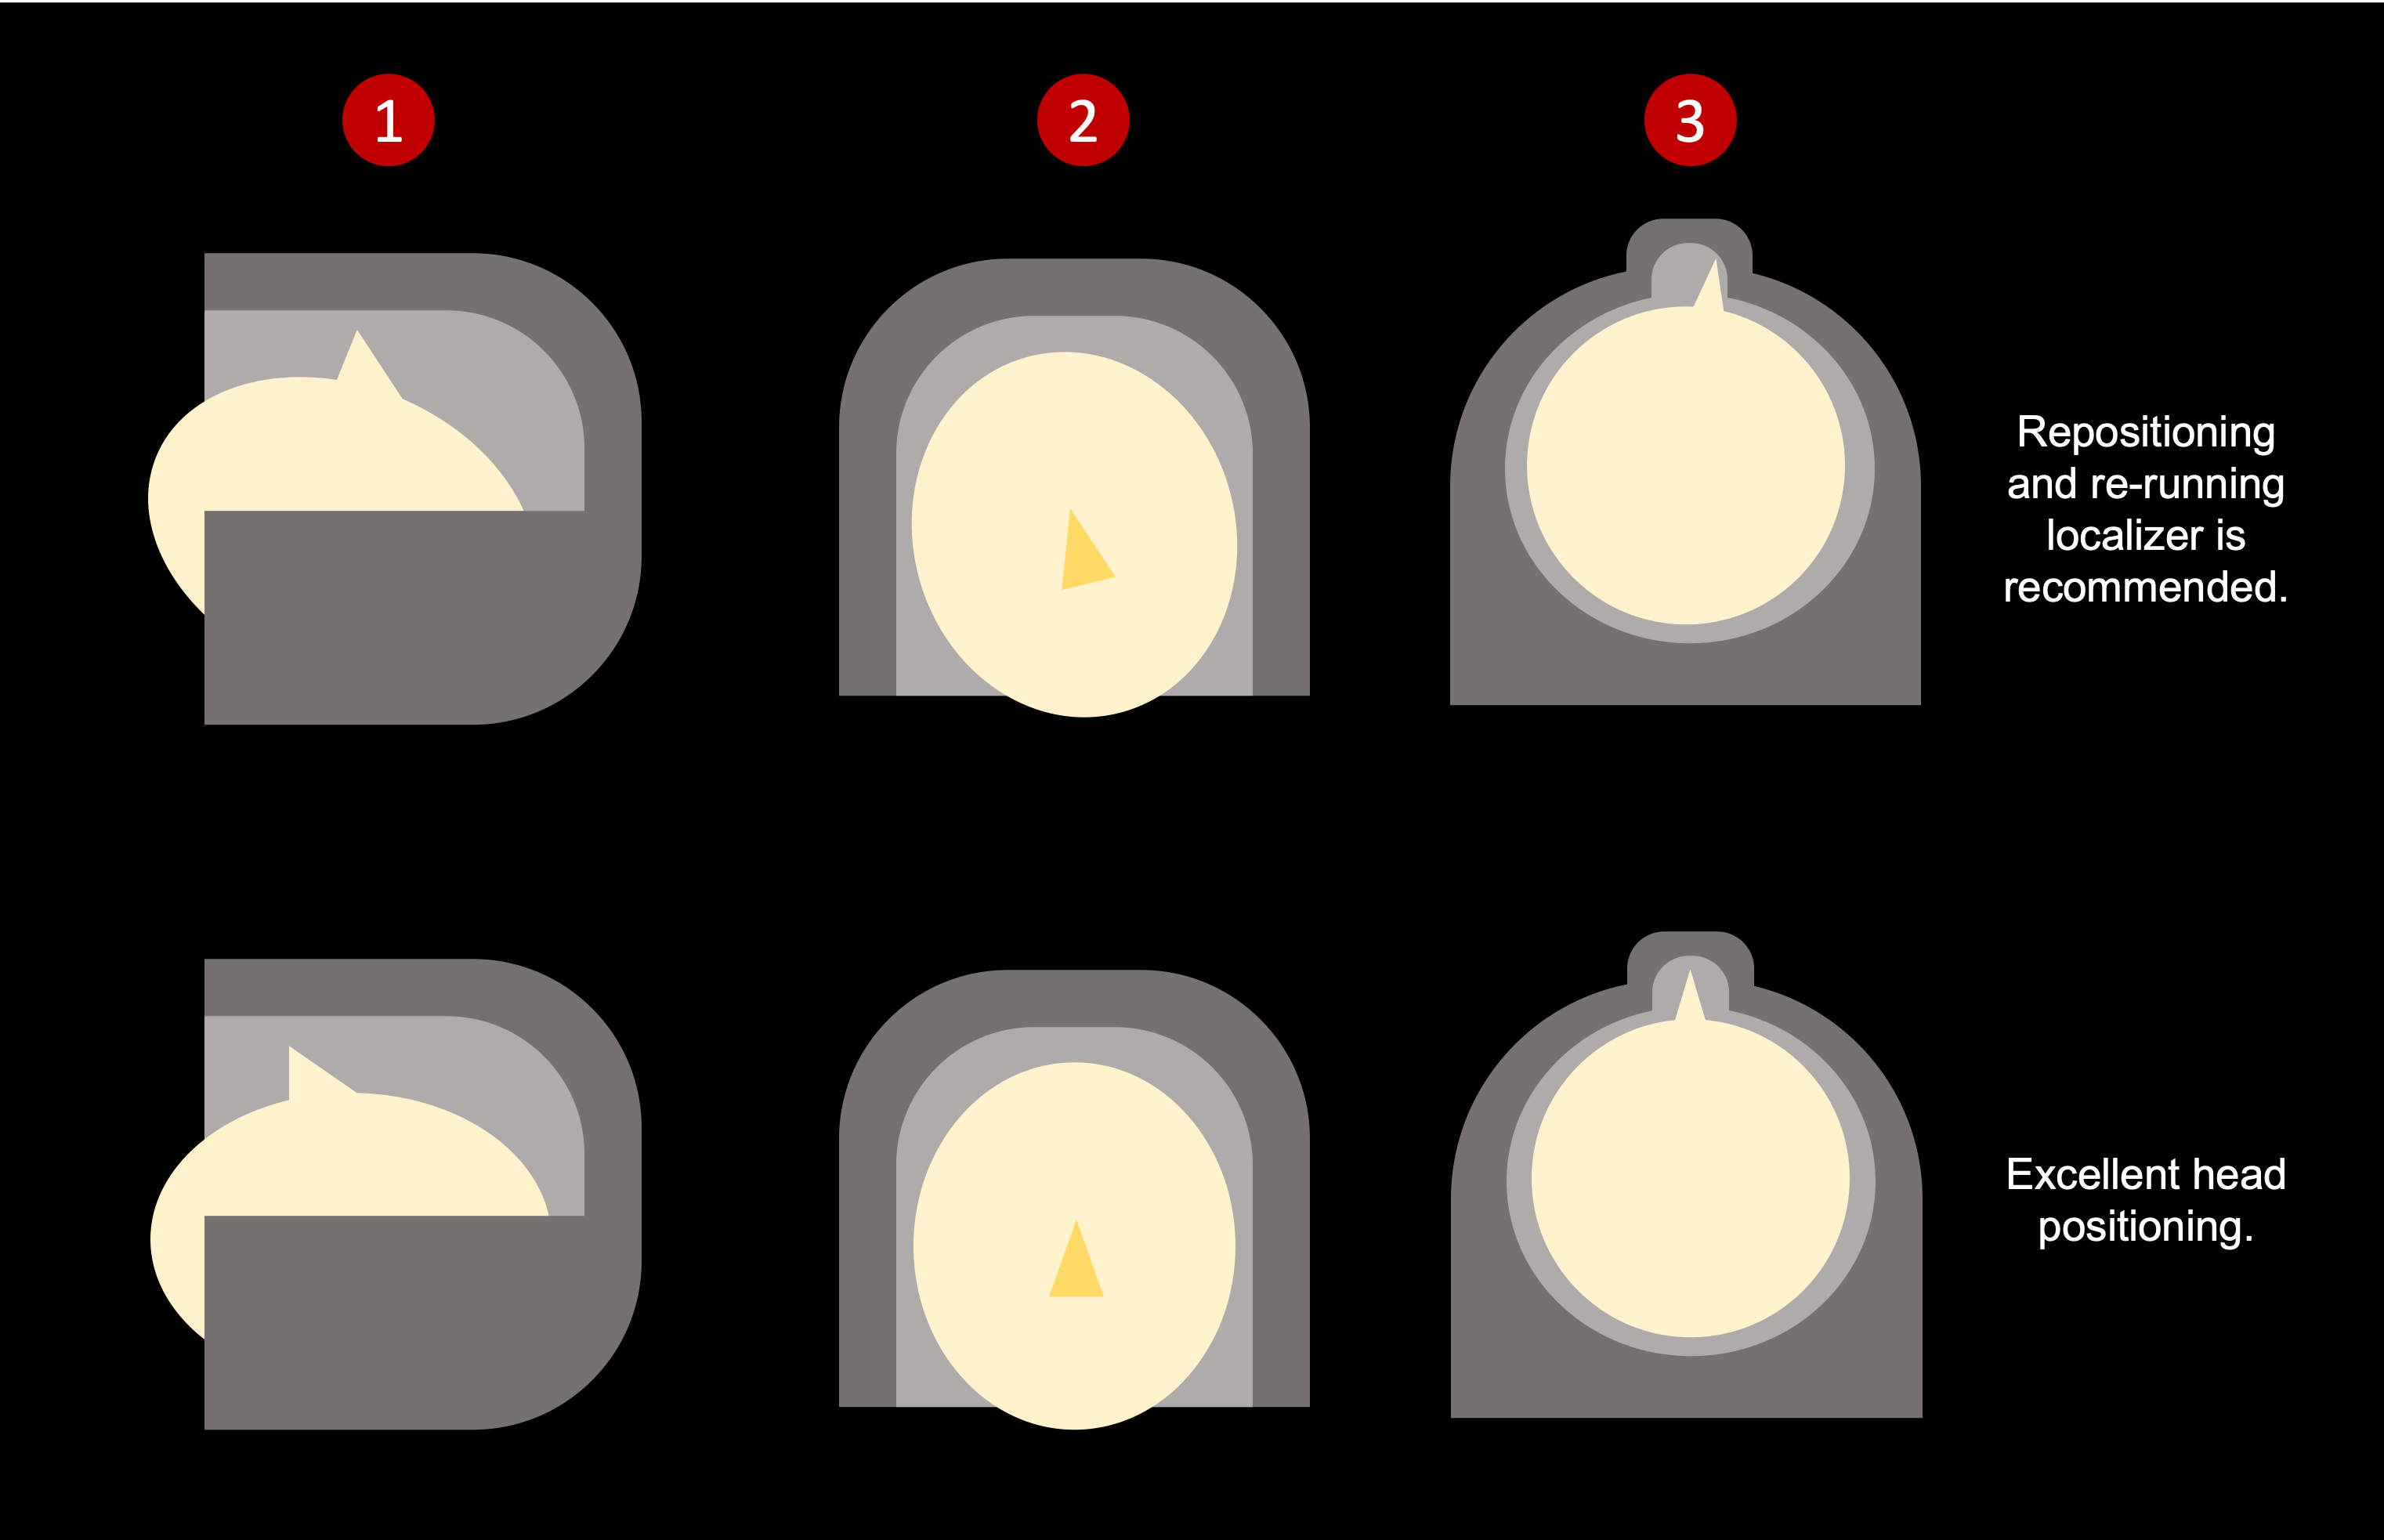
Look from the side to ensure their head is appropriately tilted (checks for rotation in sagittal plane).
Look from above their face to ensure their nose is vertical/straight (checks for rotation in coronal plane).
Stand below their feet and look up to ensure their noise is centered (checks for rotation in axial plane).
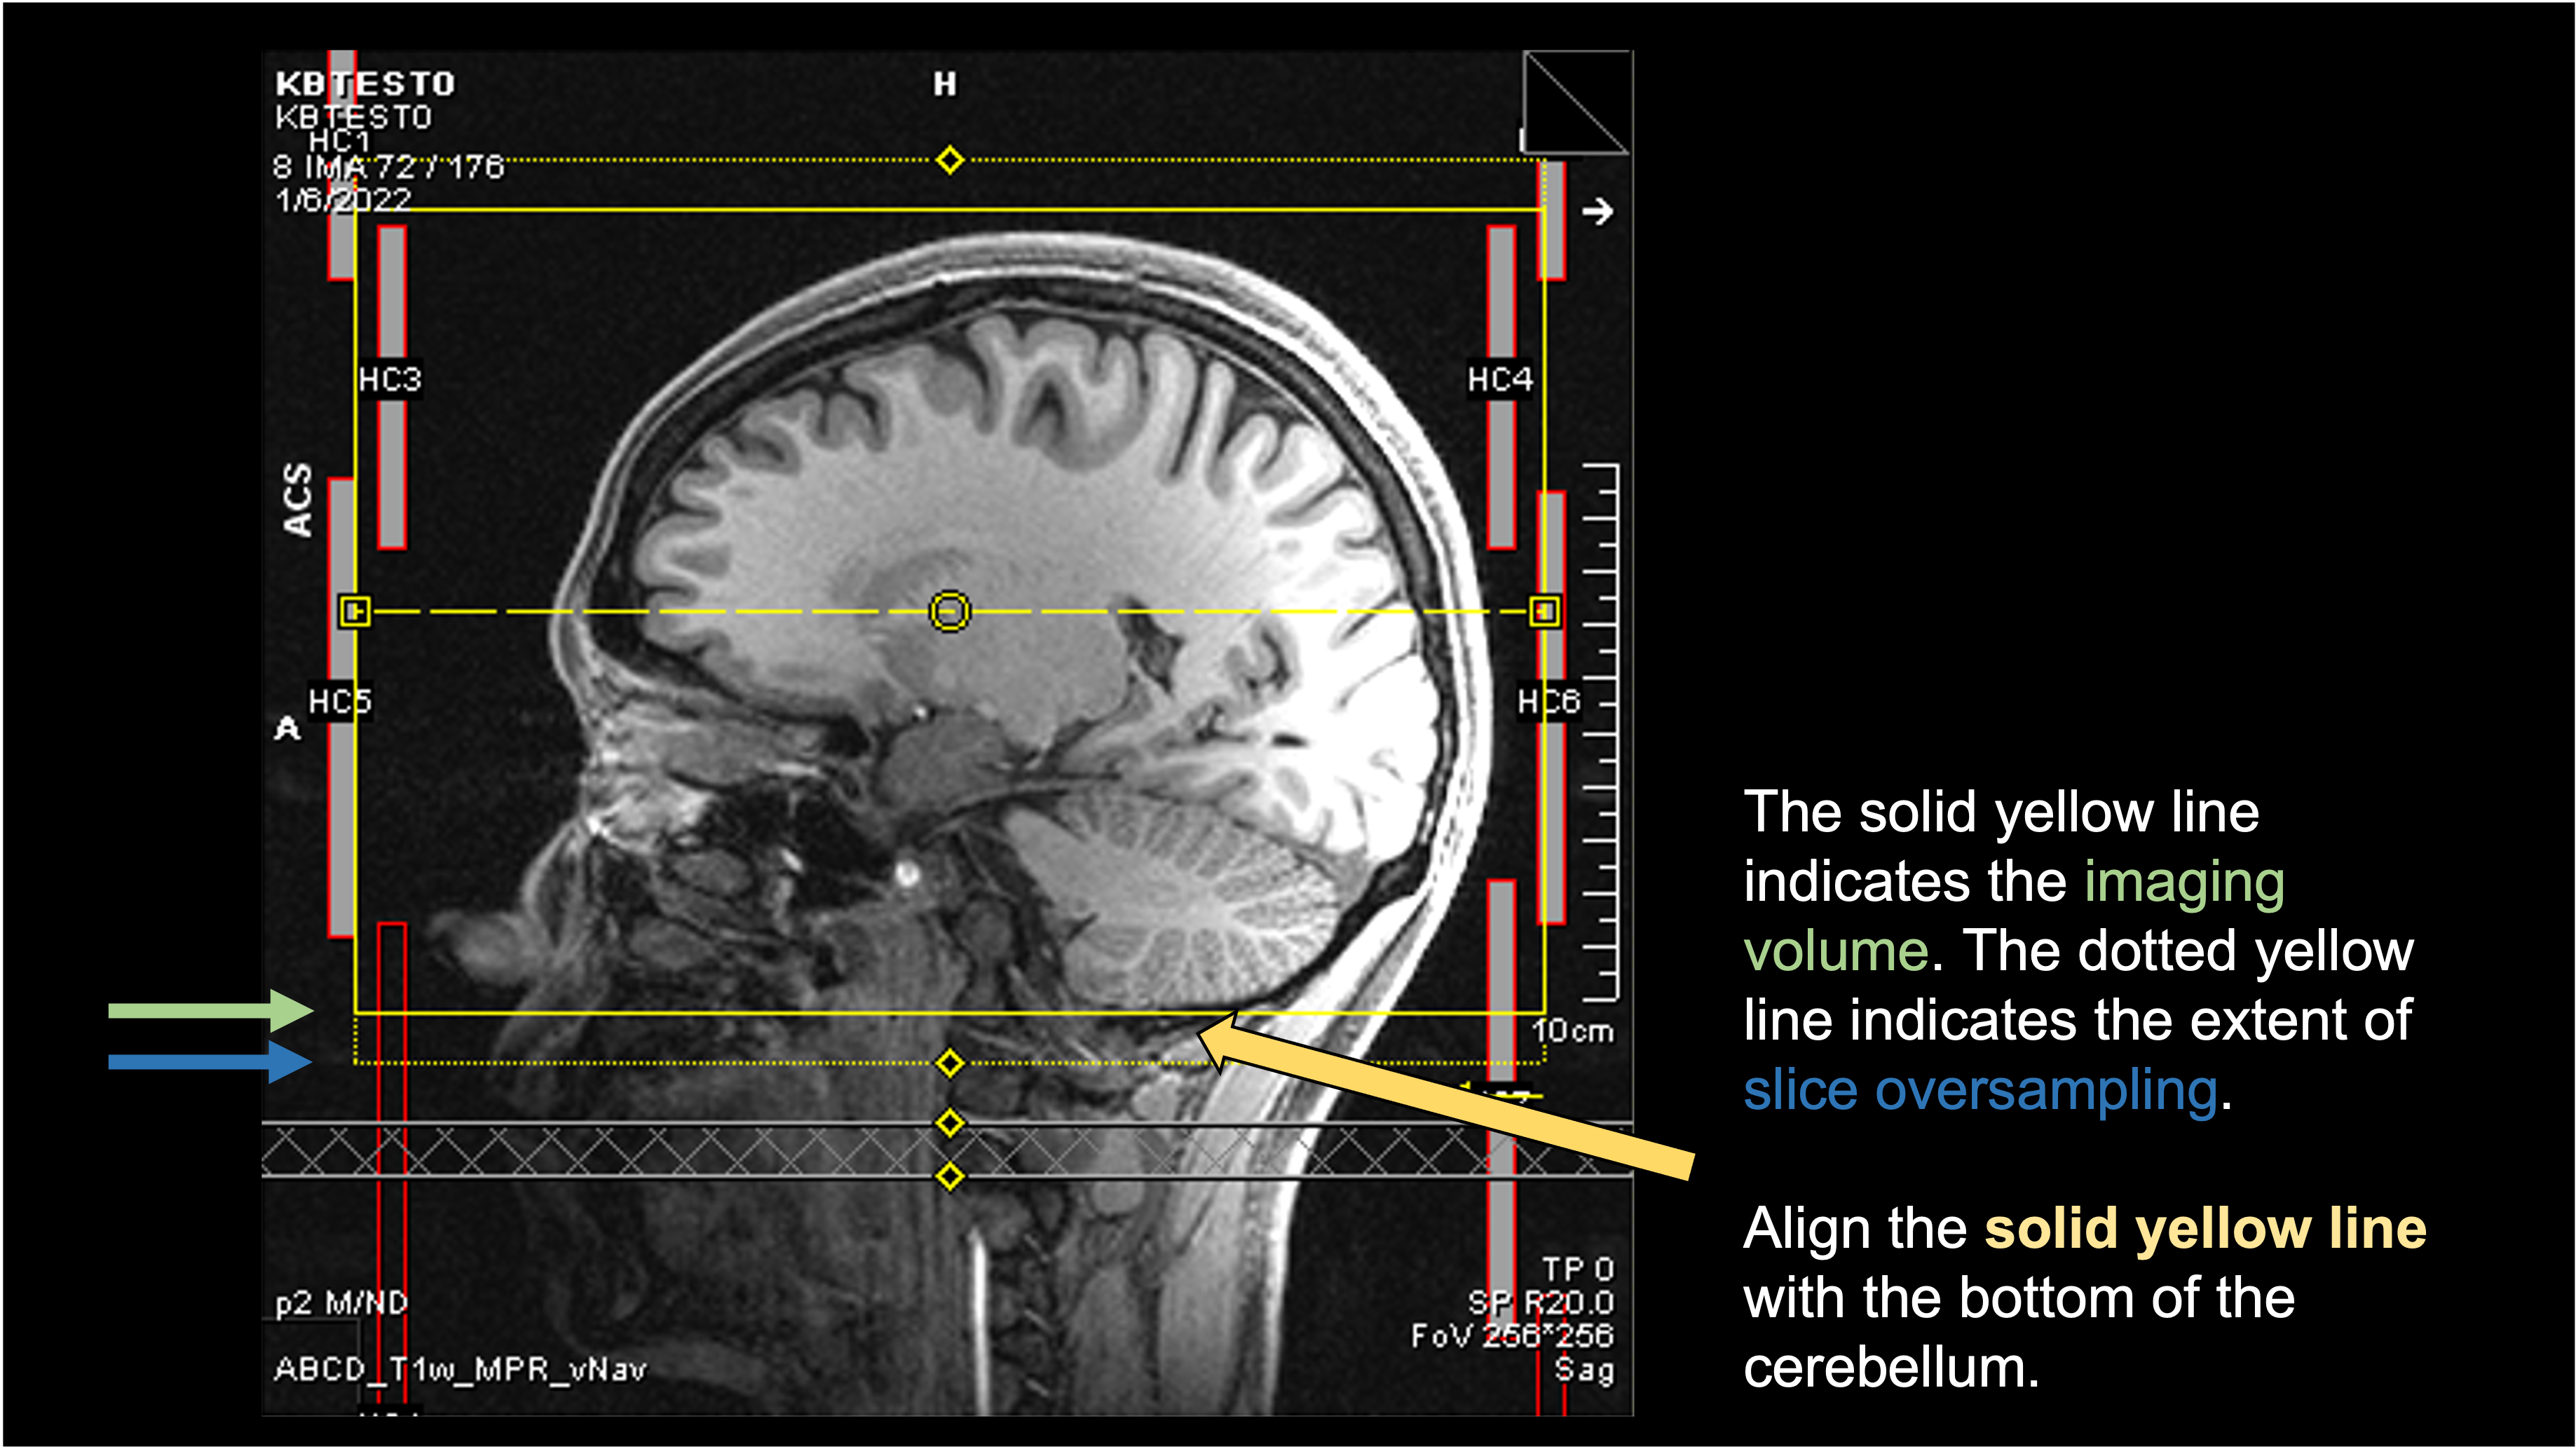
Prescription
The PCASL prescription should be set so the bottom of the imaging volume is aligned with the bottom of the cerebellum. The tag gap (see Protocol Parameters) is defined as the distance from the bottom of the imaging volume to the location of the labeling plane. This prescription approach will place the labeling plane 20mm below the cerebellum, which generally provides robust labeling. If desired, you can also acquire a Time-of-Flight (TOF) to guide the prescription and manually place the labeling plane.
The recommended prescription to the bottom of the cerebellum is shown below.
Checking ASL on the Scanner
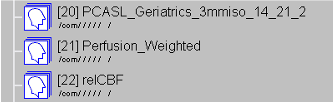
A great benefit of the Siemens Prisma is the ability to look at your ASL images immediately after the scan! This facilitates quick QA and near-realtime feedback on the quality of the incoming data. For each ASL scan, you will see three DICOM series - one with the same name as your original scan, Perfusion_Weighted, and relCBF.
Looking at the ASL time series
The original time series consists of the M0 and all the subsequent tag/control volumes. This is useful for checking obvious signs of motion. You can scroll through the entire time series and visually check for sudden movements. You can also start at the first volume and then go directly to the final volume - if there was motion at any point during the scan, it will likely be captured by this direct comparison of beginning vs end. You can also start the comparison with the M0 volume, but you would just need to “read through” the contrast change between M0 and final control image.
Below is an example of comparing the first (non-M0) volume vs the final volume. Note the scrollbar position.
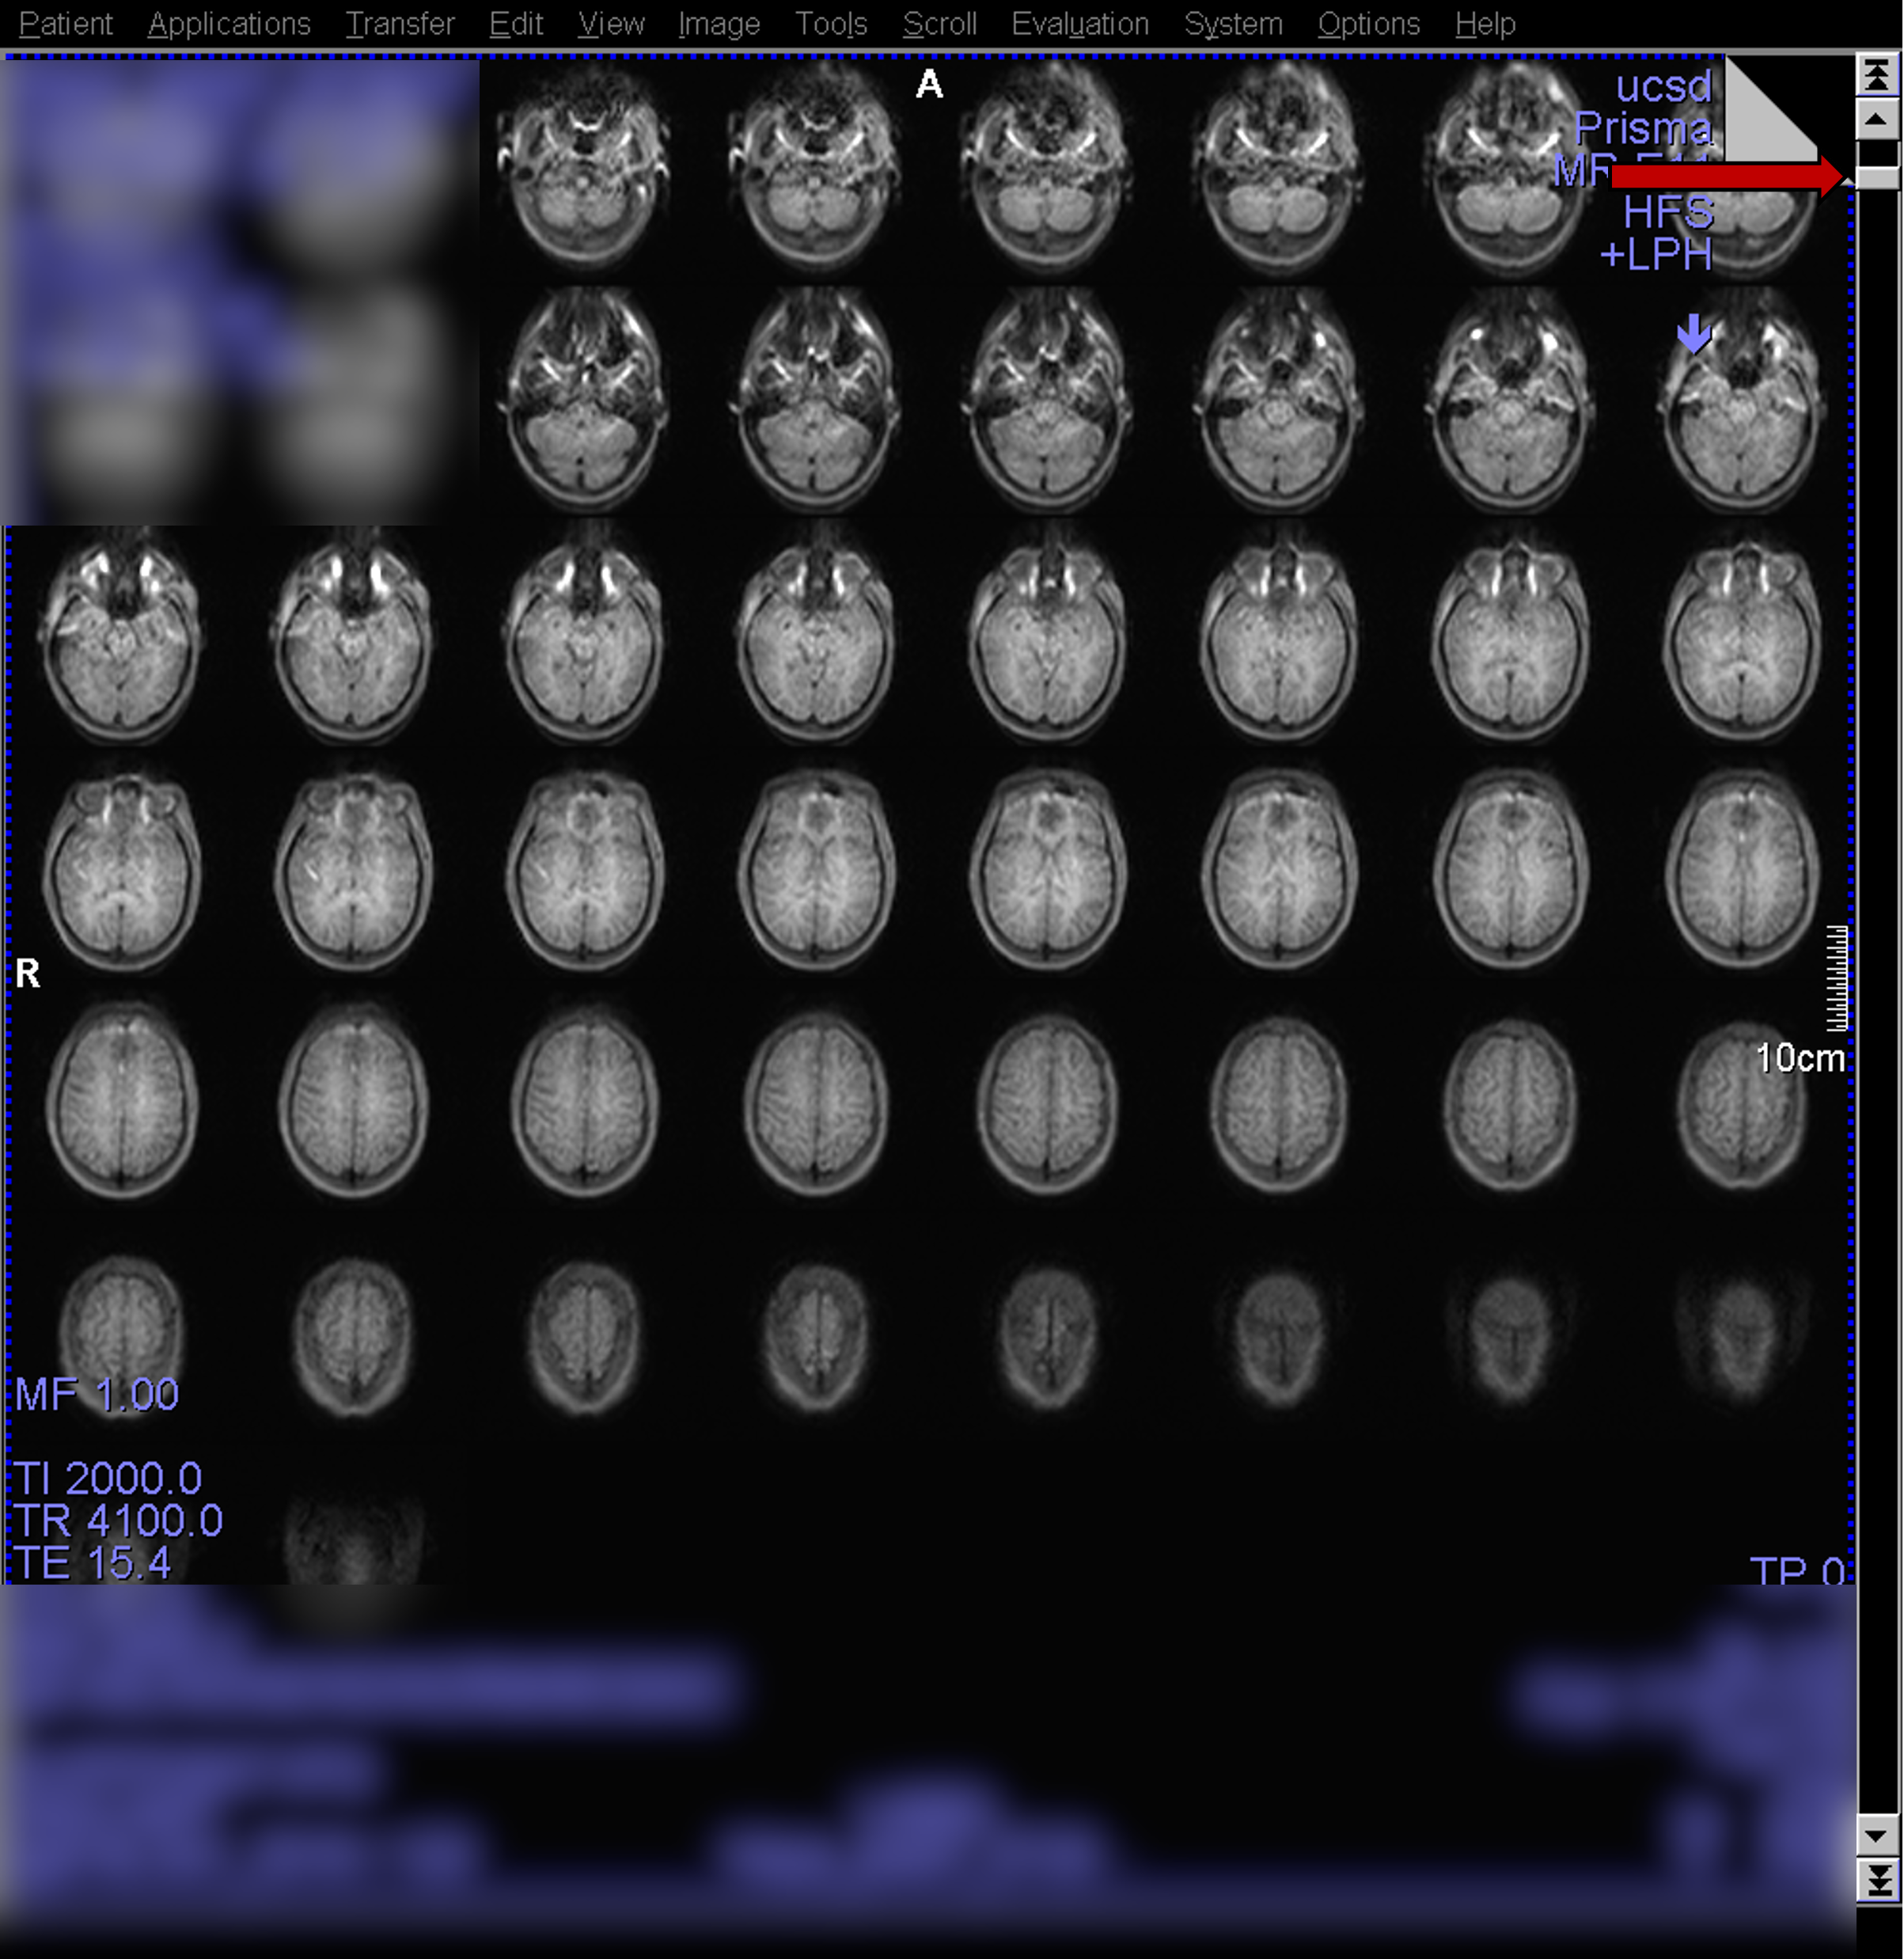
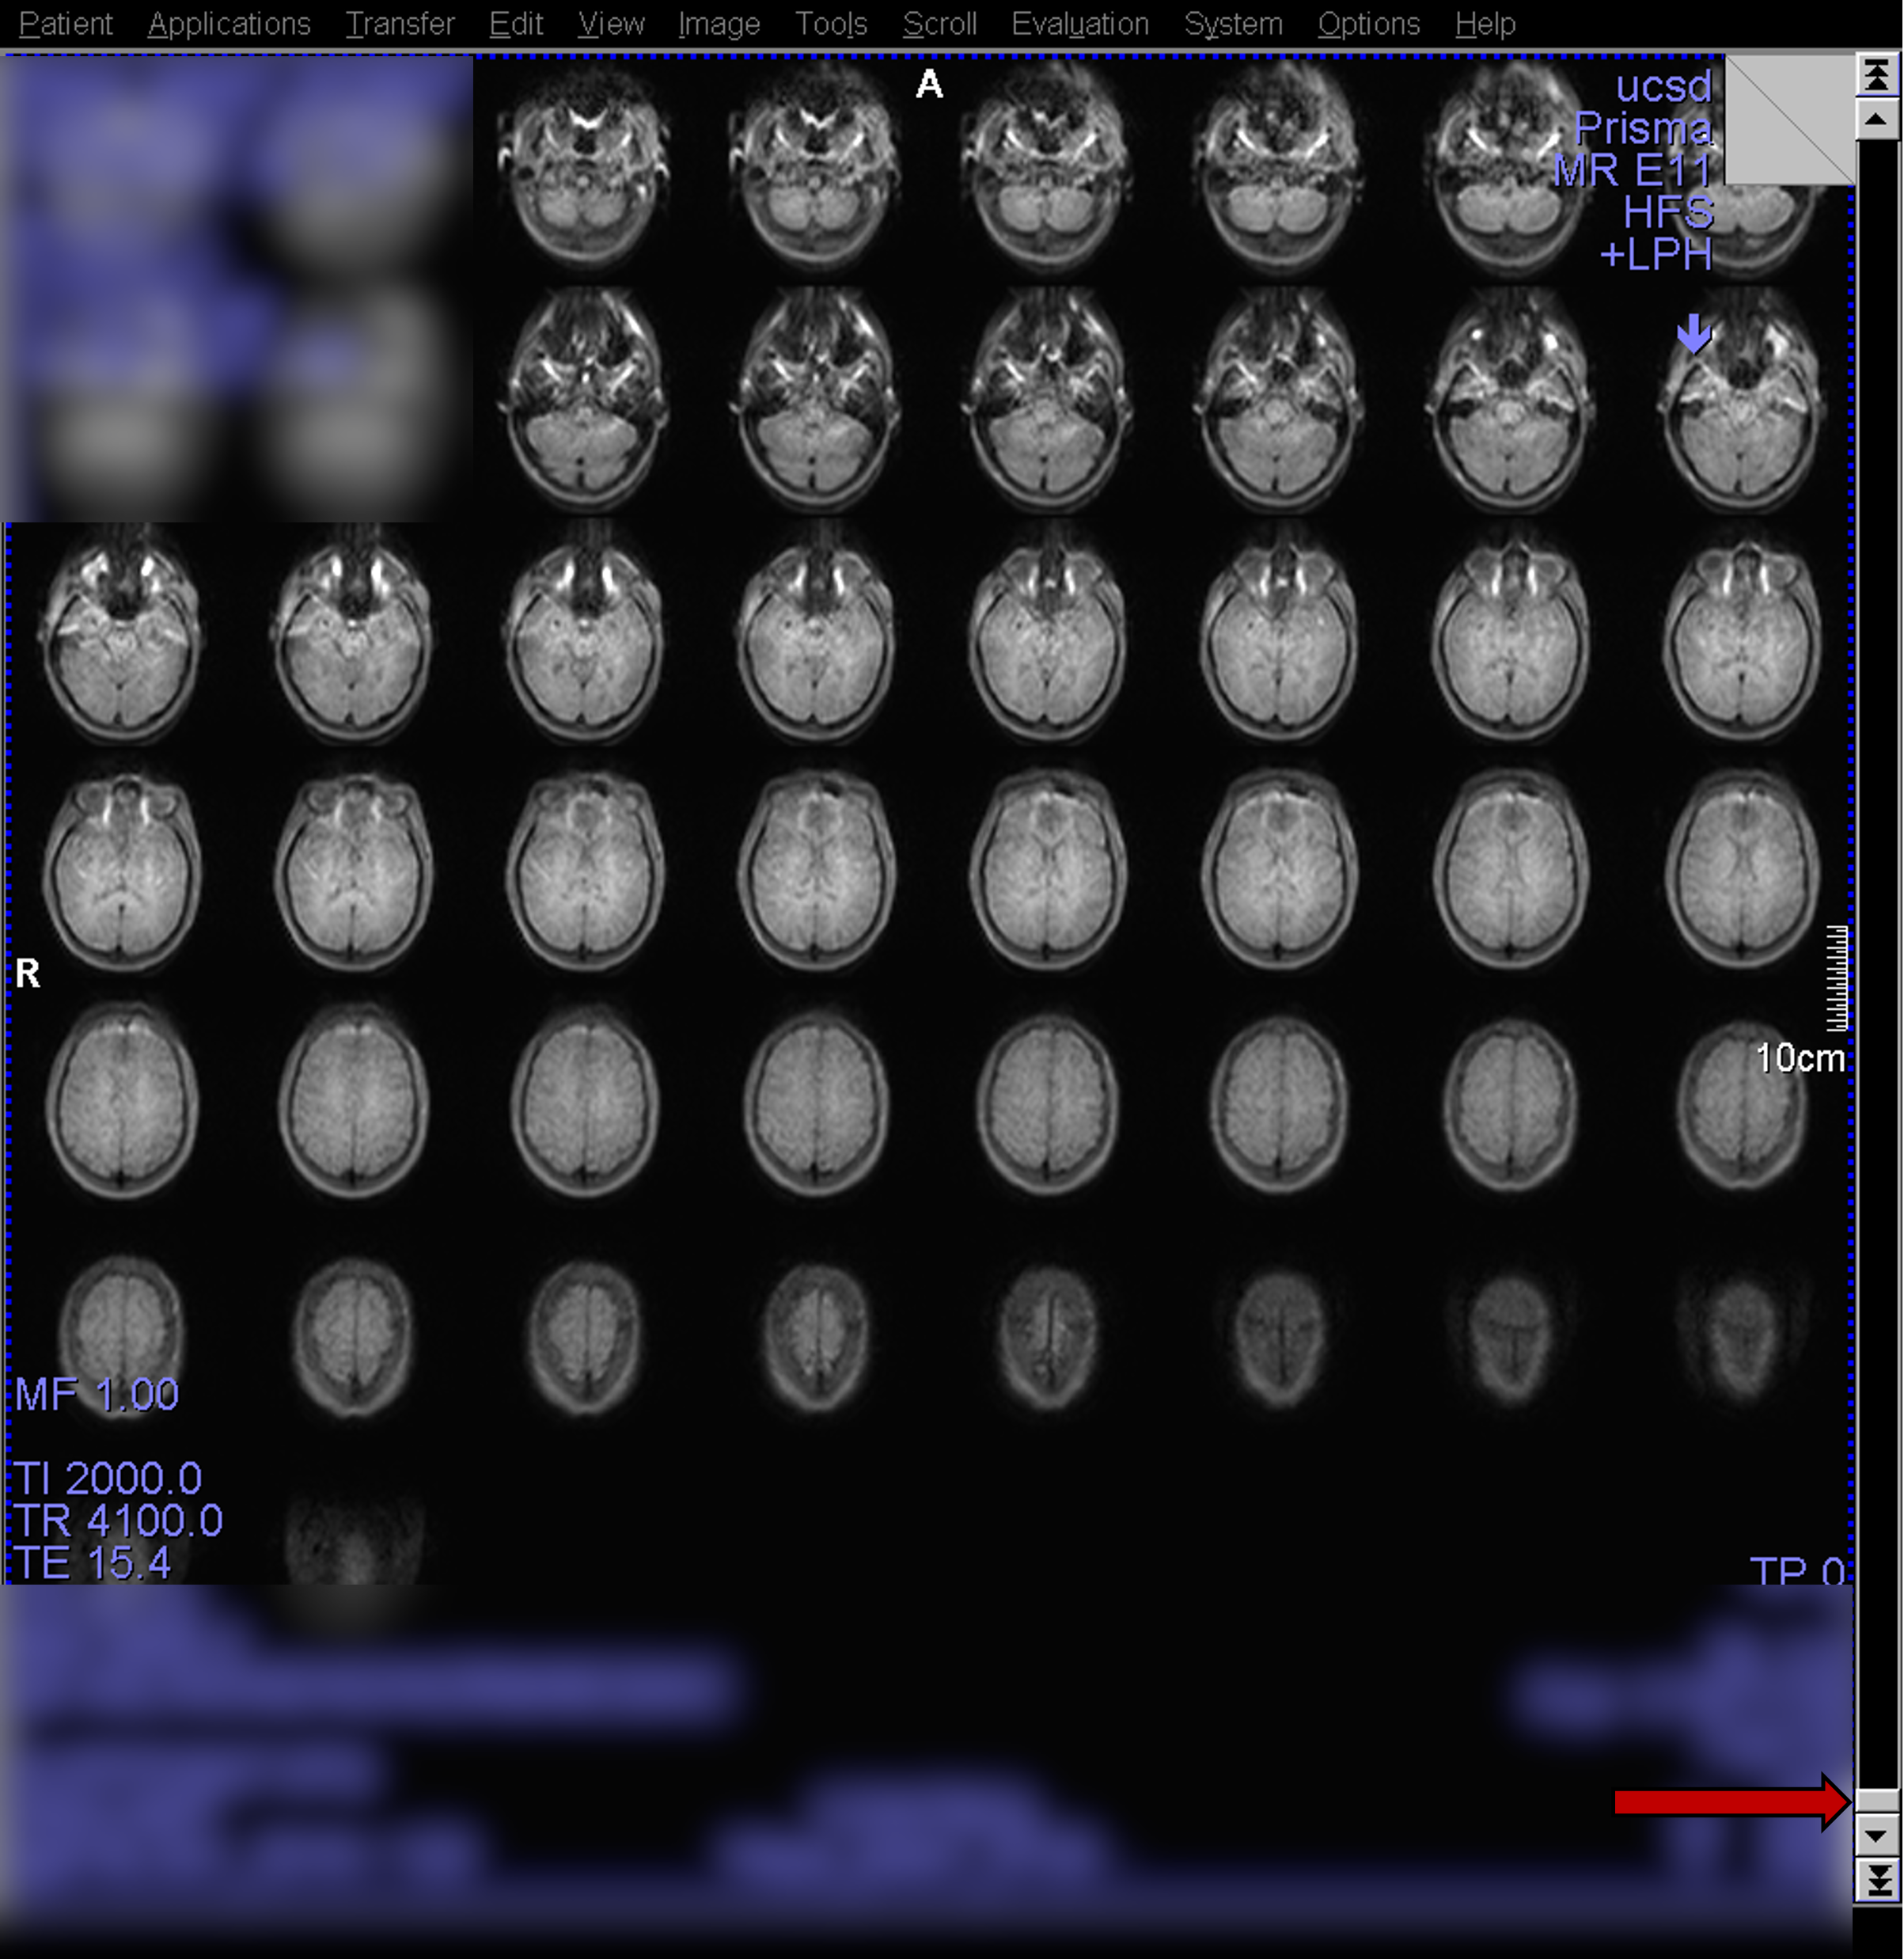
Here, it is a little harder to visually detect motion since the images are separate. On the scanner console however, any differences caused by motion will be obvious as you toggle between the first and last while staying in the same space.
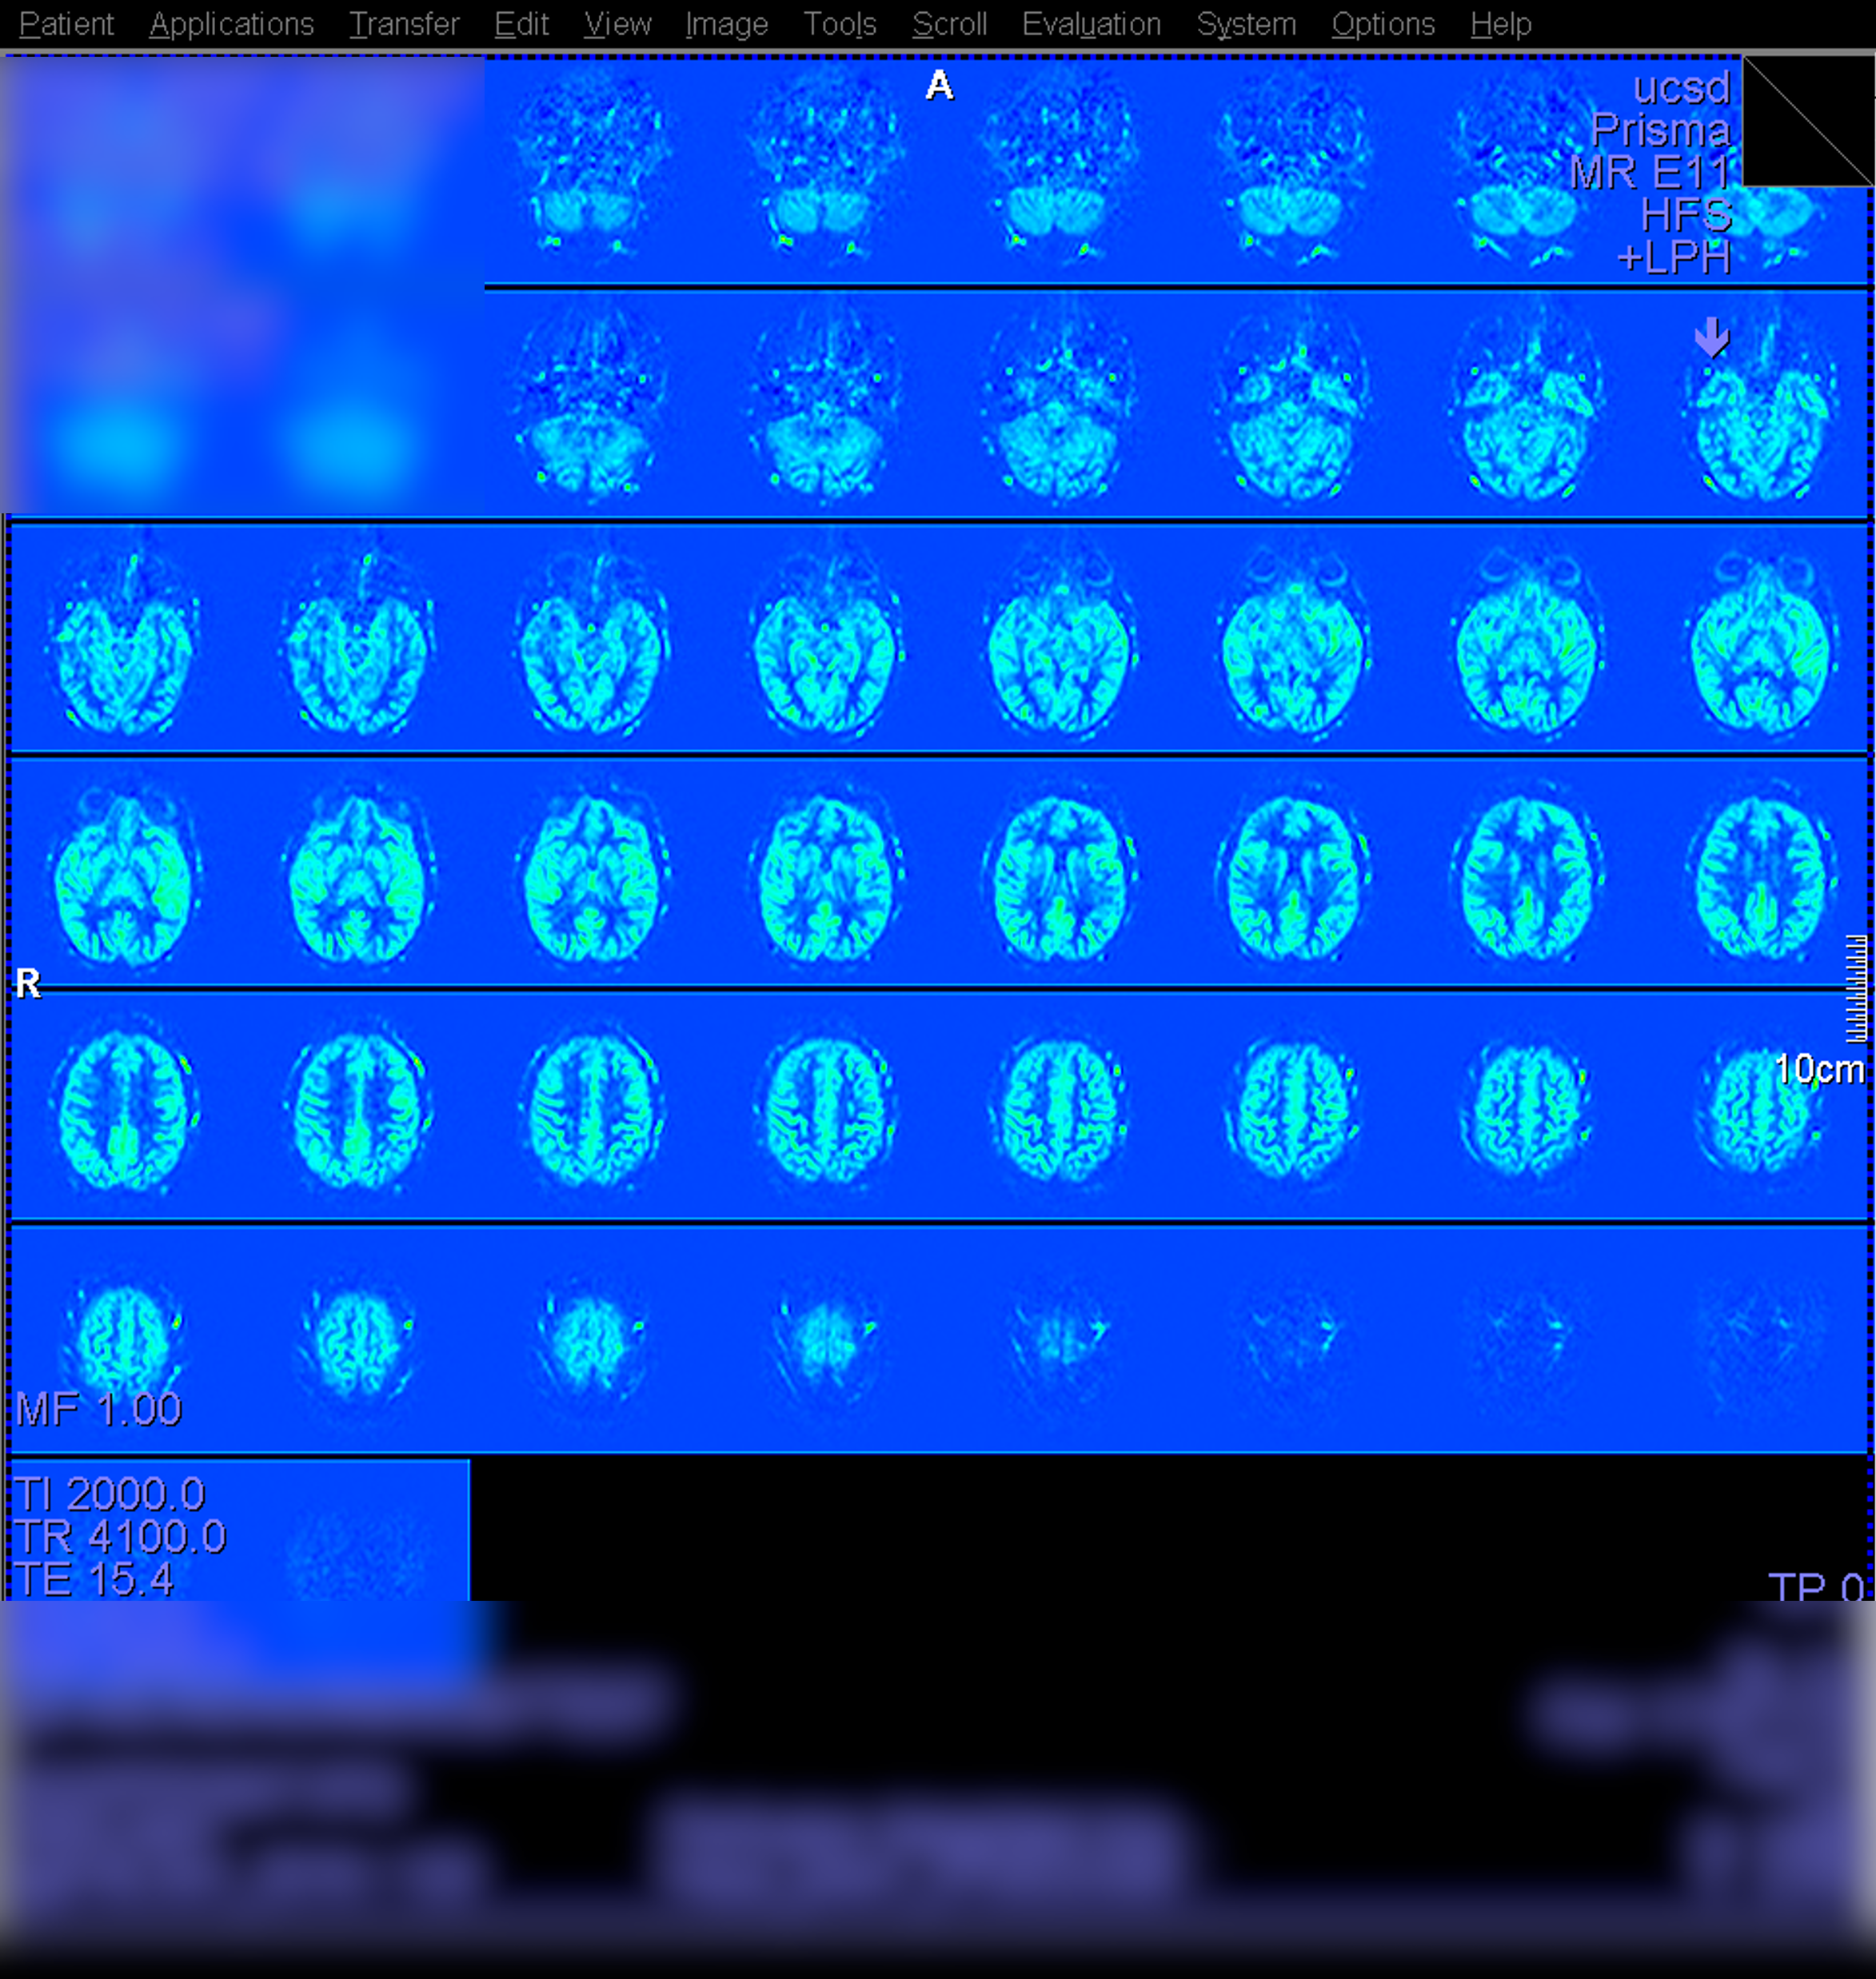
Looking at Perfusion_Weighted
The Perfusion_Weighted scan is derived from the original time series. It is computed as the mean (averaged across time) control - tag subtraction image. Below is an example of a high-quality PWI collected on a young healthy subject.
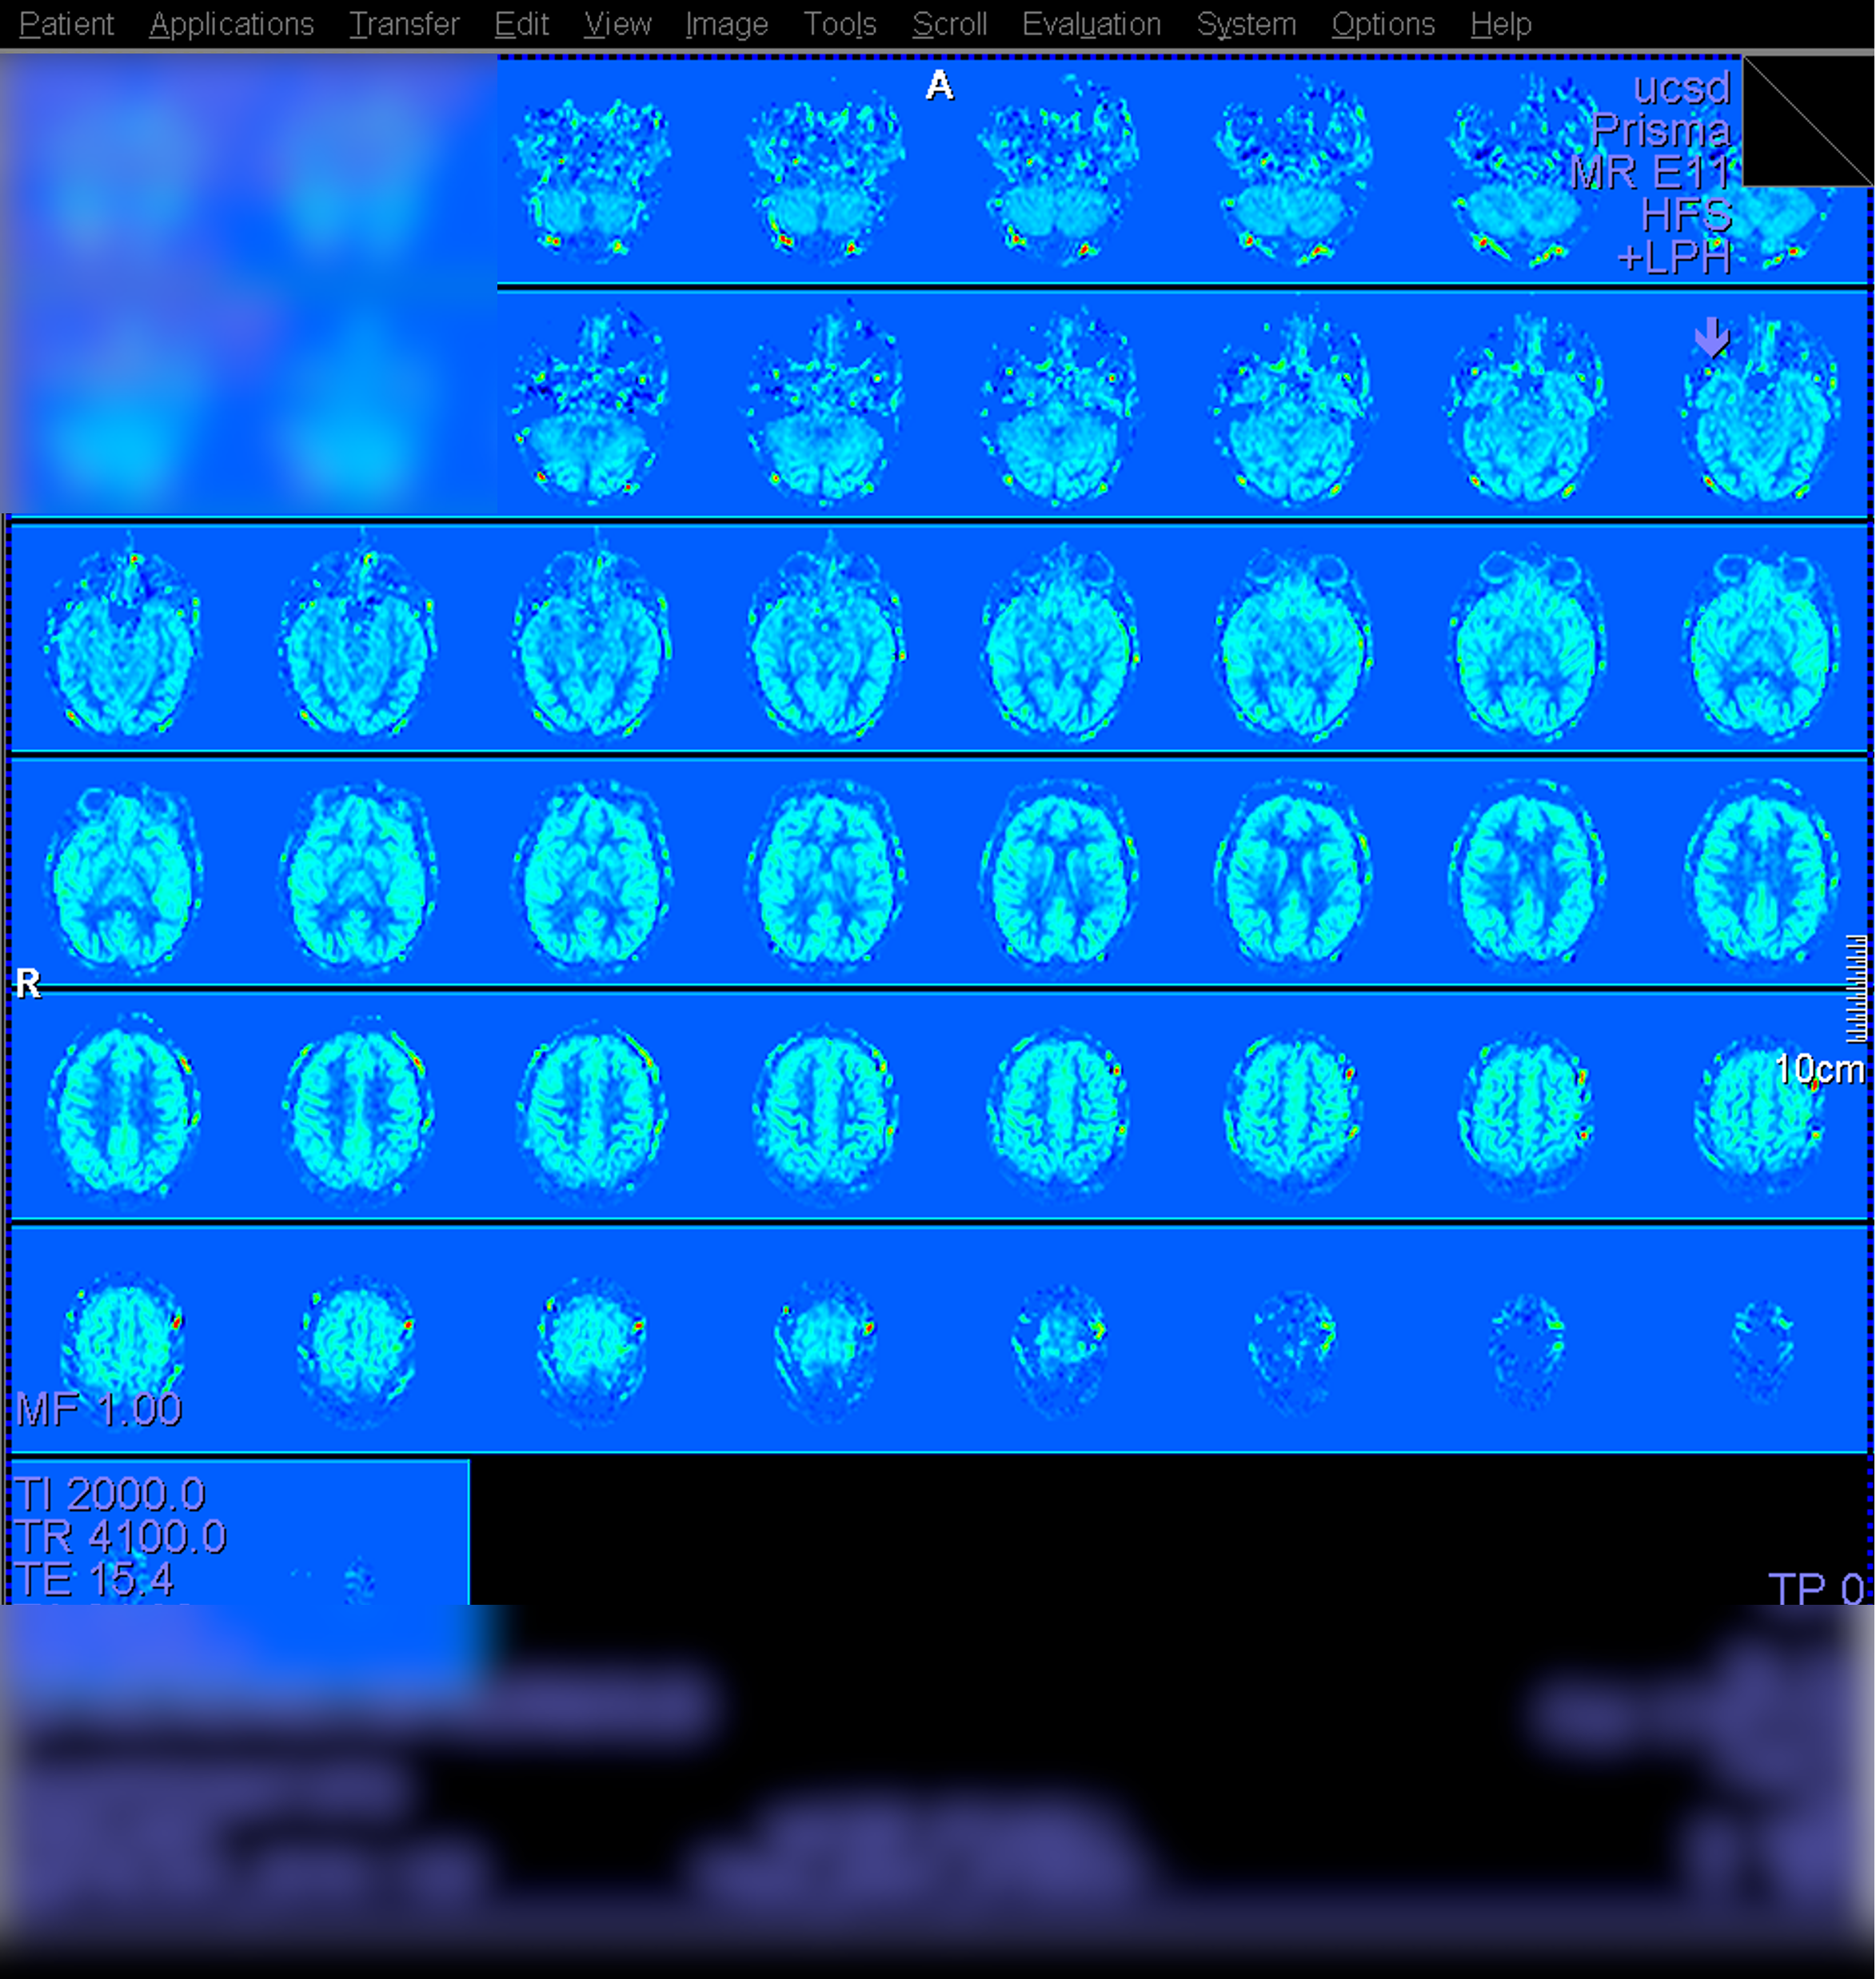
Looking at relCBF
The relCBF scan is derived from Perfusion_Weighted image by dividing by the M0 scan, plus additional scaling by other factors for a quantified CBF map. Below is an example of a high-quality CBF collected on a young healthy subject.
Example of poor labeling
Below is an instance of poor tagging/labeling due to significant subject motion which led to poor labeling. The scan session consisted of multiple ASL runs. Run #1 looked fairly normal, but the subject then made significant movement at some point before Run #2. The scan was prescribed as normal to the base of the cerebellum on the localizer image. However, because the initial localizer no longer reflected the subject’s actual position, the labeling plane was placed in a suboptimal location, resulting in poor labeling and yielding noisy perfusion signal for the scan.
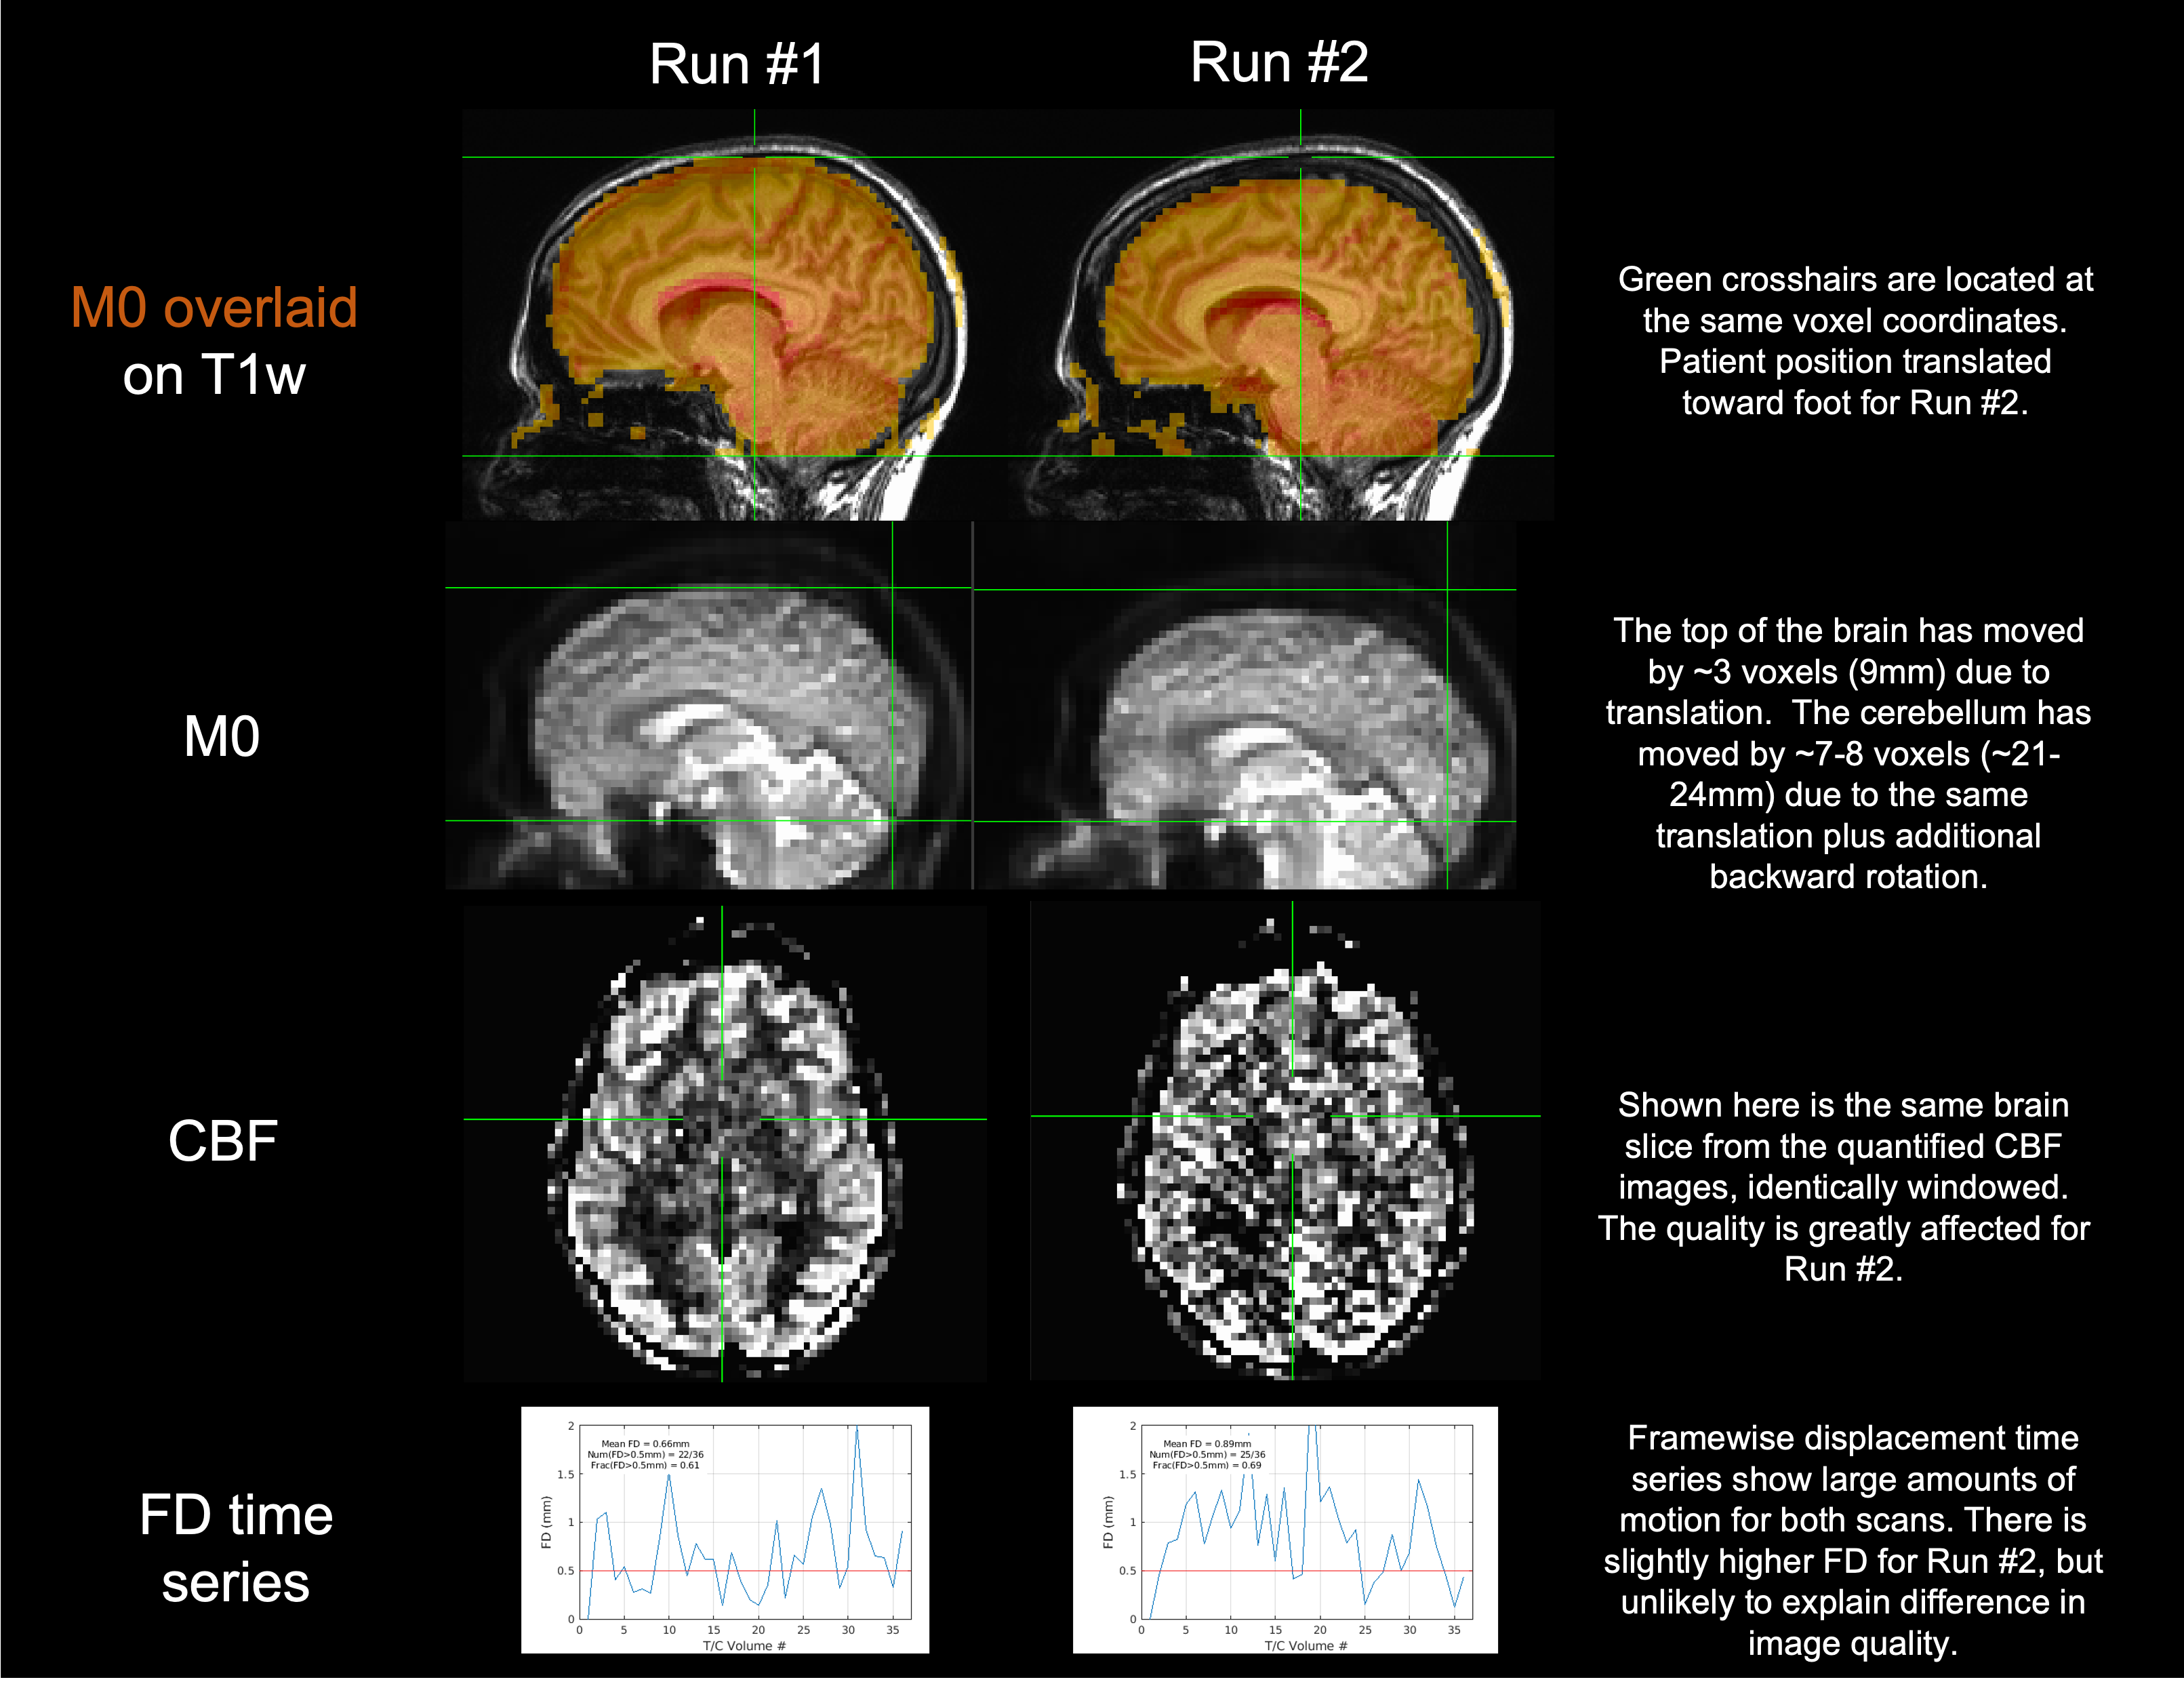
Viewed and windowed on the scanner, you may see the noisiness manifest as indicated in red.
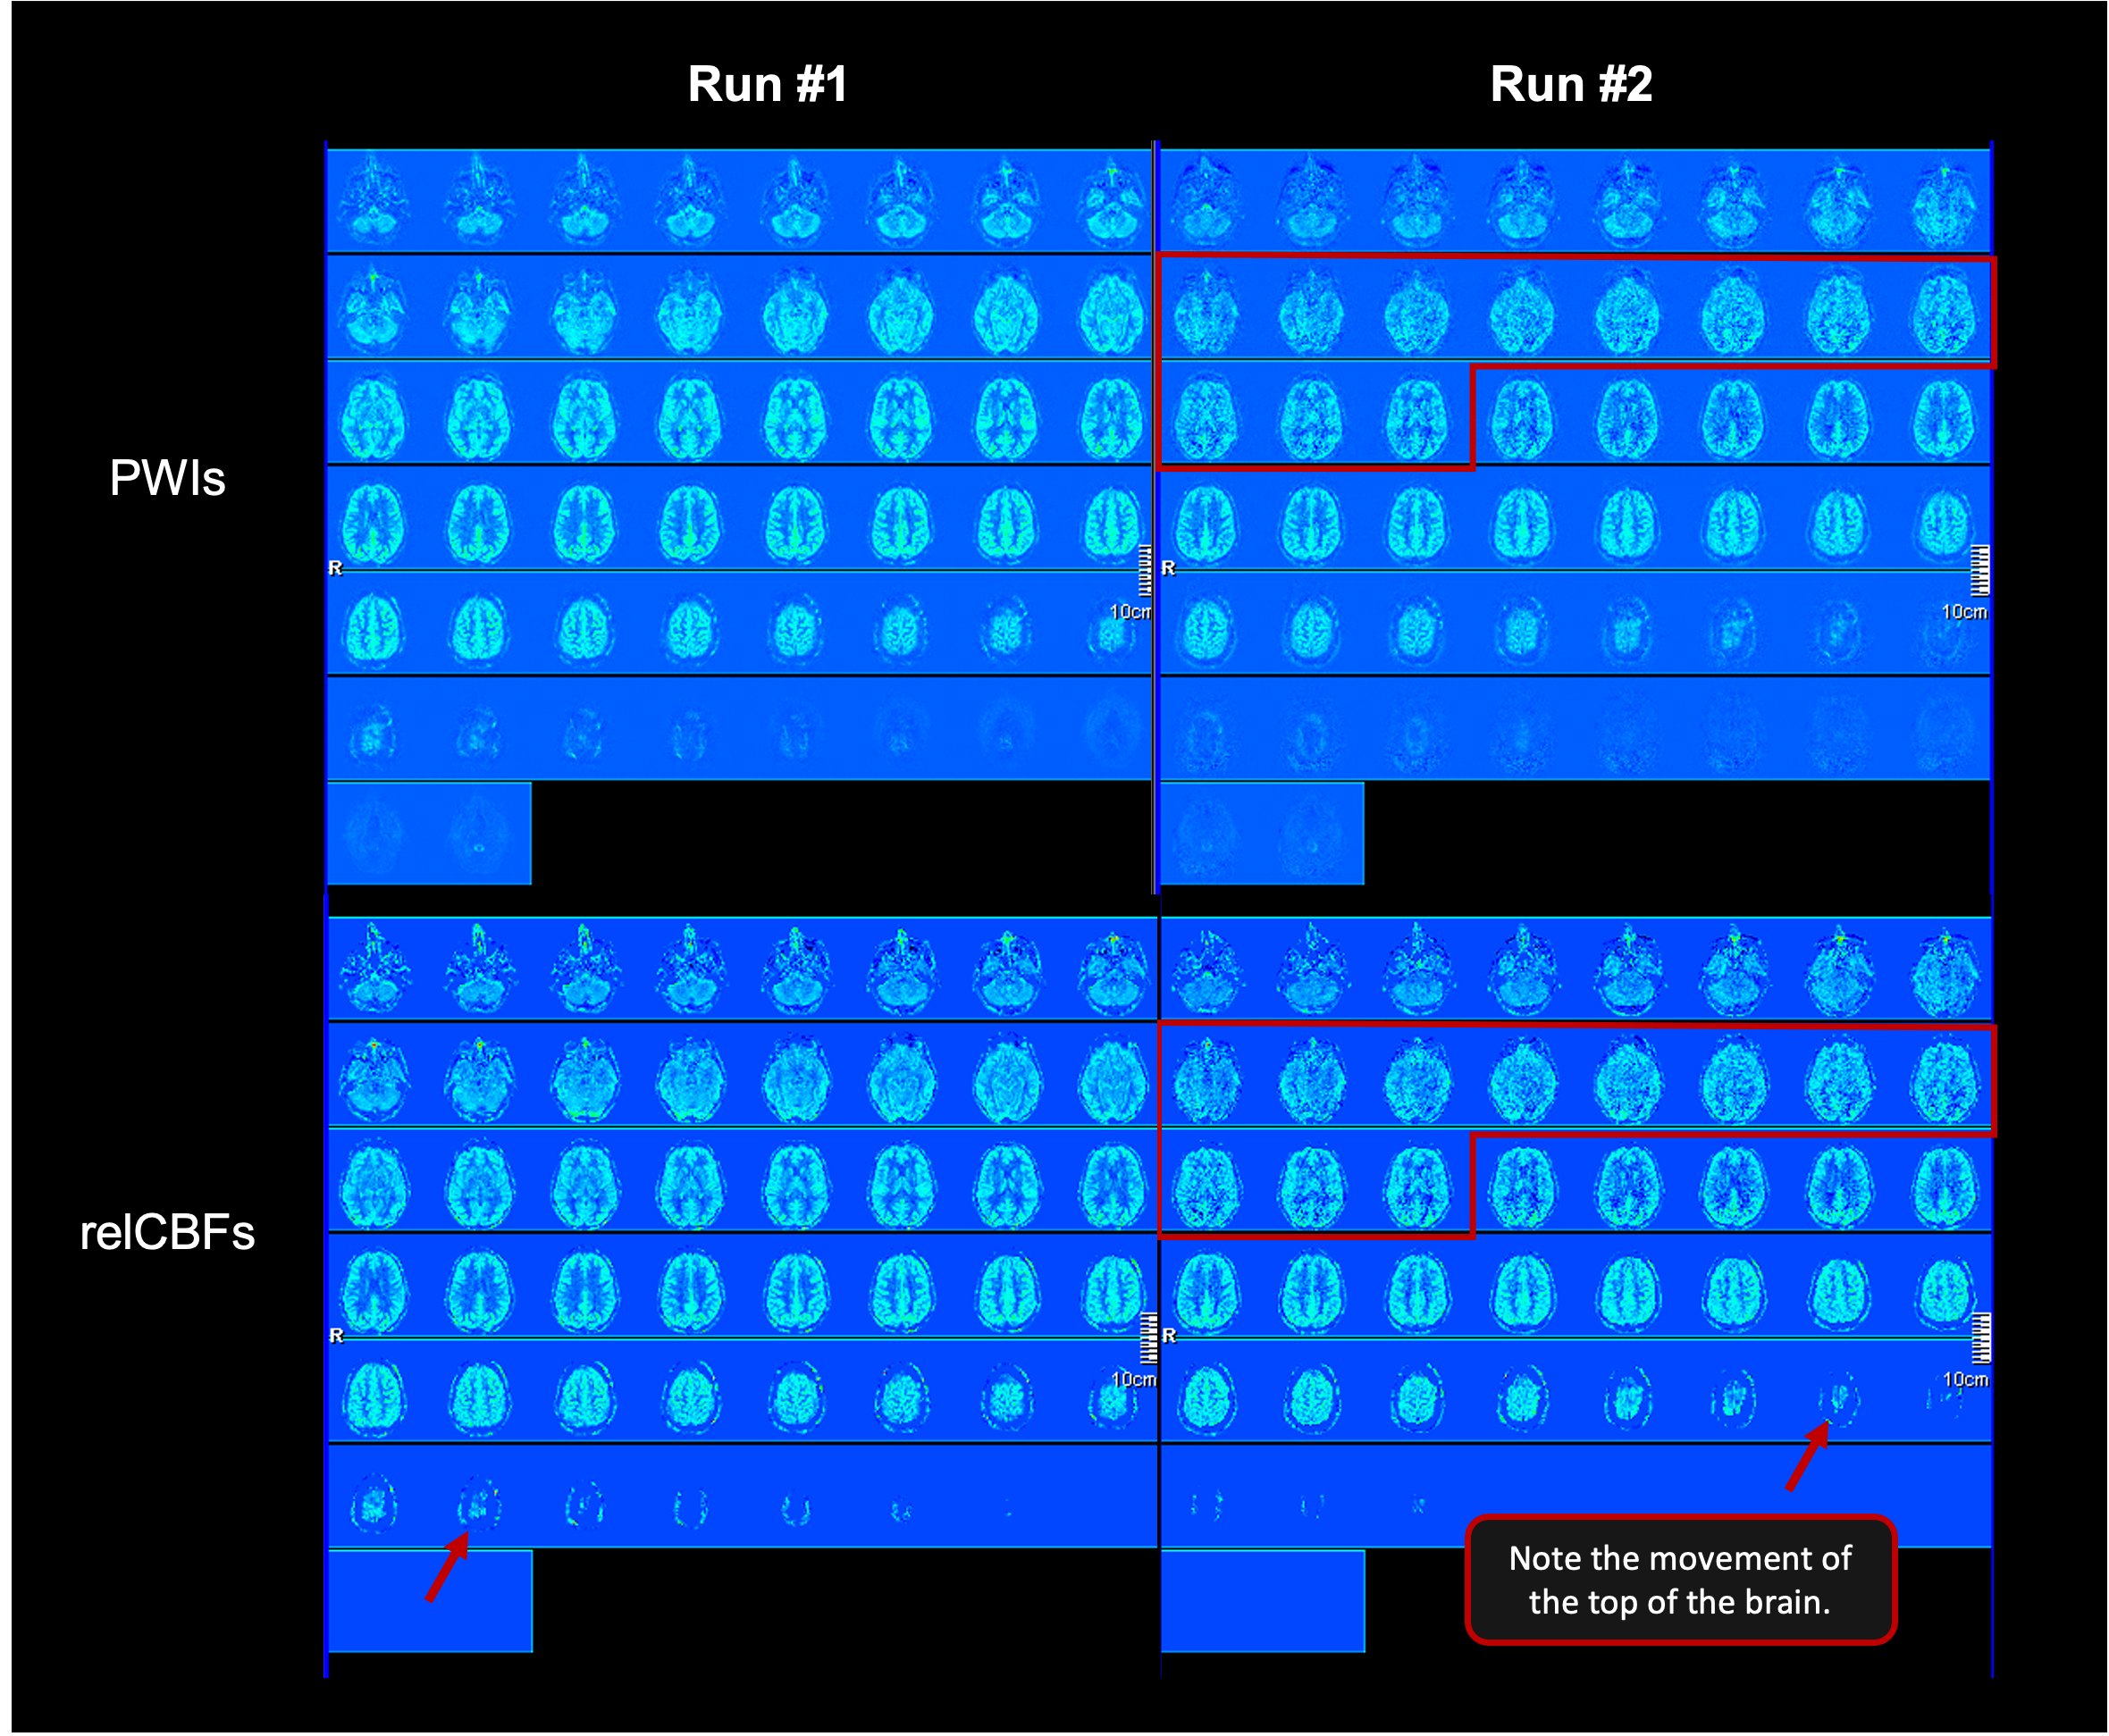
If you see this kind of image quality, consider re-running a localizer (to confirm their current position) and the ASL scan, if time permits in your session.
Retrospective Reconstruction for POCS
We recommend also using Projection Onto Convex Sets (POCS) for Partial Fourier reconstruction. This reconstruction option is not available from the standard scan configuration, but it can be accessed via the Retrospective Reconstruction (RR) workflow. Note: RR can only be done when there is no scan running! We thus recommend saving this step for the end of your scanning session, quickly initiating it before re-entering the magnet room for subject retrieval and scanner cleanup.
RR Steps
On the scanner console computer, hold Shift and then left click on the echo icon located in the toolbar. Remember the Shift - it is easy to forget!

In the window that pops up, find and click the ASL scan for performing RR. It should now be highlighted in blue. Click the Edit Protocol button. On the Edit Protocol screen in the POCS dropdown field, select POCS_ALL. This should be the only change you need to make - ensure your screen matches the screenshot below.
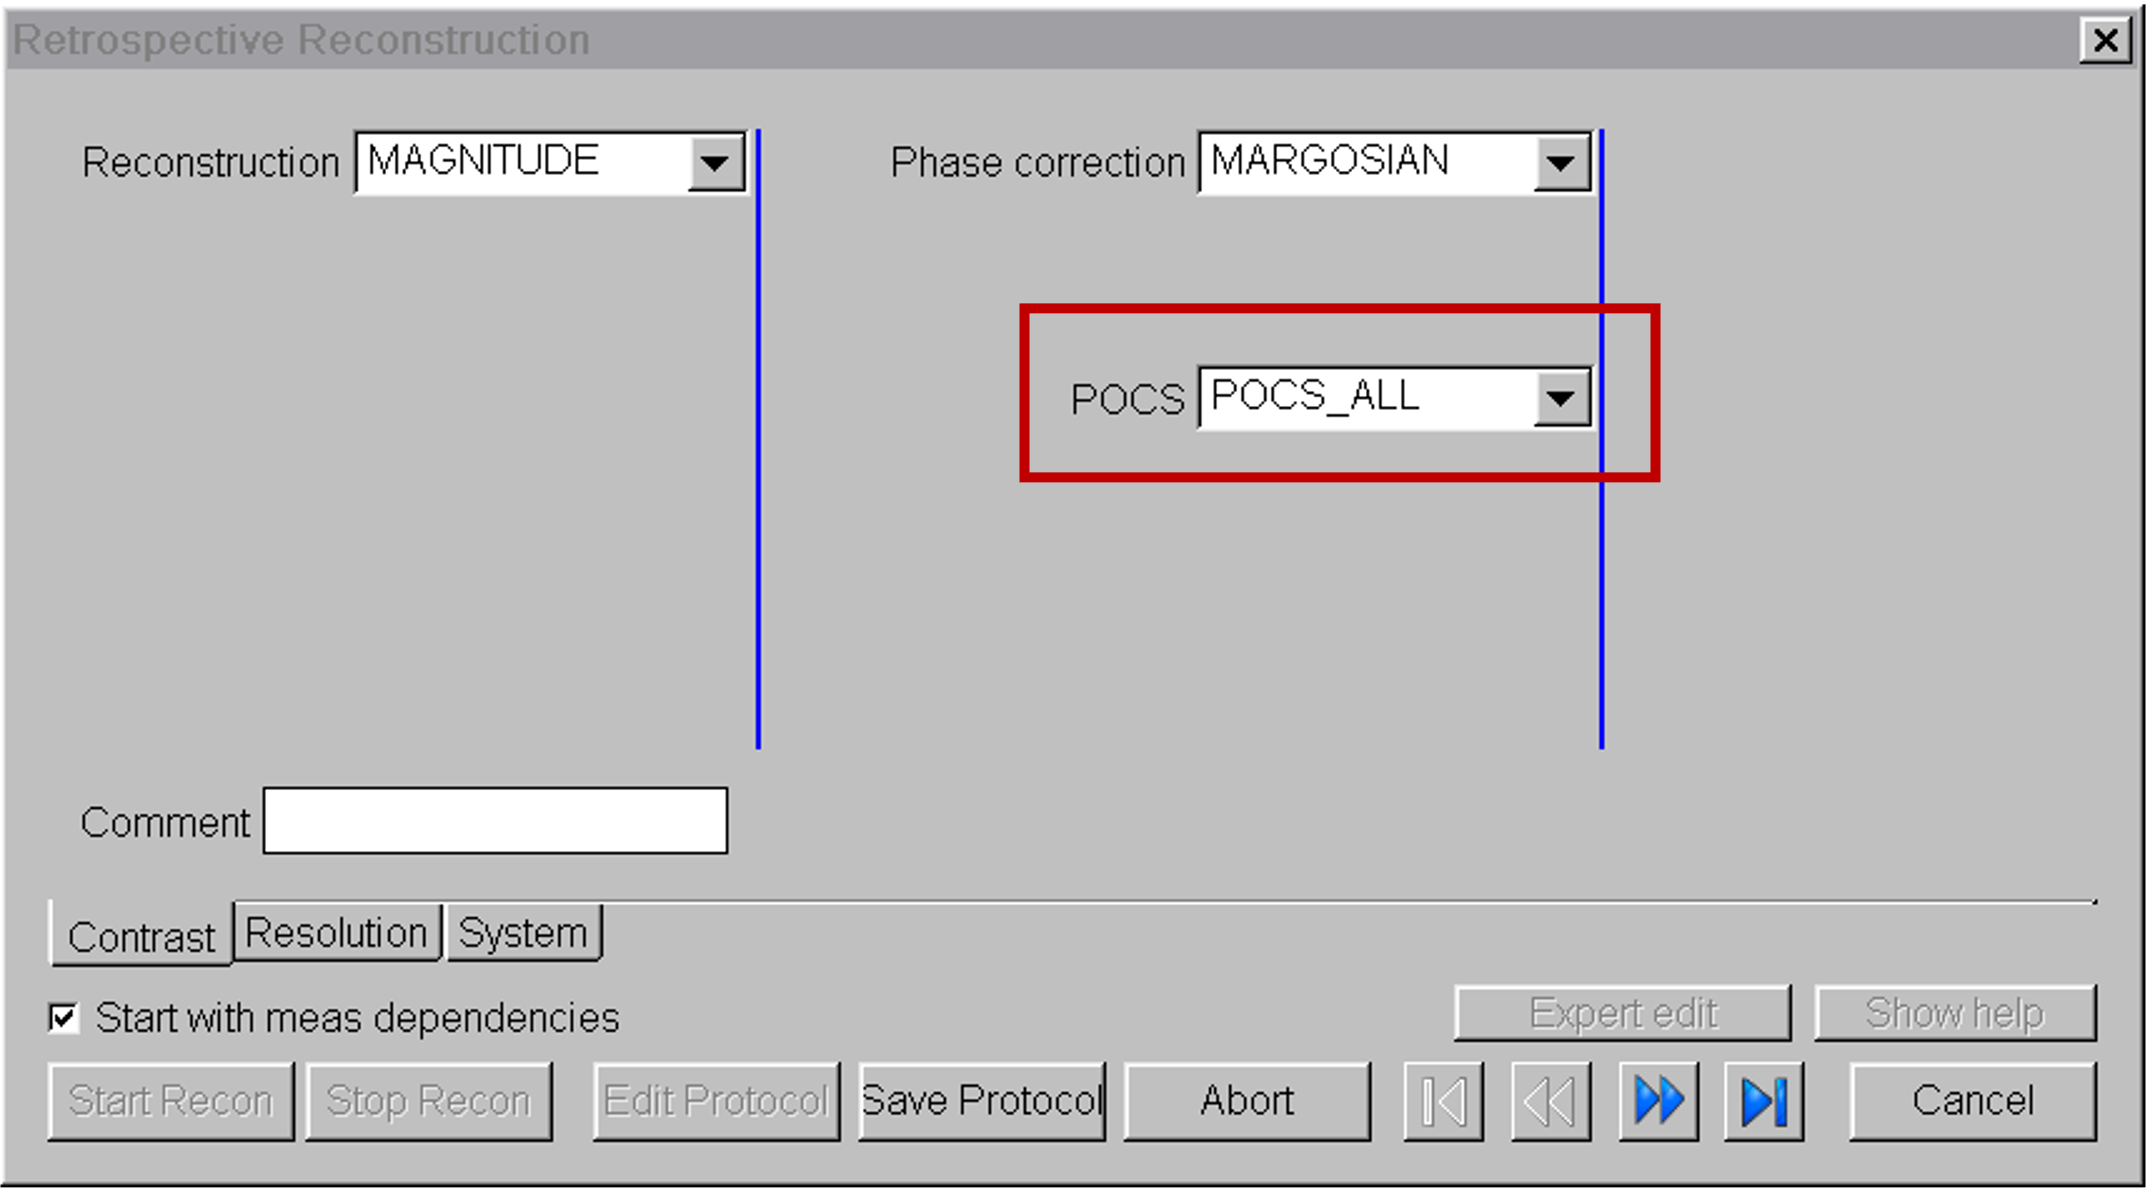
Click Save Protocol and then Start Recon. The process should take about 30s to run. You can tell it is complete when you see the green check mark in the status column.
For each ASL scan series where you take these steps, a new scan series will be generated (which you can see on the console in Patient Browser) with suffix _RR. The original DICOM series without POCS is still retained in your dataset, so there is no downside to running this process.
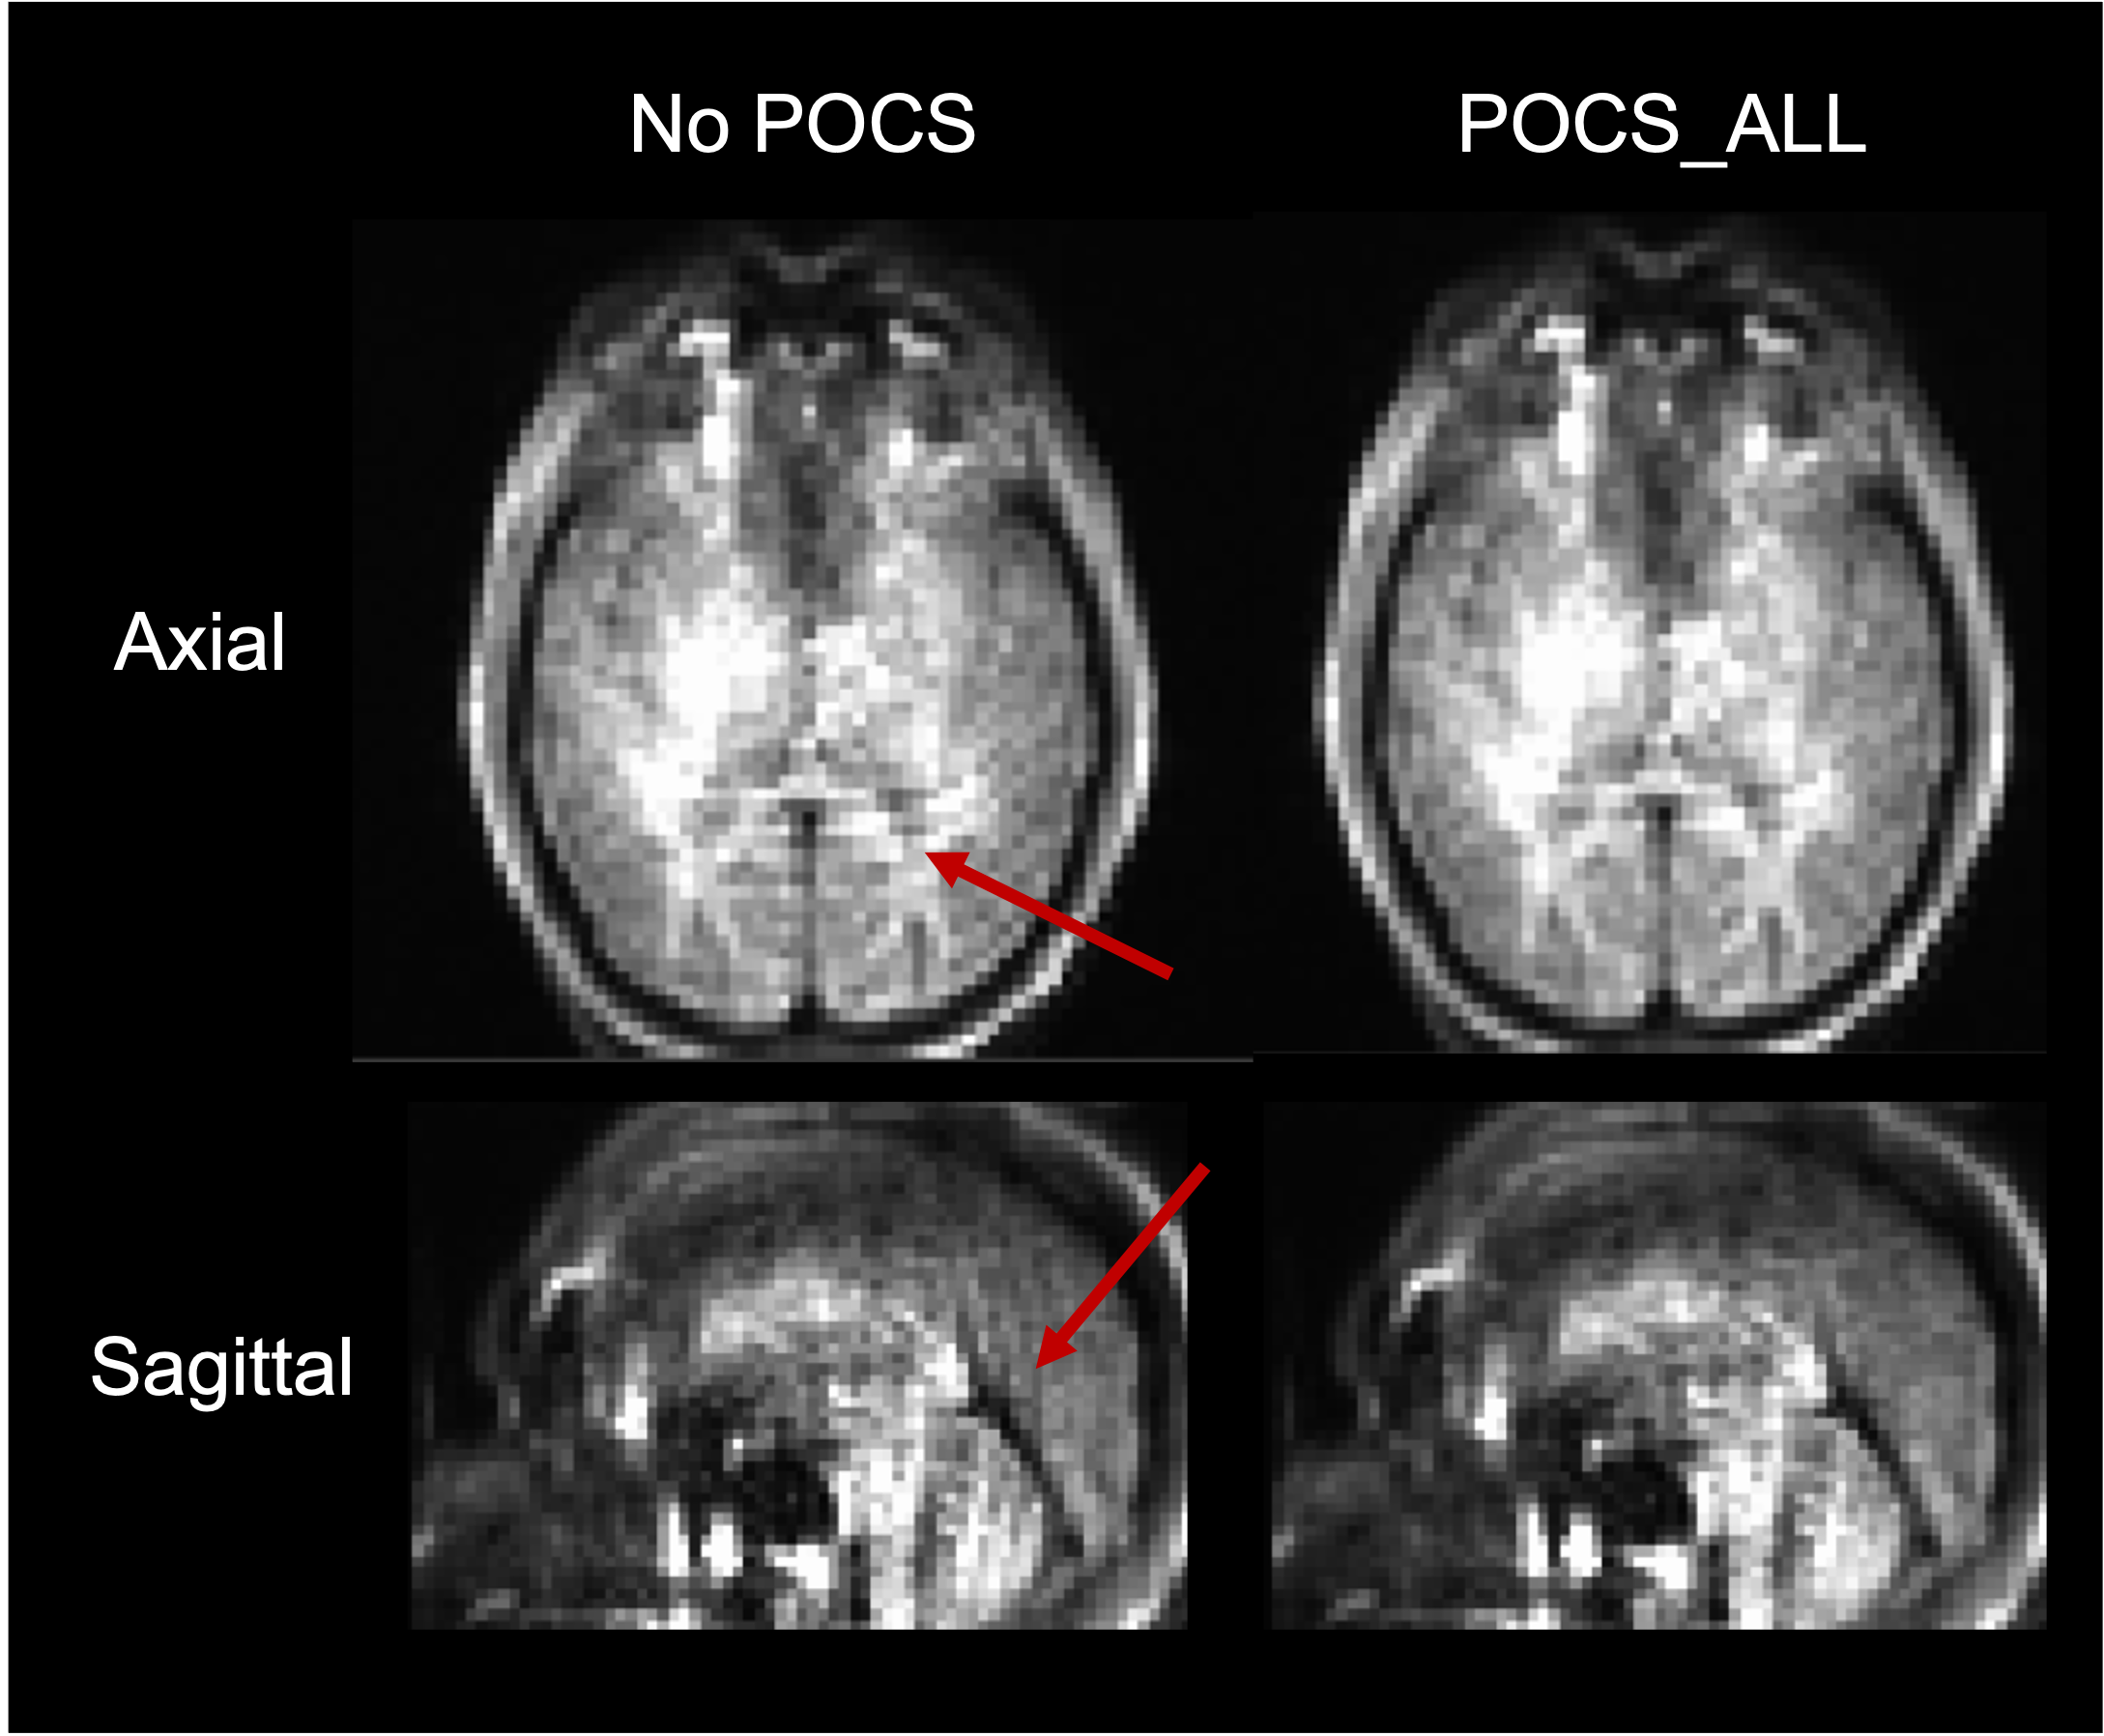
POCS Effect
The image below shows an example tag image. The red arrows highlight Gibbs ringing artifacts from Partial Fourier, which POCS reconstruction helps clean up. Even without POCS reconstruction, such artifacts are rarely seen in the PWI or CBF images as they are typically subtracted out. However this workflow is still recommended for obtaining the best data quality possible and prevent those rare cases where a subtle subtraction artifact is present.
Logging Physio
If you would like to record physiological signal, please see the Siemens Physio page.