FIRMM Usage with High Dynamic Range (HDR) Enabled
Initiating the FIRMM Real-Time Motion Plotting Software with HDR Enabled
Stop the Default FIRMM Connection
Attention
BEFORE REGISTERING YOUR PATIENT: Stop the current FIRMM processes (by default, the FIRMM software will be running when you arrive at the scanner).
Hit: “Cntrl-Esc” to open the standard Windows menu
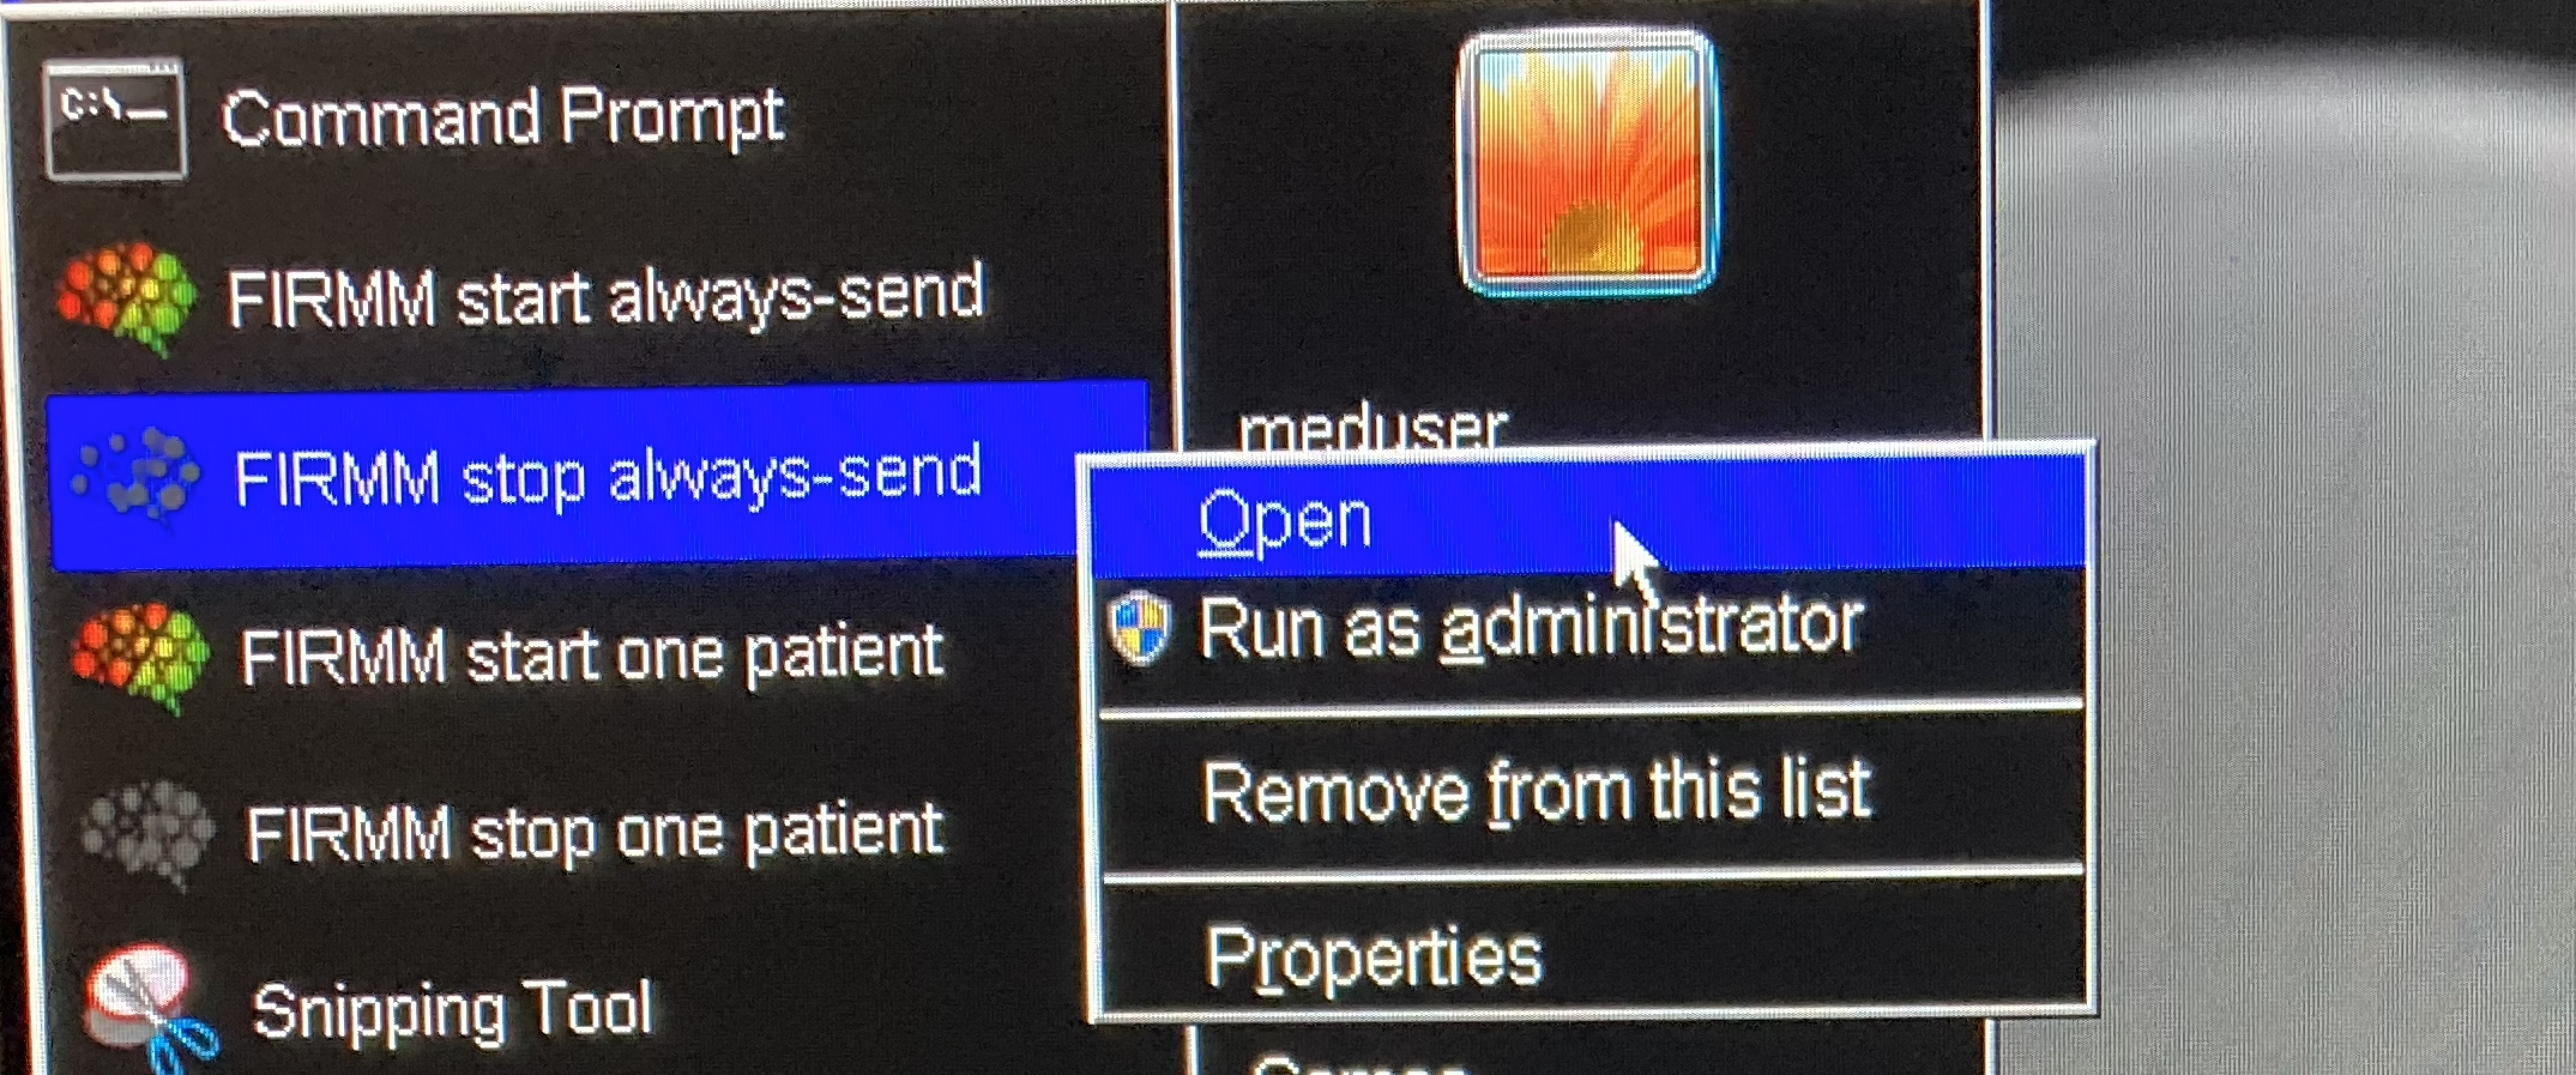
Near the top of the menu, you will see several FIRMM-related options
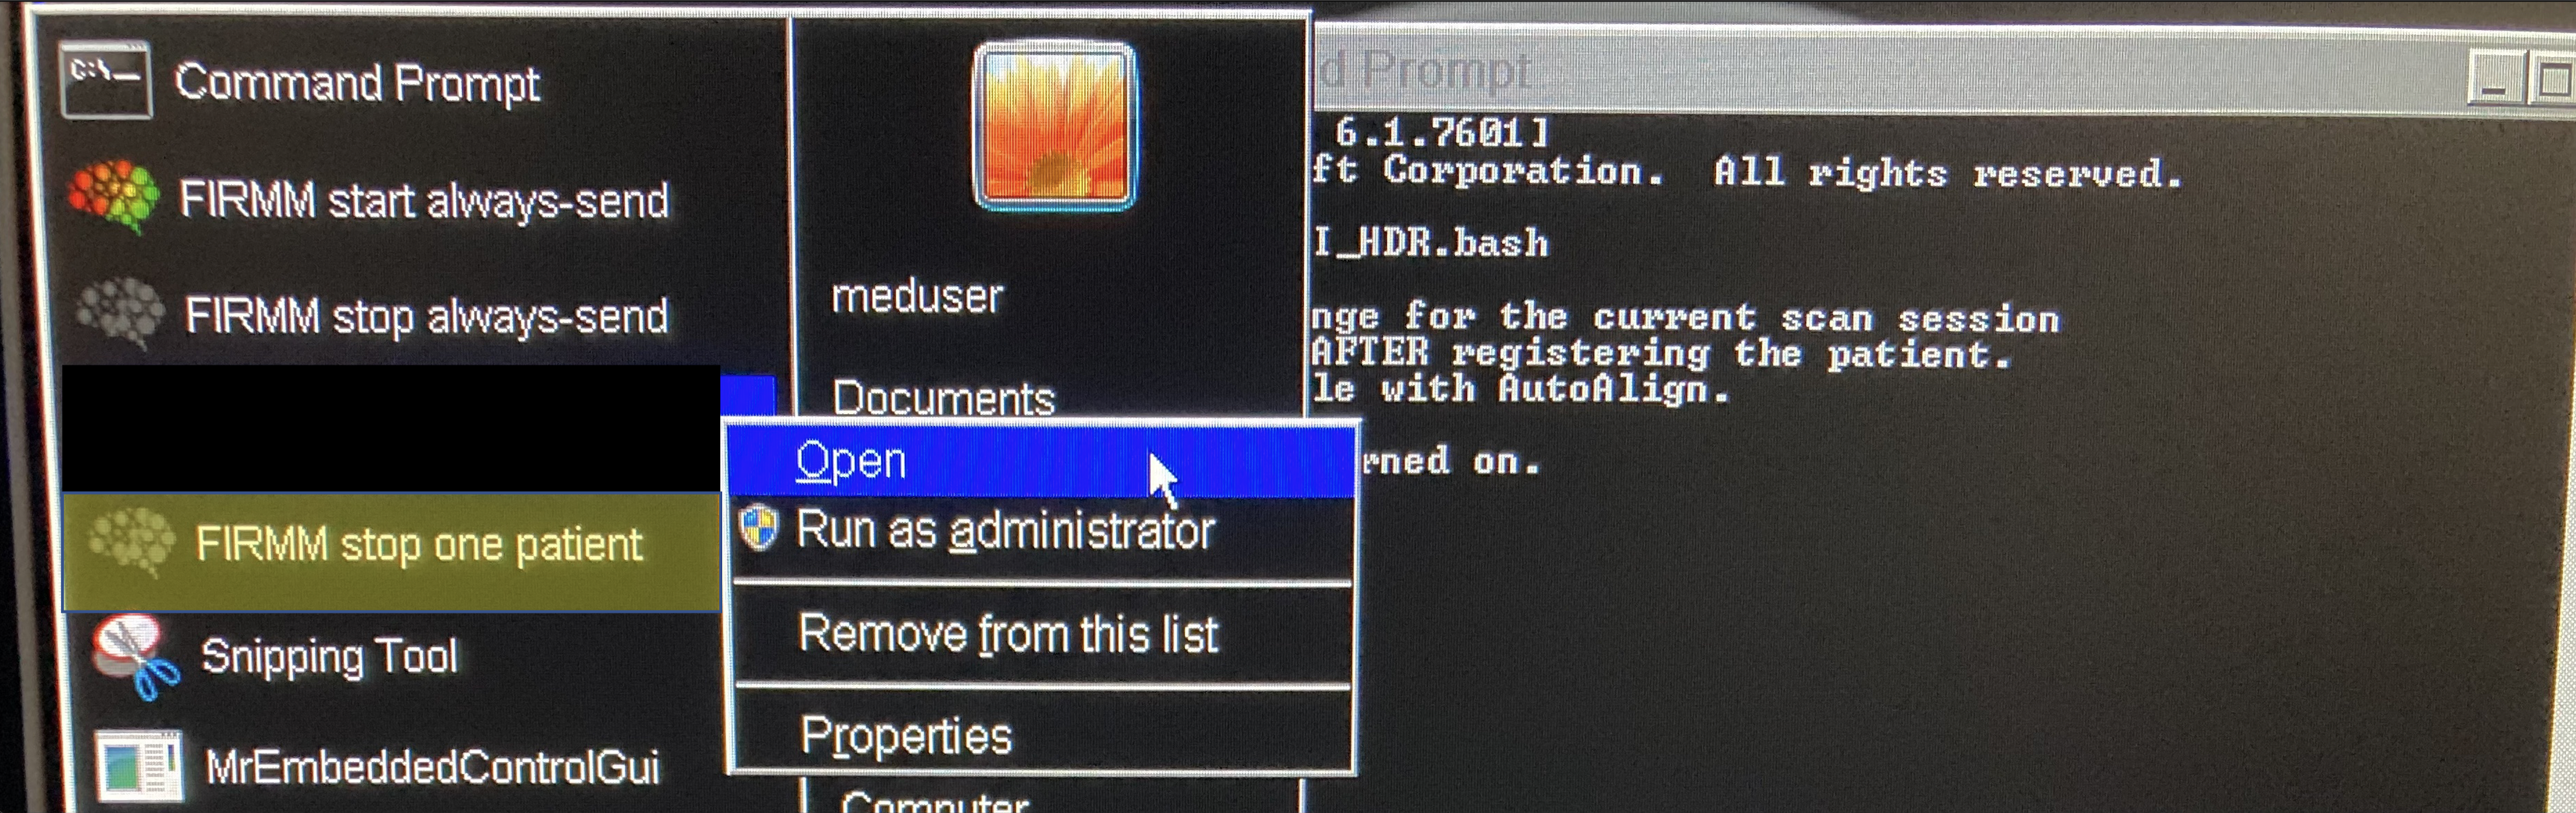
Right-click on “FIRMM stop always-send”
In the sub-menu for this option, click “Open”
DO NOT SELECT “Run as administrator”
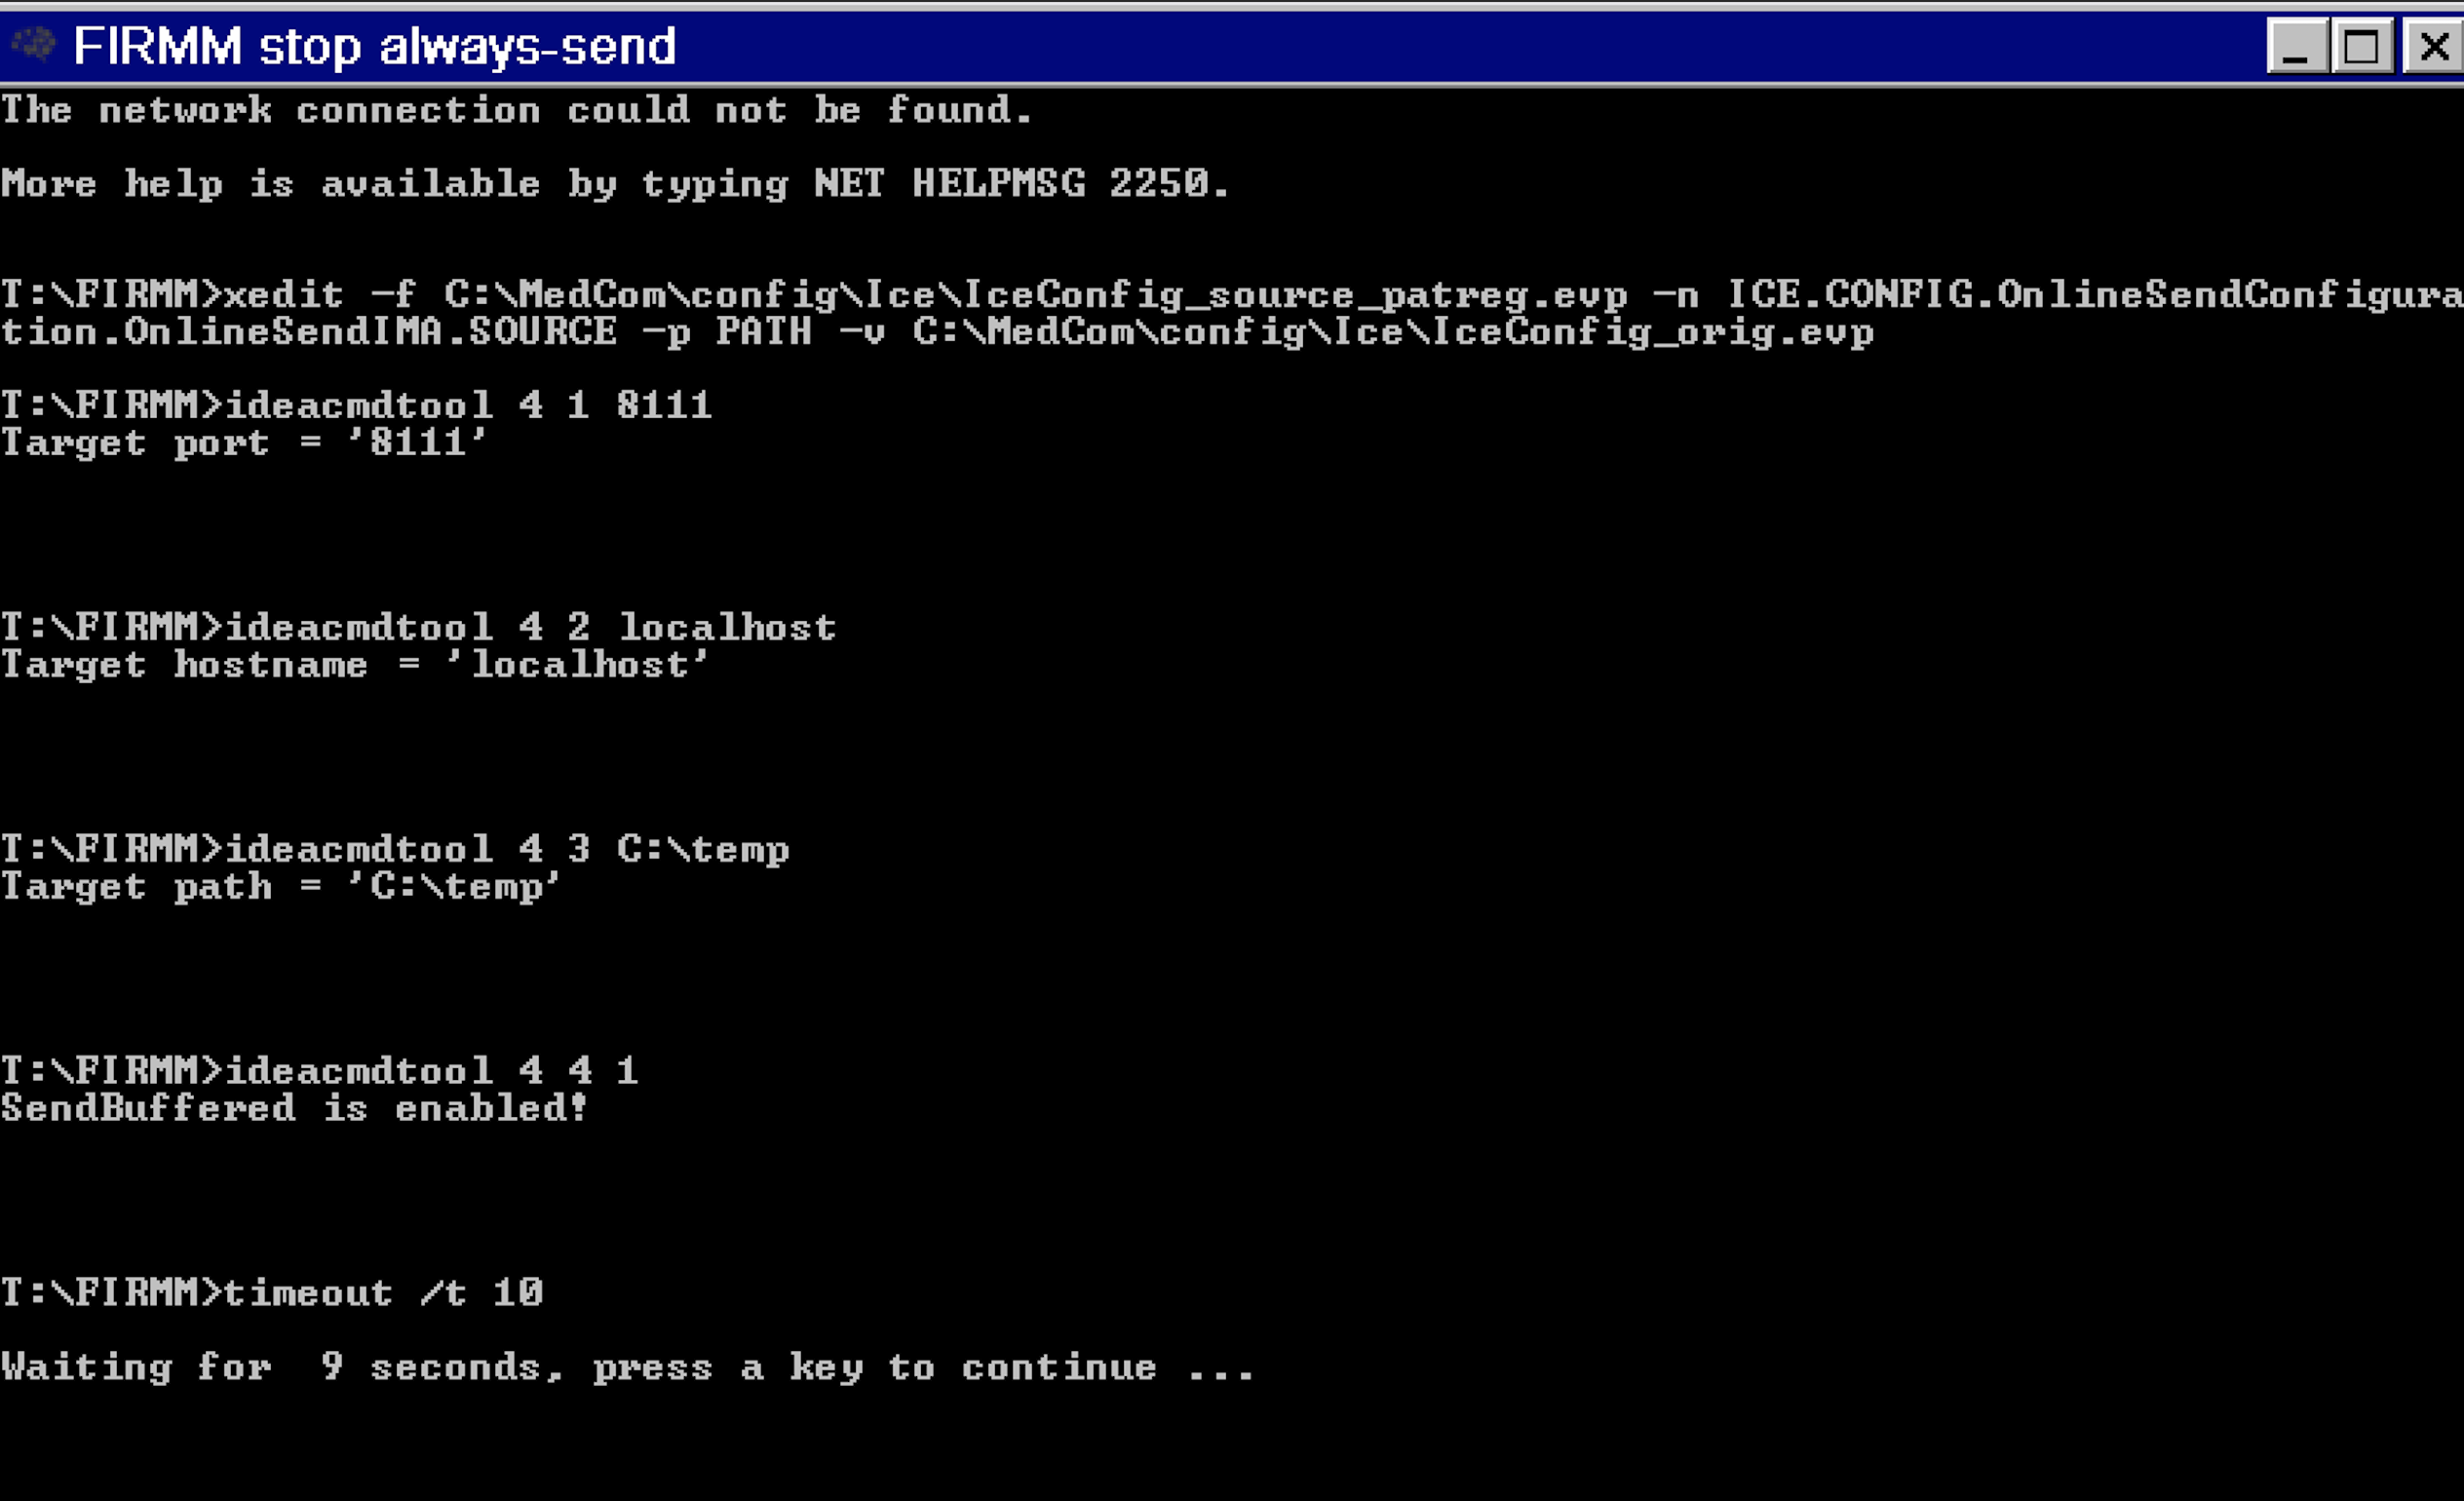
A terminal will open and the FIRMM system will start shutting down the connection to the scanner
Allow the terminal window to complete the process before closing it
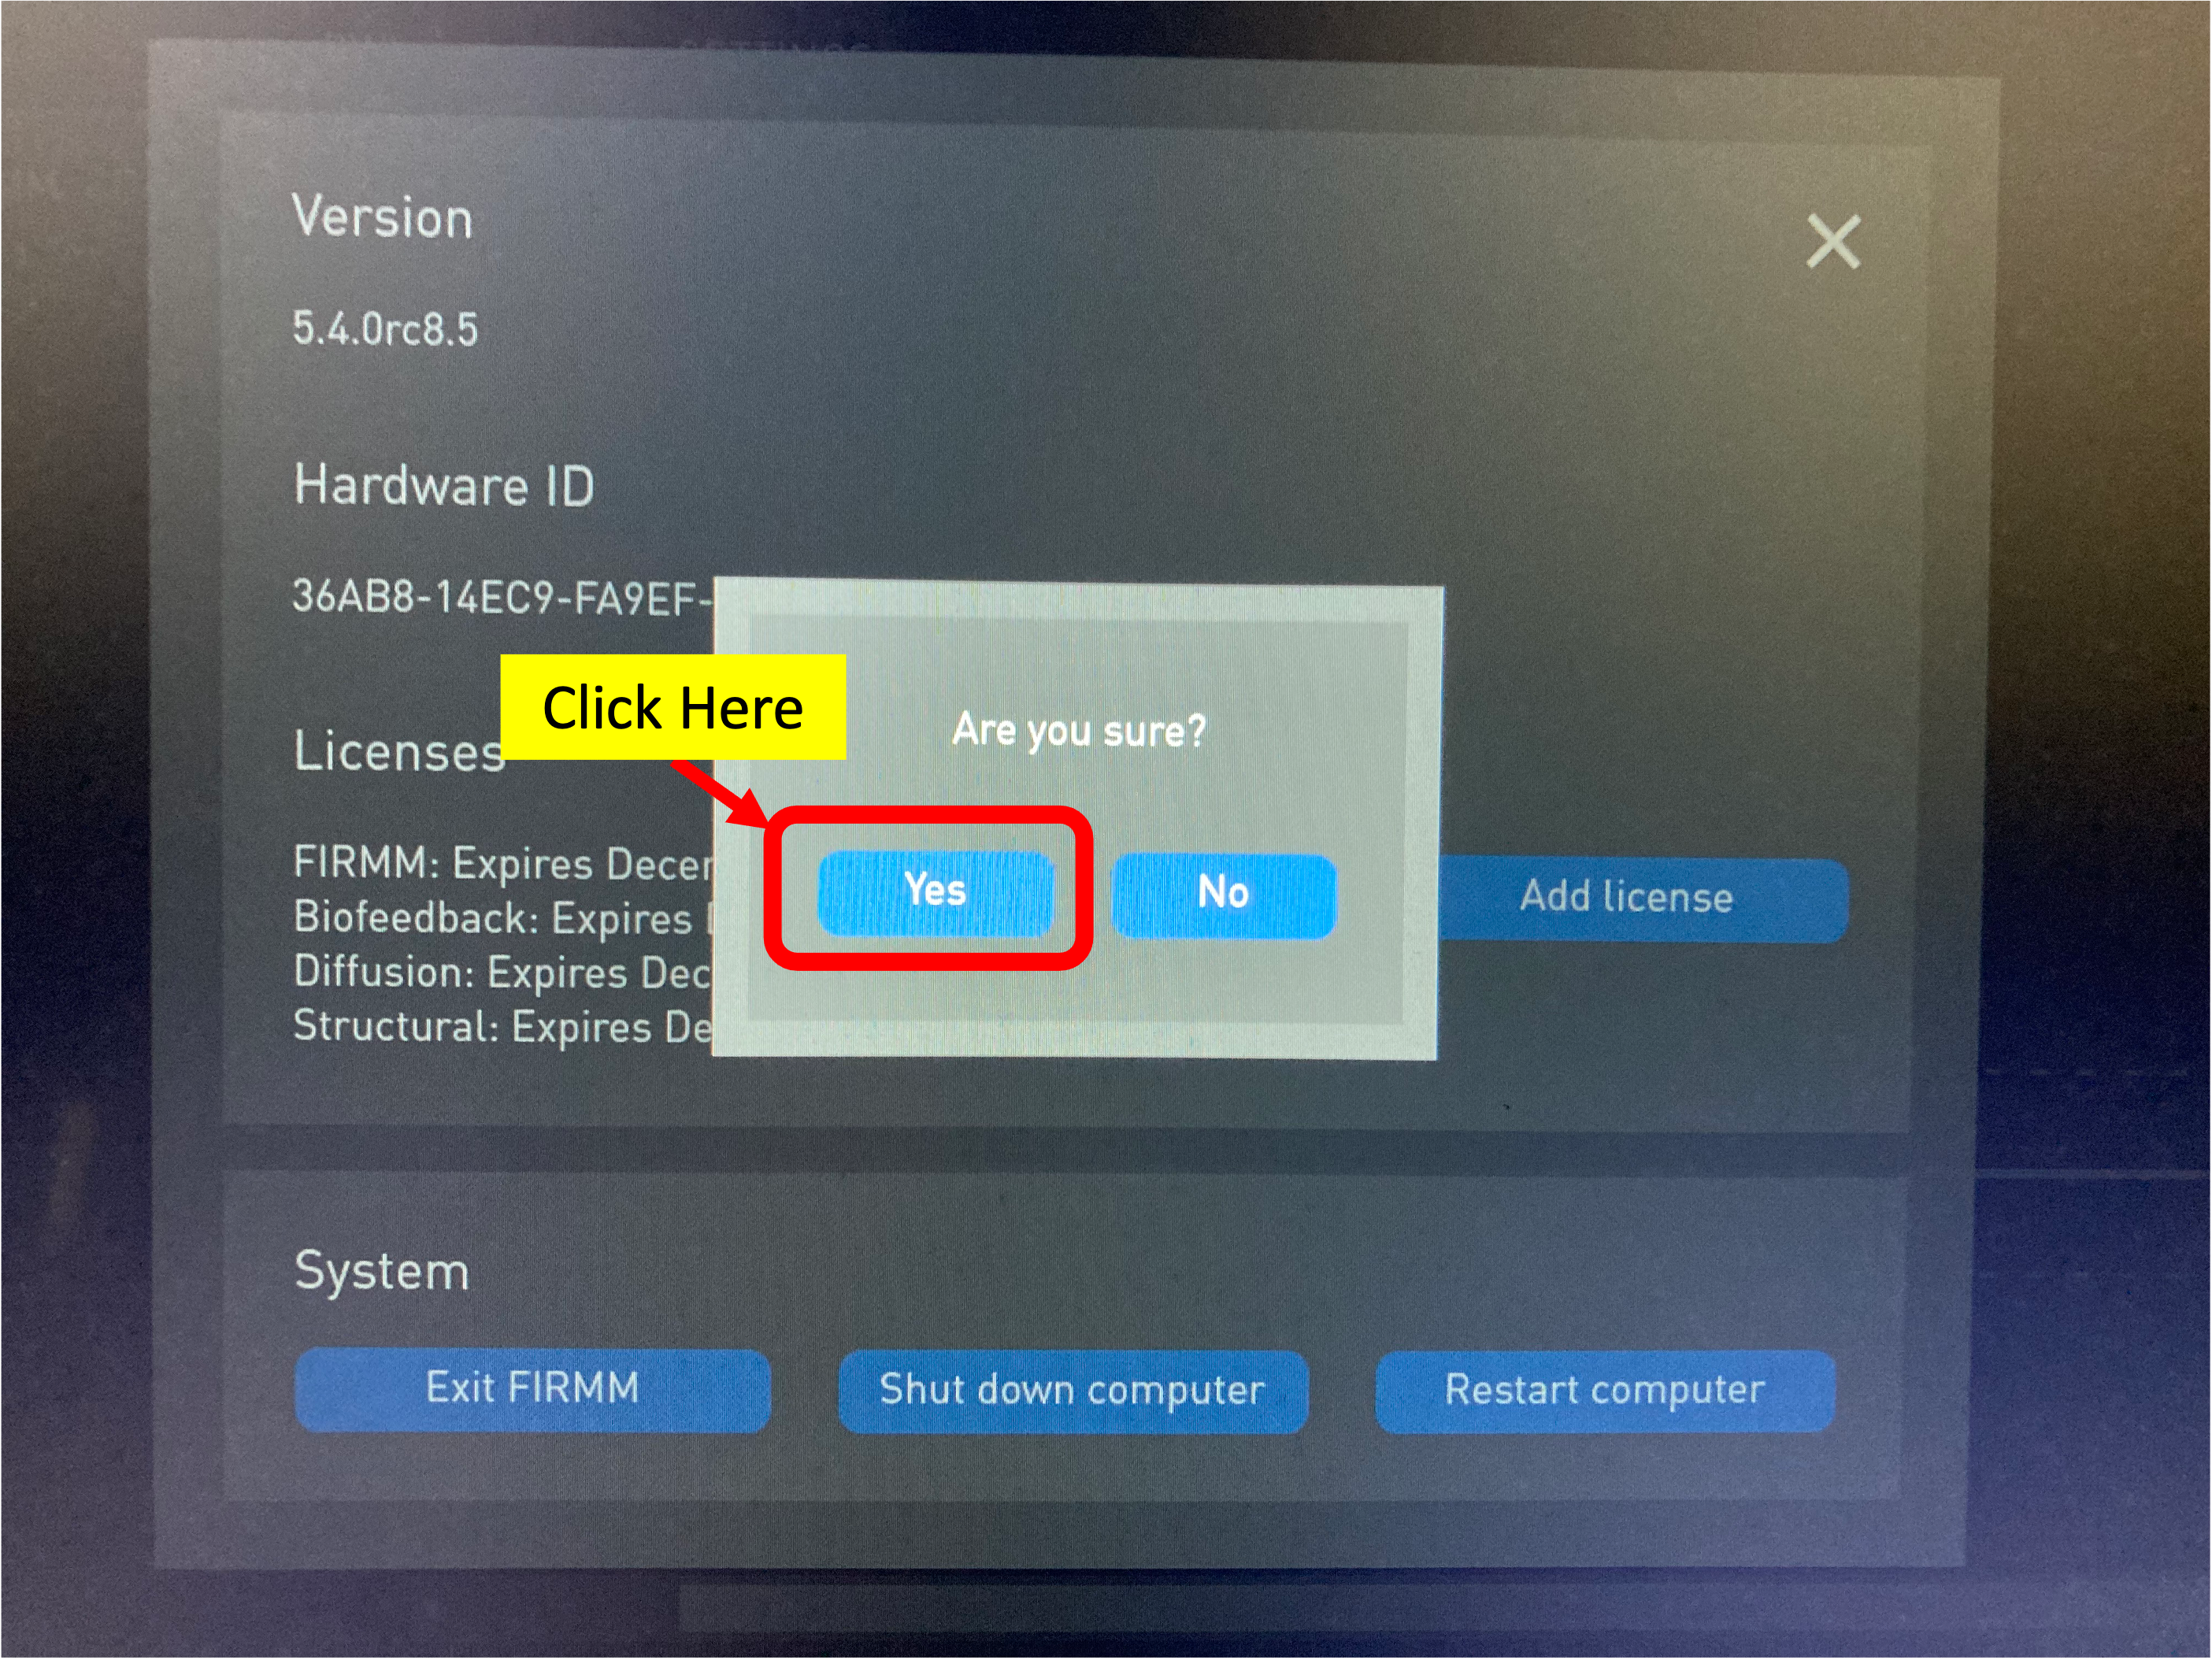
Reboot the FIRMM Tablet

Begin Your Imaging Session (with FIRMM off)
At this point, you can start your session and go through all the typical procedures used by your project.
- When the time comes to turn on the High Dynamic Range (HDR) option, use the standard method outlined here:
Attention
If your protocol uses Auto-Align to position your Rx, do not turn on the HDR flag until AFTER the Auto-Align routine is complete (E.g., Localizer, AAHScout, Localizer_aligned).
After the HDR flag has been switched ON, you can turn re-establish the FIRMM motion tracking software connection using the info below.
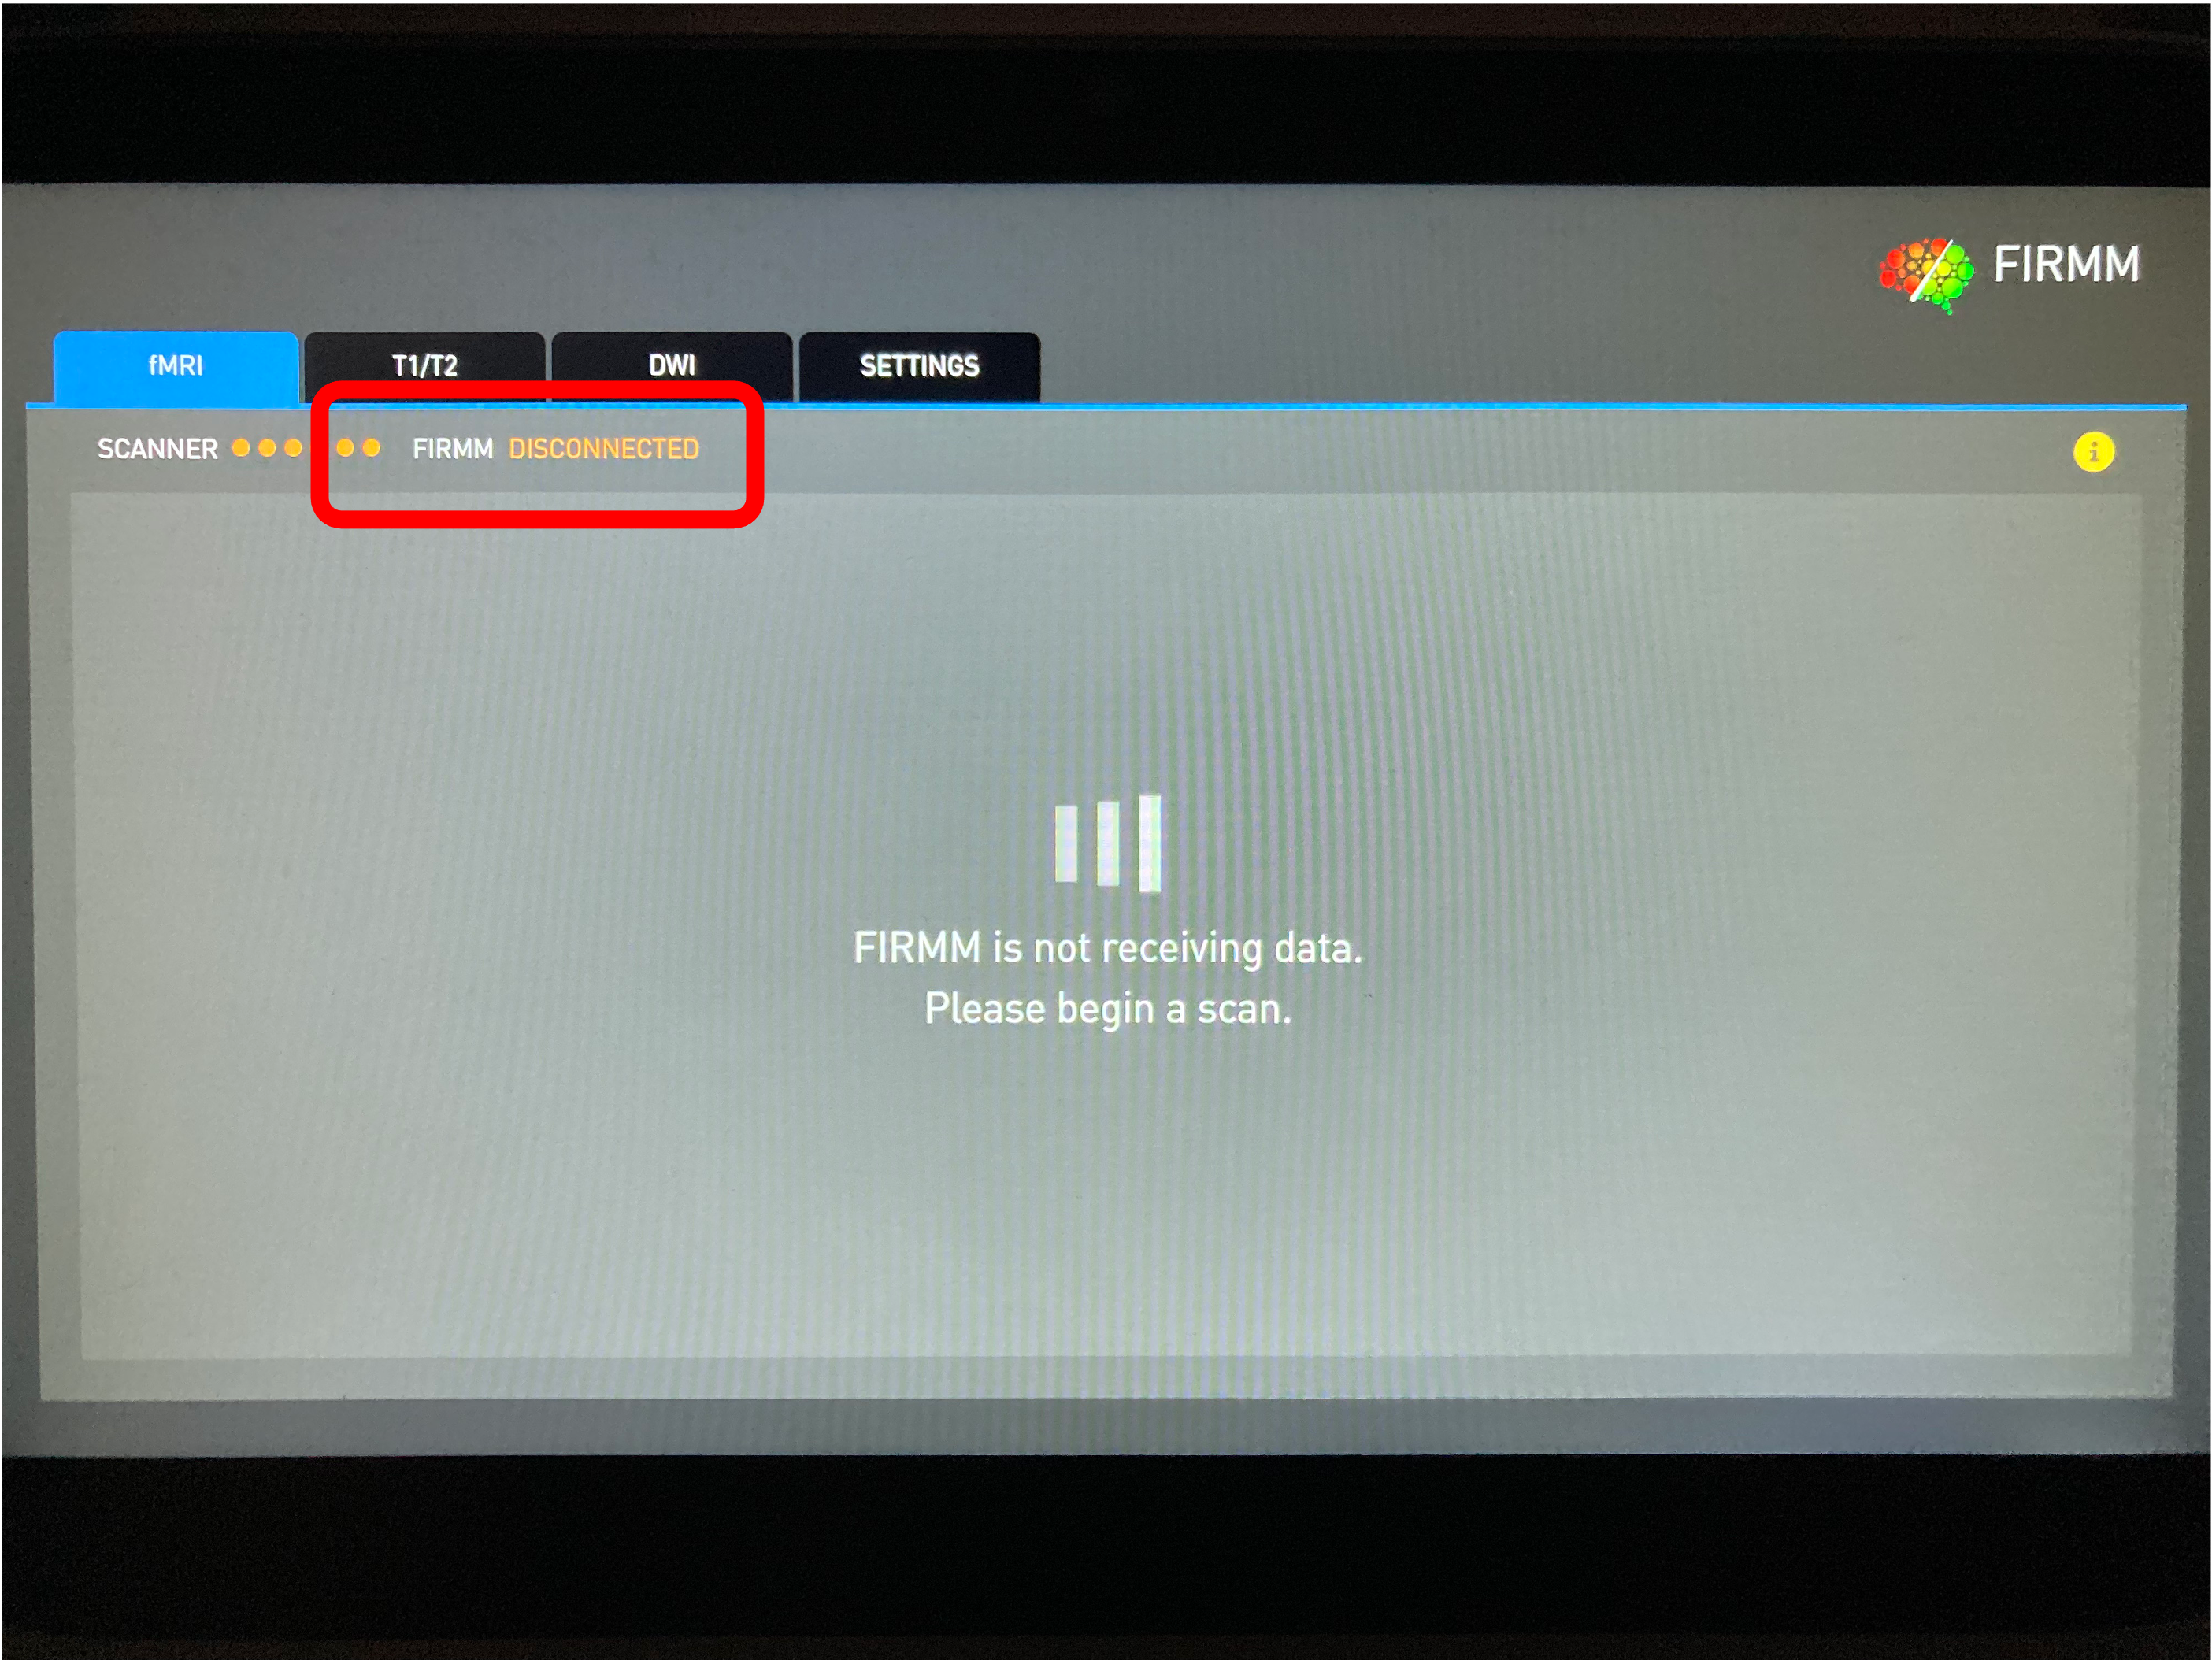
After the FIRMM tablet reboots, the display will look like the image below, indicating that FIRMM is “DISCONNECTED”
Re-Establishing a Connection to the FIRMM Software
Hit: “Cntrl-Esc” to open the standard Windows menu
Near the top of the menu, you will see several FIRMM-related options
Right-click on “FIRMM start ONE PATIENT”
In the sub-menu for this option, click “Open”
DO NOT SELECT “Run as administrator”

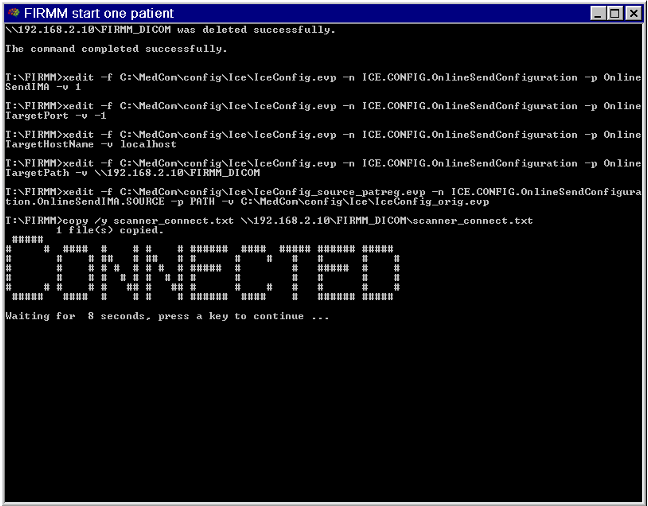
A terminal window will open and the re-connection to the FIRMM tablet will begin.
Wait for the processes to complete. The window will close automatically.
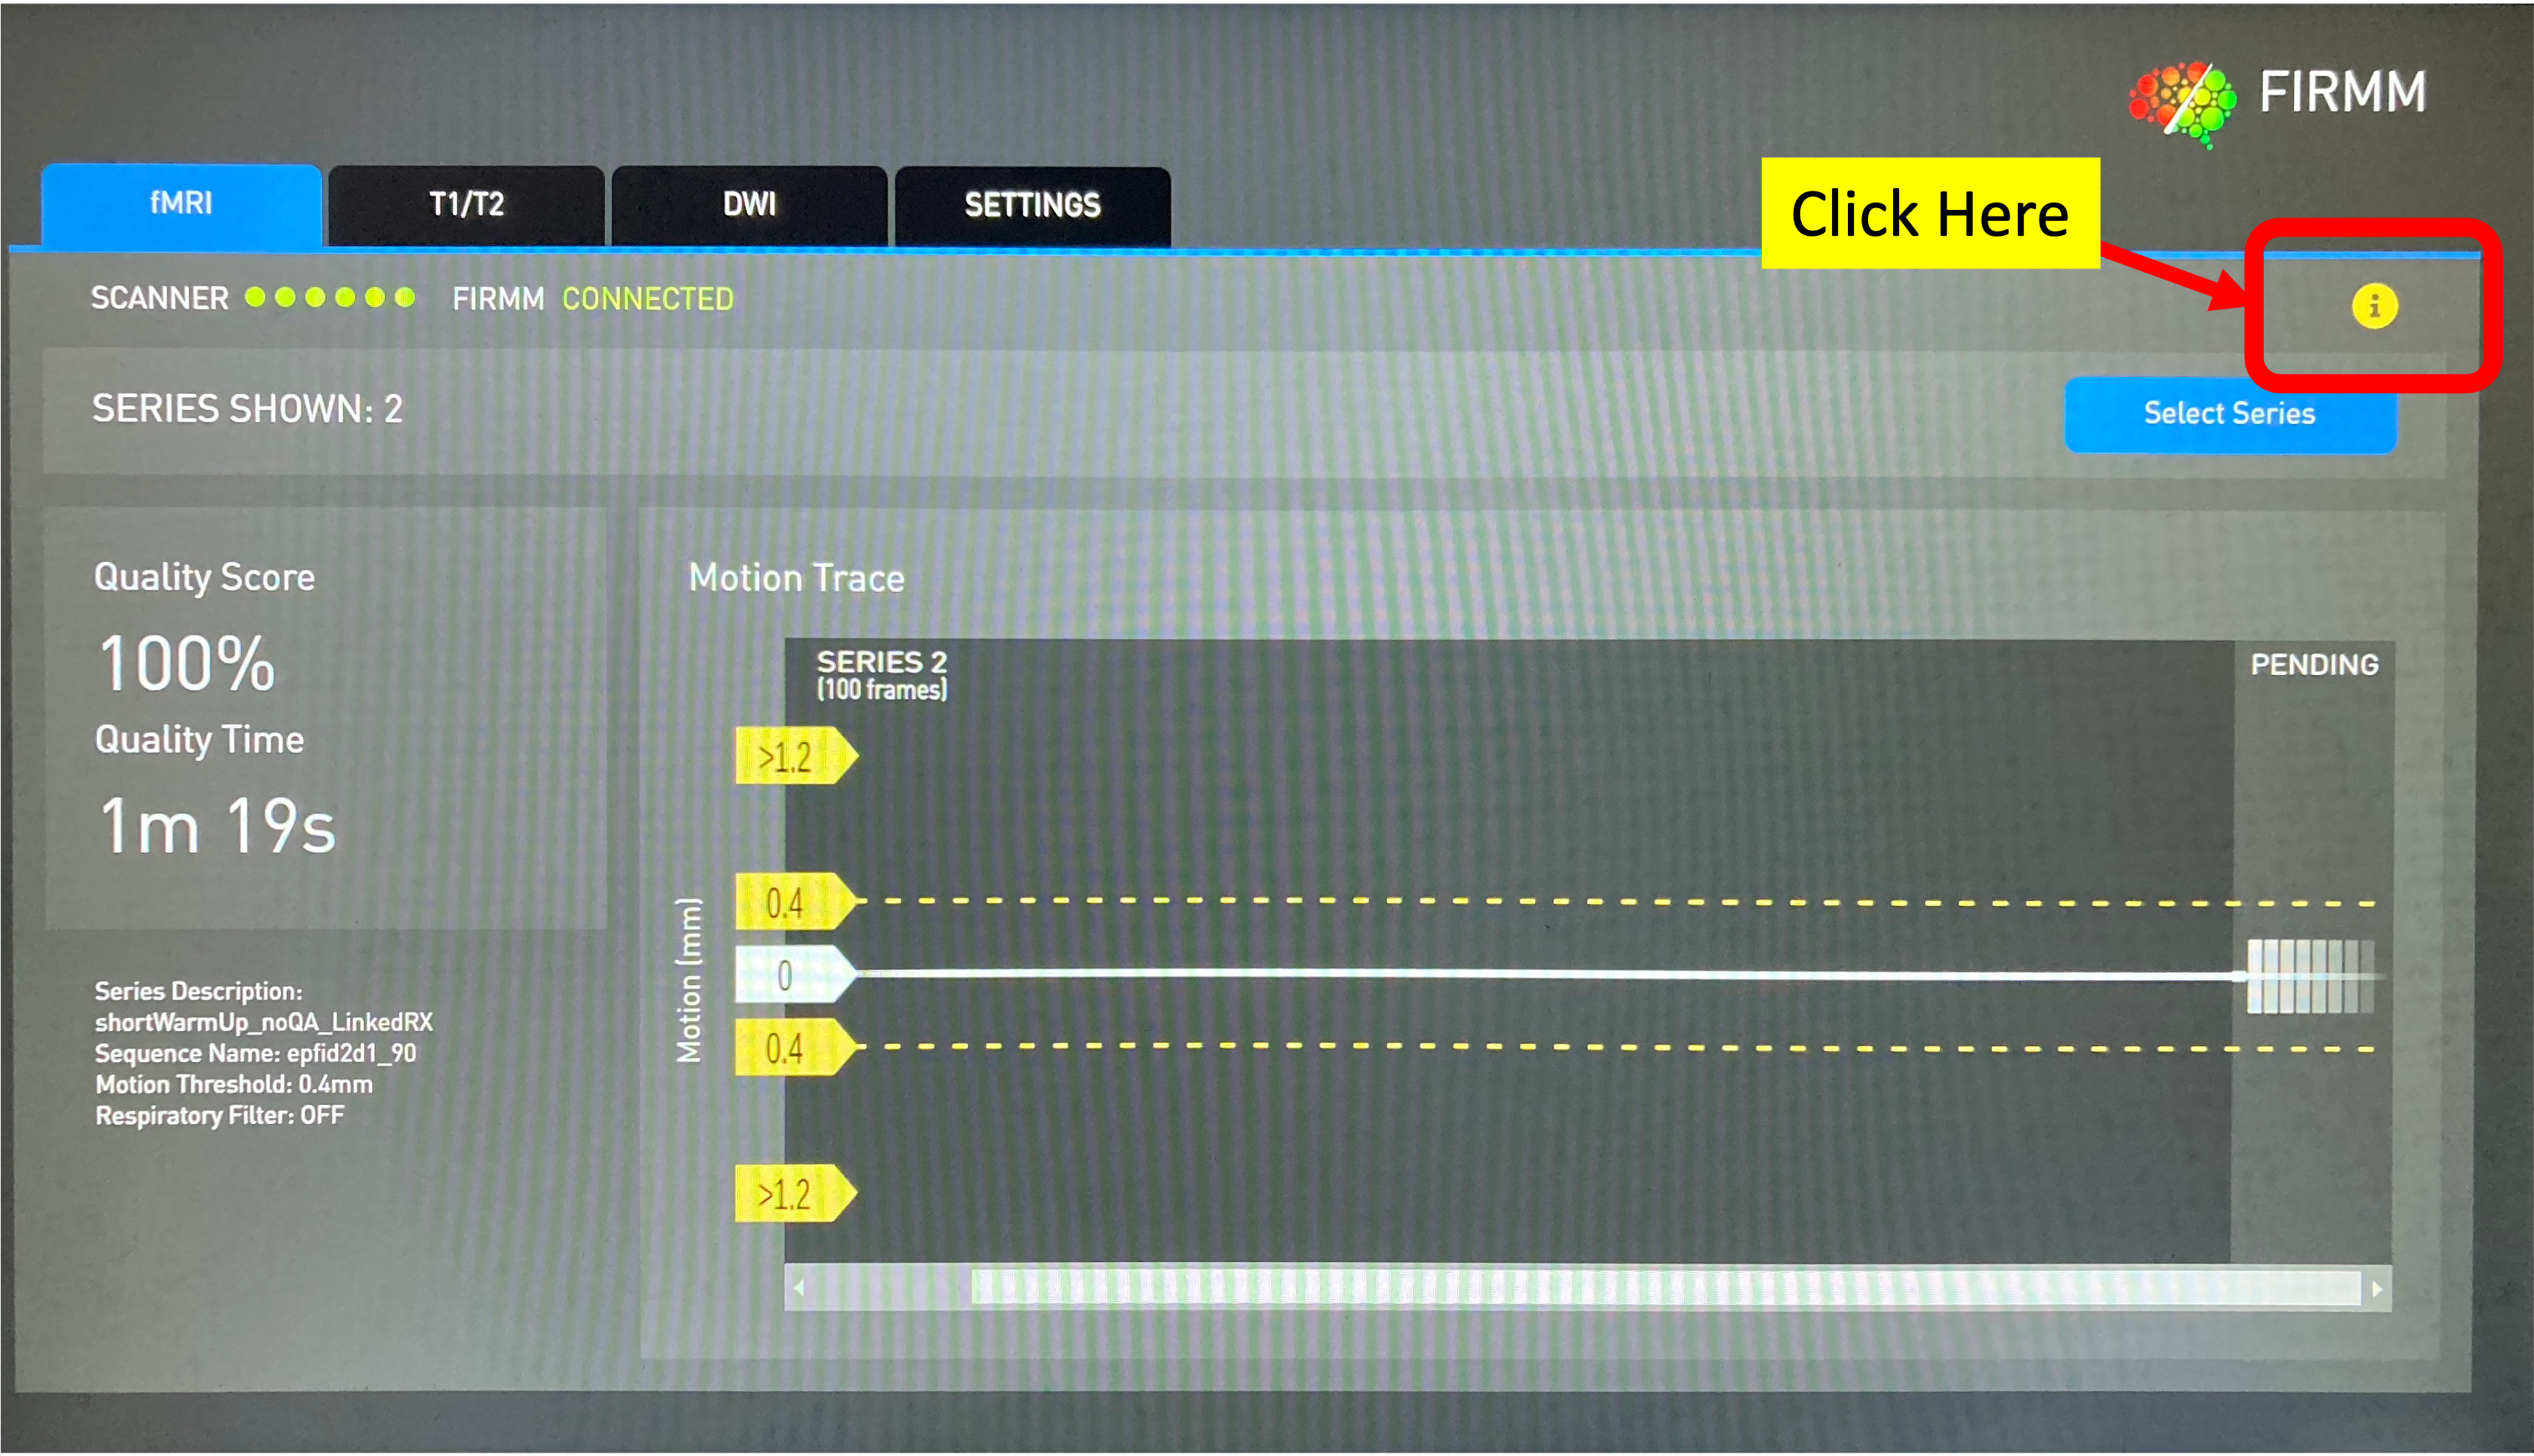
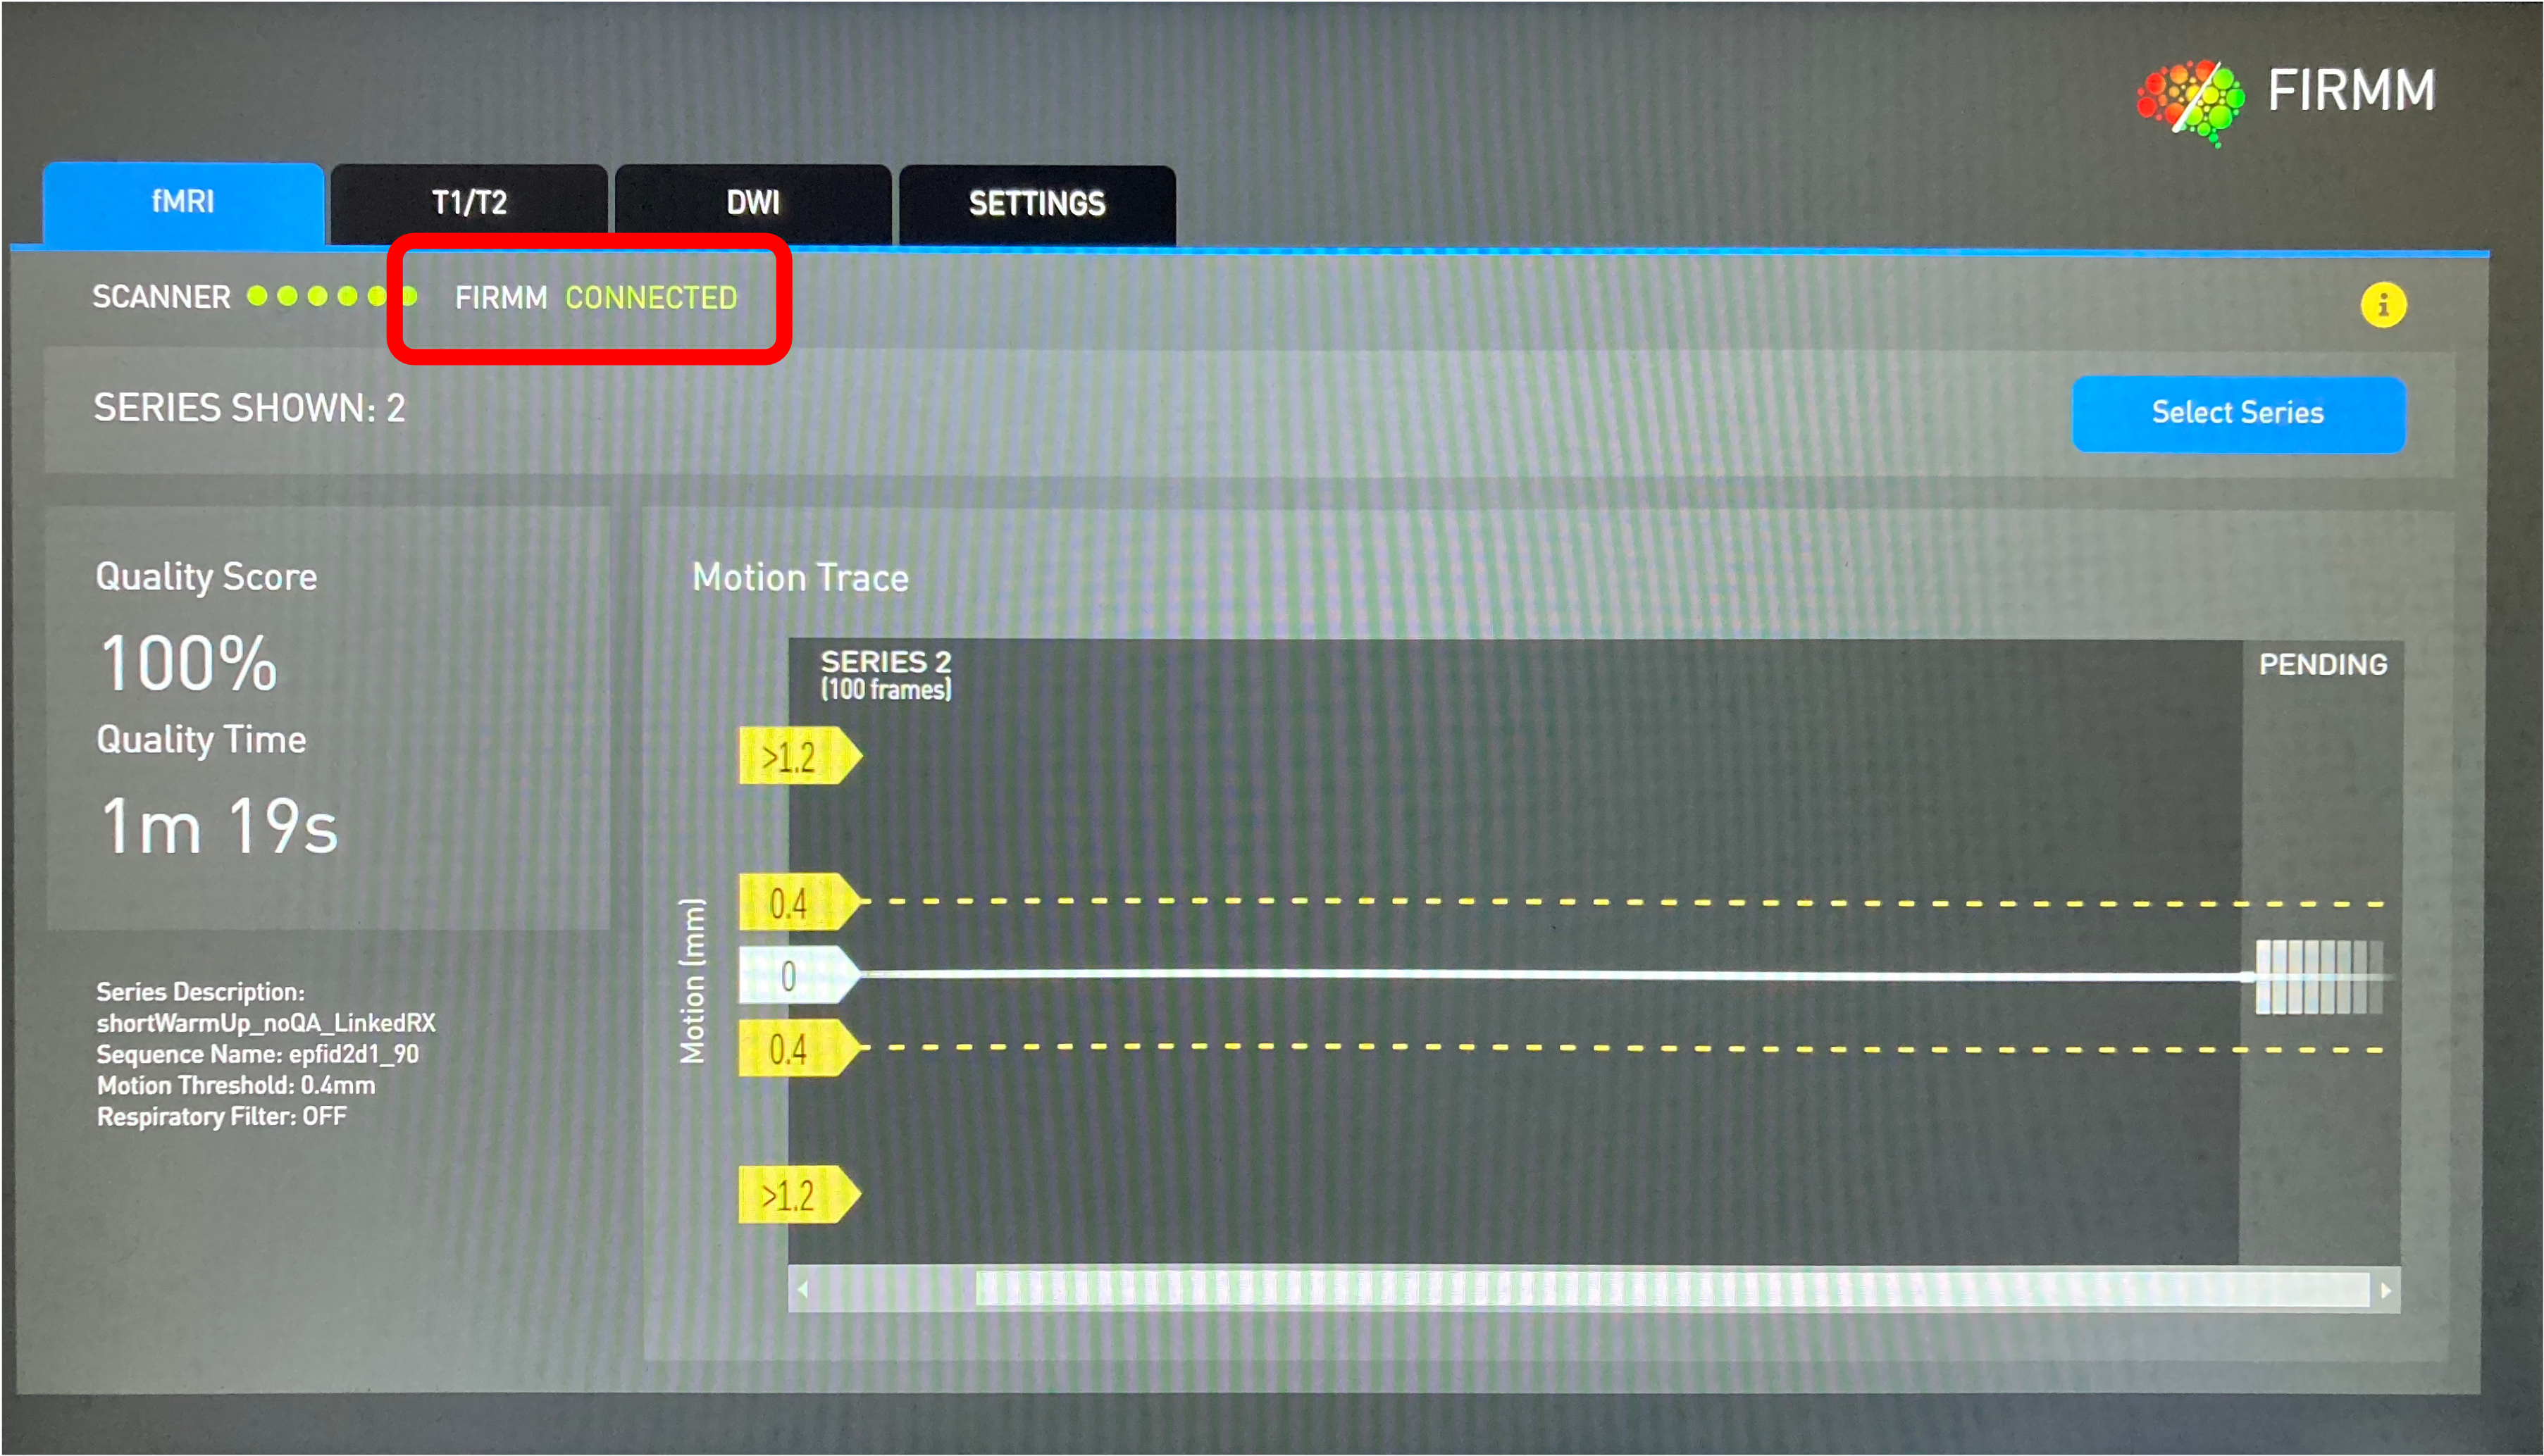
After you see “CONNECTED”, you are ready to resume scanning.
The FIRMM tablet should look like the image below, indicating that FIRMM is “CONNECTED”.
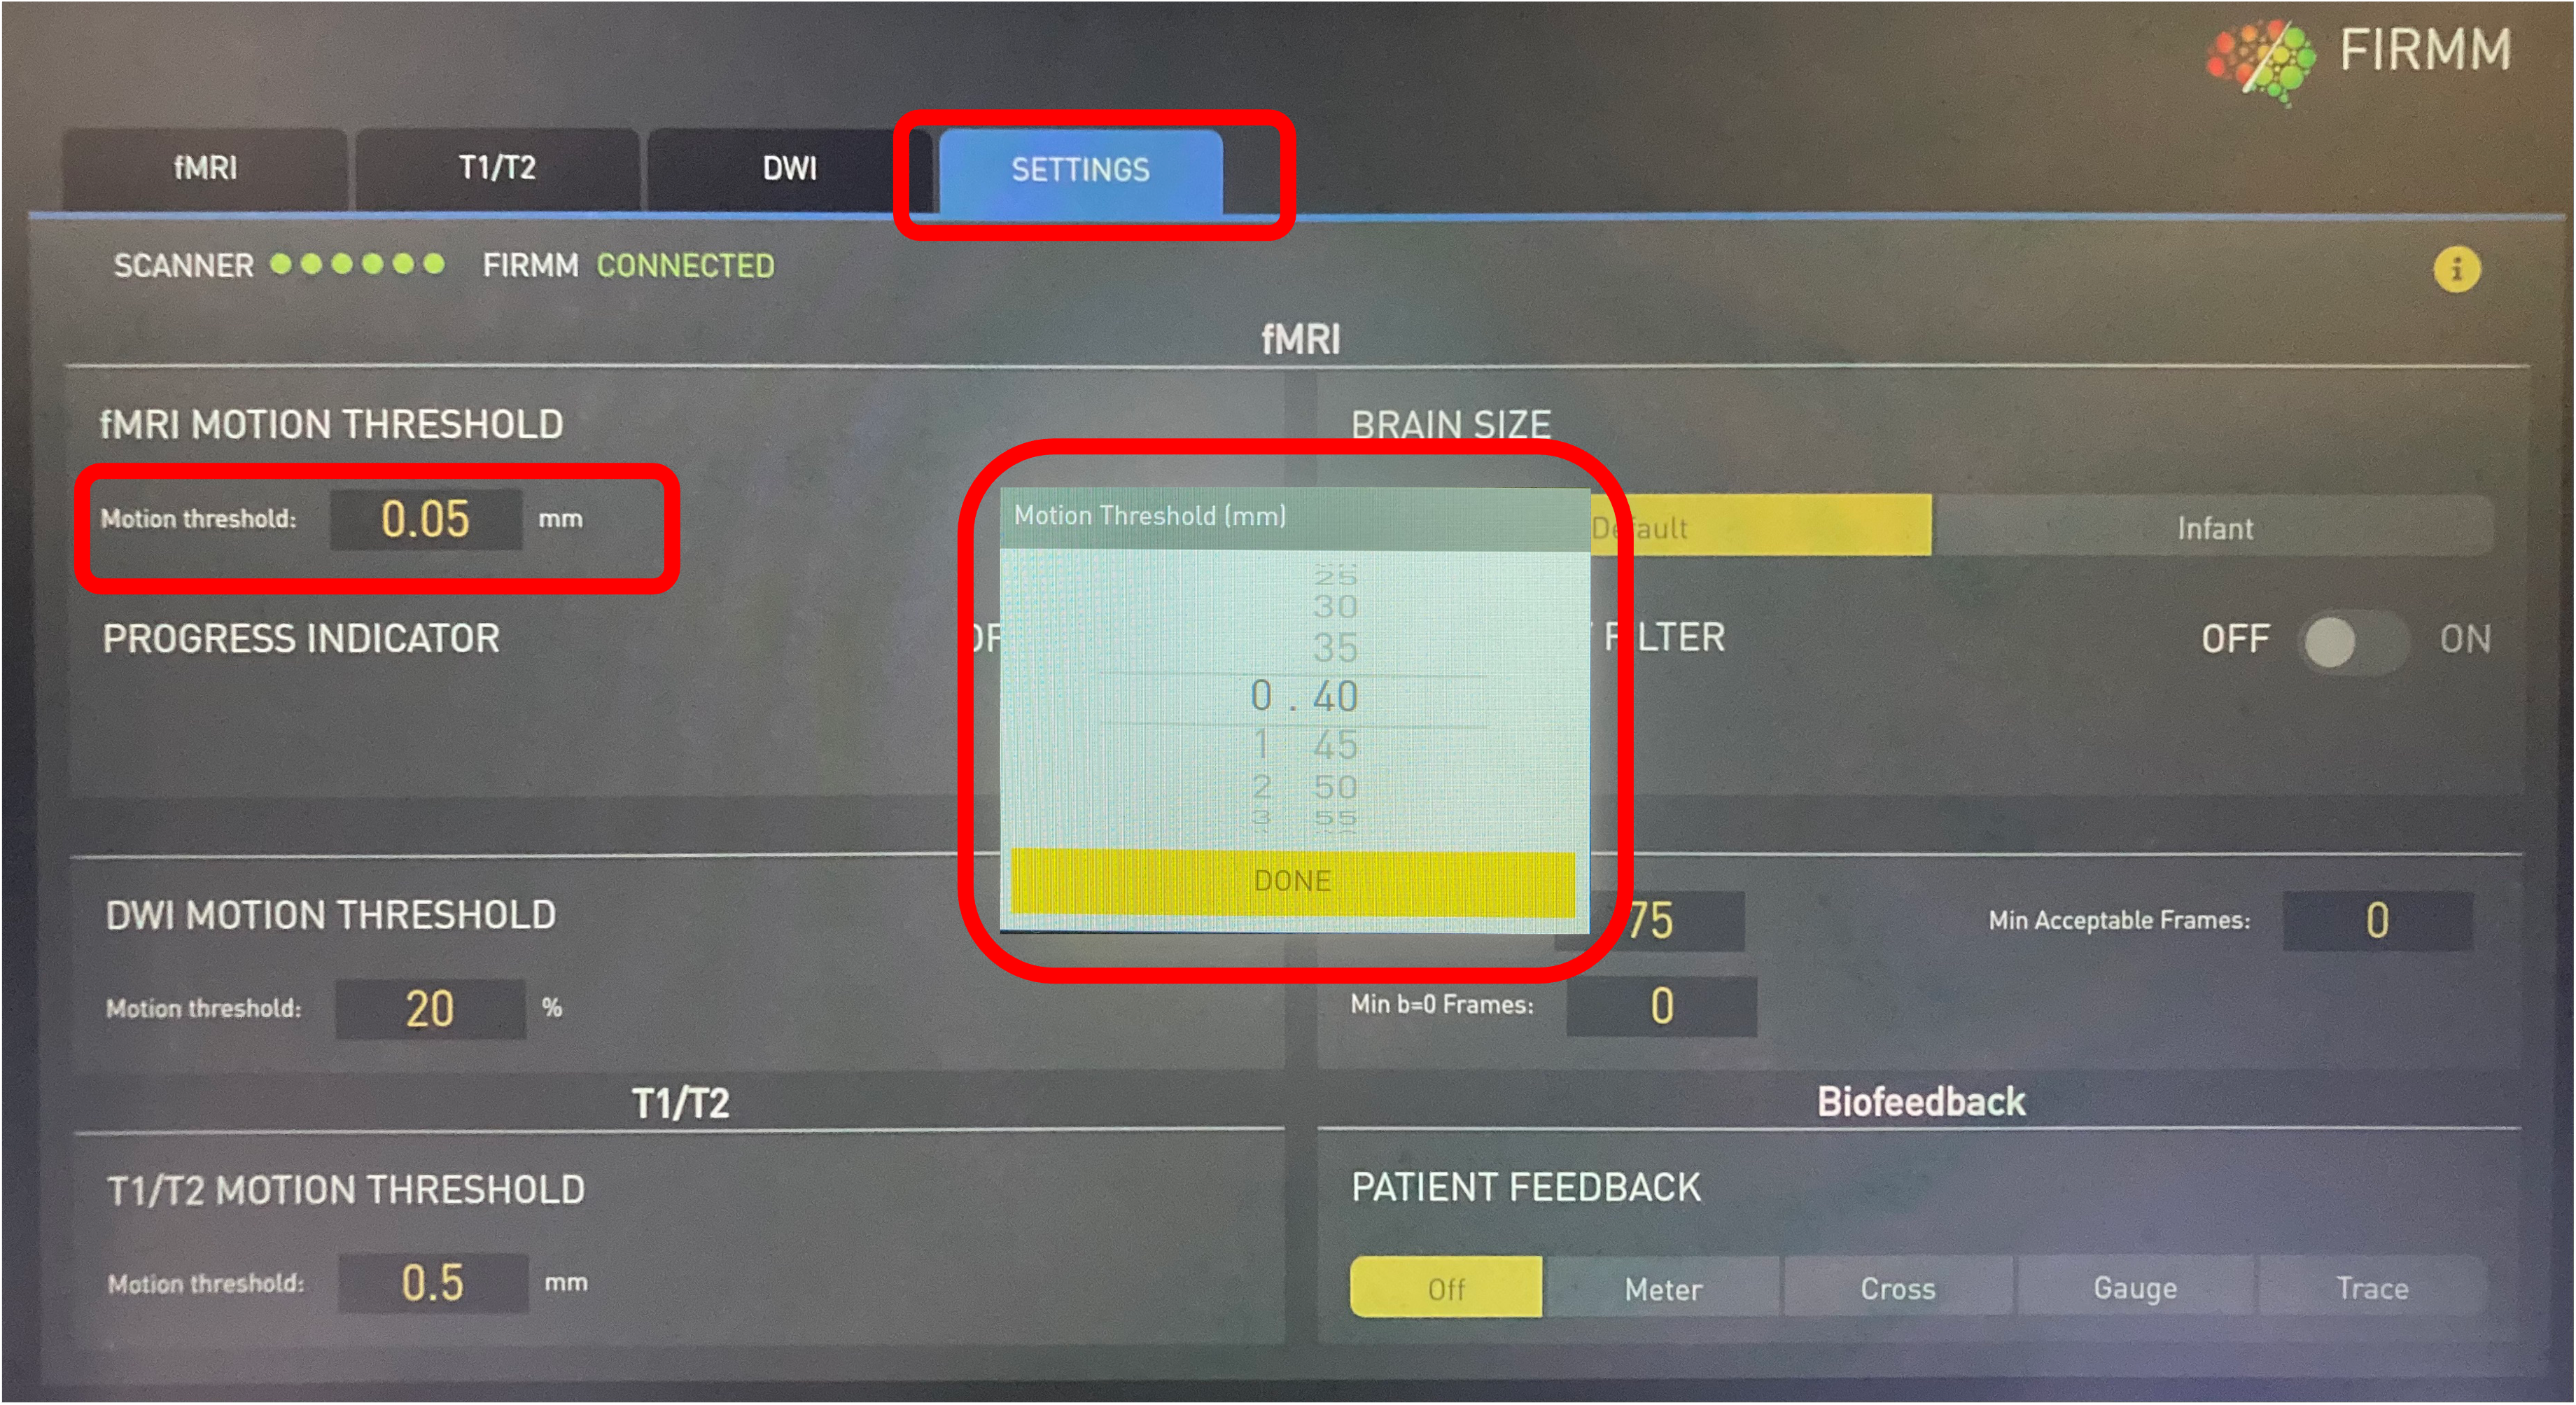
Resetting the FIRMM Threshold Parameter
After a reboot, the system will default to 0.2 mm for the motion threshold.
We generally set this to 0.4 mm, but your project can decide how strict your threshold should be for the display.
Monitoring Motion During Your fMRI, DTI, and T1/T2 Acquisitions
During your session, you should automatically see the motion plots for your fMRI, DTI, and T1/T2 acquisitions.
Note: Only T1 & T2 acquisitions including the navigation setter scan will work with FIRMM.
POST SCAN REQUIREMENTS
Attention
At the end of your MRI booking, you will need to return the FIRMM tablet to the default configuration.
Stop the “One Patient” FIRMM Connection
Hit: “Cntrl-Esc” to open the standard Windows menu
Near the top of the menu, you will see several FIRMM-related options
Right-click on “FIRMM stop one patient”
In the sub-menu for this option, click “Open”
DO NOT SELECT “Run as administrator”
Reboot the FIRMM Tablet After Your MRI Session
Restore the Default FIRMM Connection for the Next Group
Hit: “Cntrl-Esc” to open the standard Windows menu
Near the top of the menu, you will see several FIRMM-related options
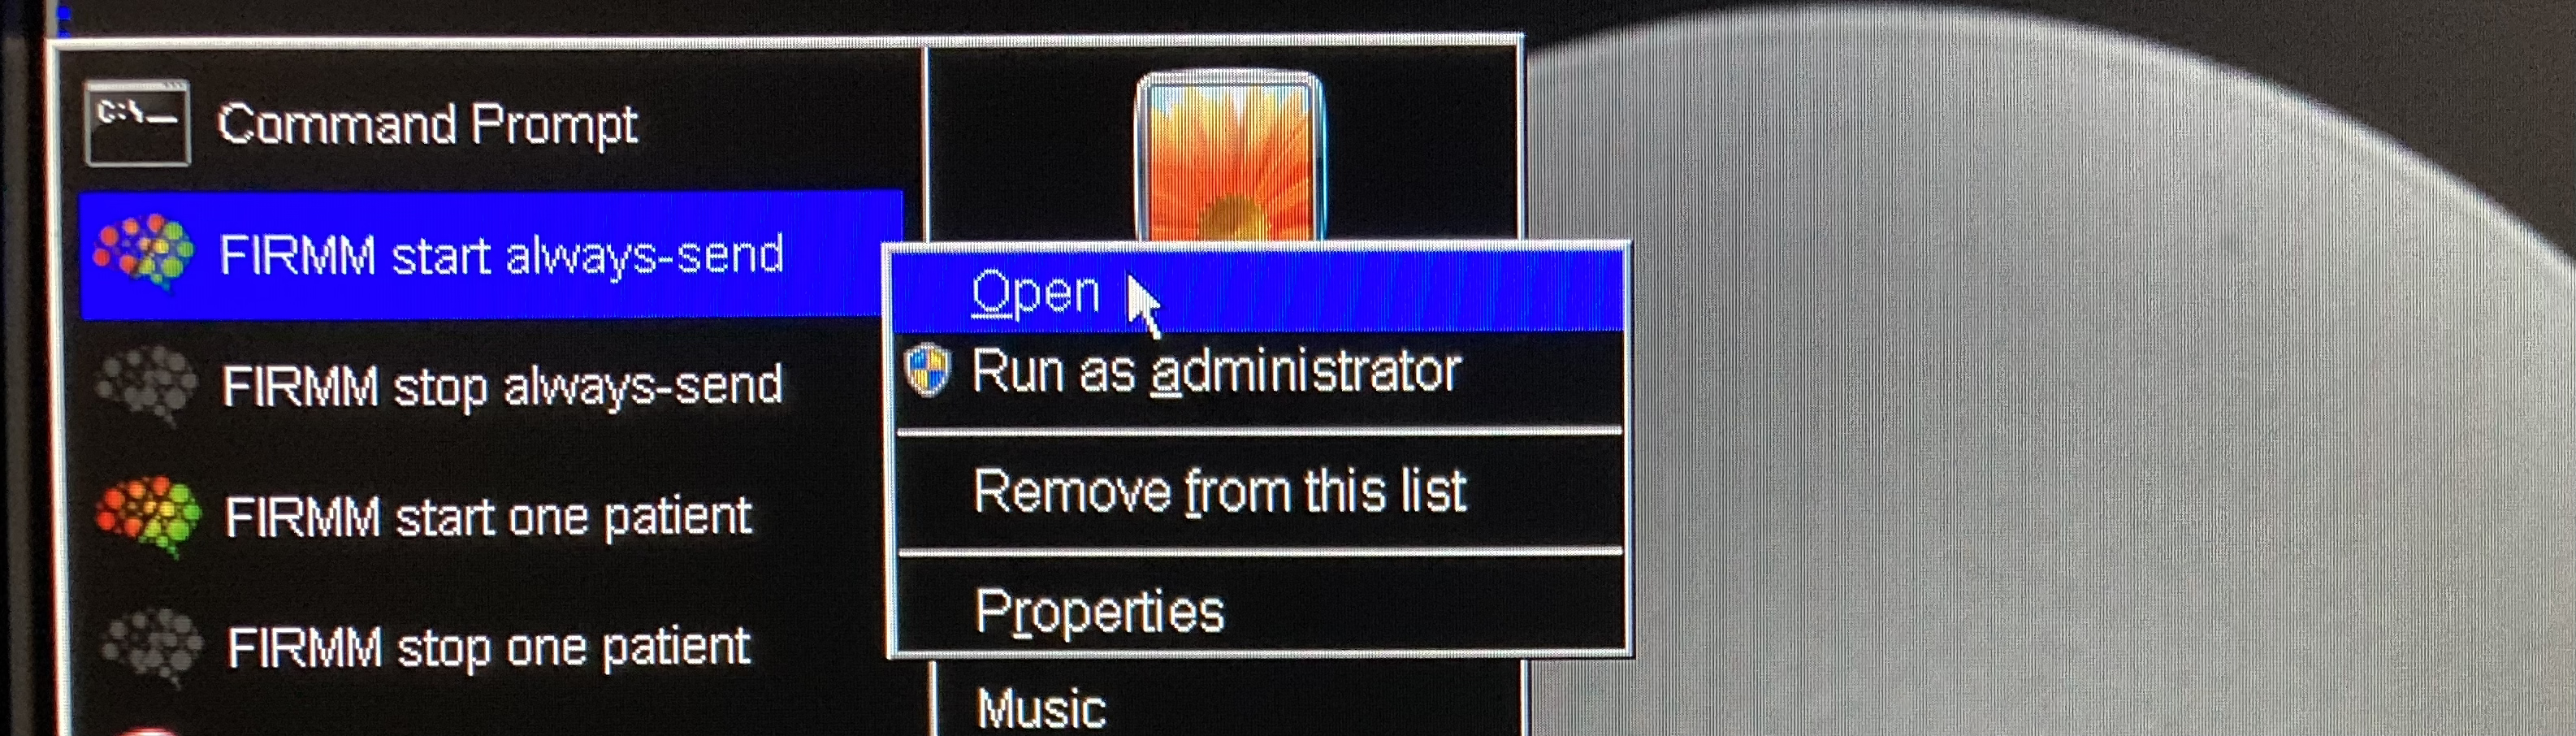
Right-click on “FIRMM start always-send”
In the sub-menu for this option, click “Open”
DO NOT SELECT “Run as administrator”
A terminal window will appear with a countdown.
Leave the window open and allow it to complete the process.
